01
Background
Standard Outdoor Stereo Systems typically have a markup as a luxury item. They also are very proprietary and not very friendly to customization or expansion. I decided I can solve both of these issues effectively, and at a more reasonable cost, by building the system myself.
This Stereo System uses a Standard Desktop PC Power Supply which I had lying around, a middle-of-the-road Head Unit with removable faceplate (to prevent tampering), shelves of Medium Density Fiber Board (MDF), a recycled instant hot water heater, and a Marine Outdoor Stereo Antenna.
The Instant Hot Water Heater was destined to be scrapped as the entire model was replaced due to a Recall. I intercepted it before it was thrown out, gutted it, and brought a whole new life to it.
The outside shell is Stainless Steel, which is great as it won't rust outside in humid conditions, and is aesthetically pleasing next to a Stainless Steel Grill and other appliances. This also has enough space to hook up multiple power supplies to power LED Lighting, Yard Lighting, charge cell phones, and run additional consumer electronics, as you will see.
02
Photos
A look at the back of the newly purchased unit. Different type of high-quality RCA Cable ports for an amplifier as well as a Wiring Harness Clip. Antenna Plug visible in the bottom left. Heatsink in the middle.
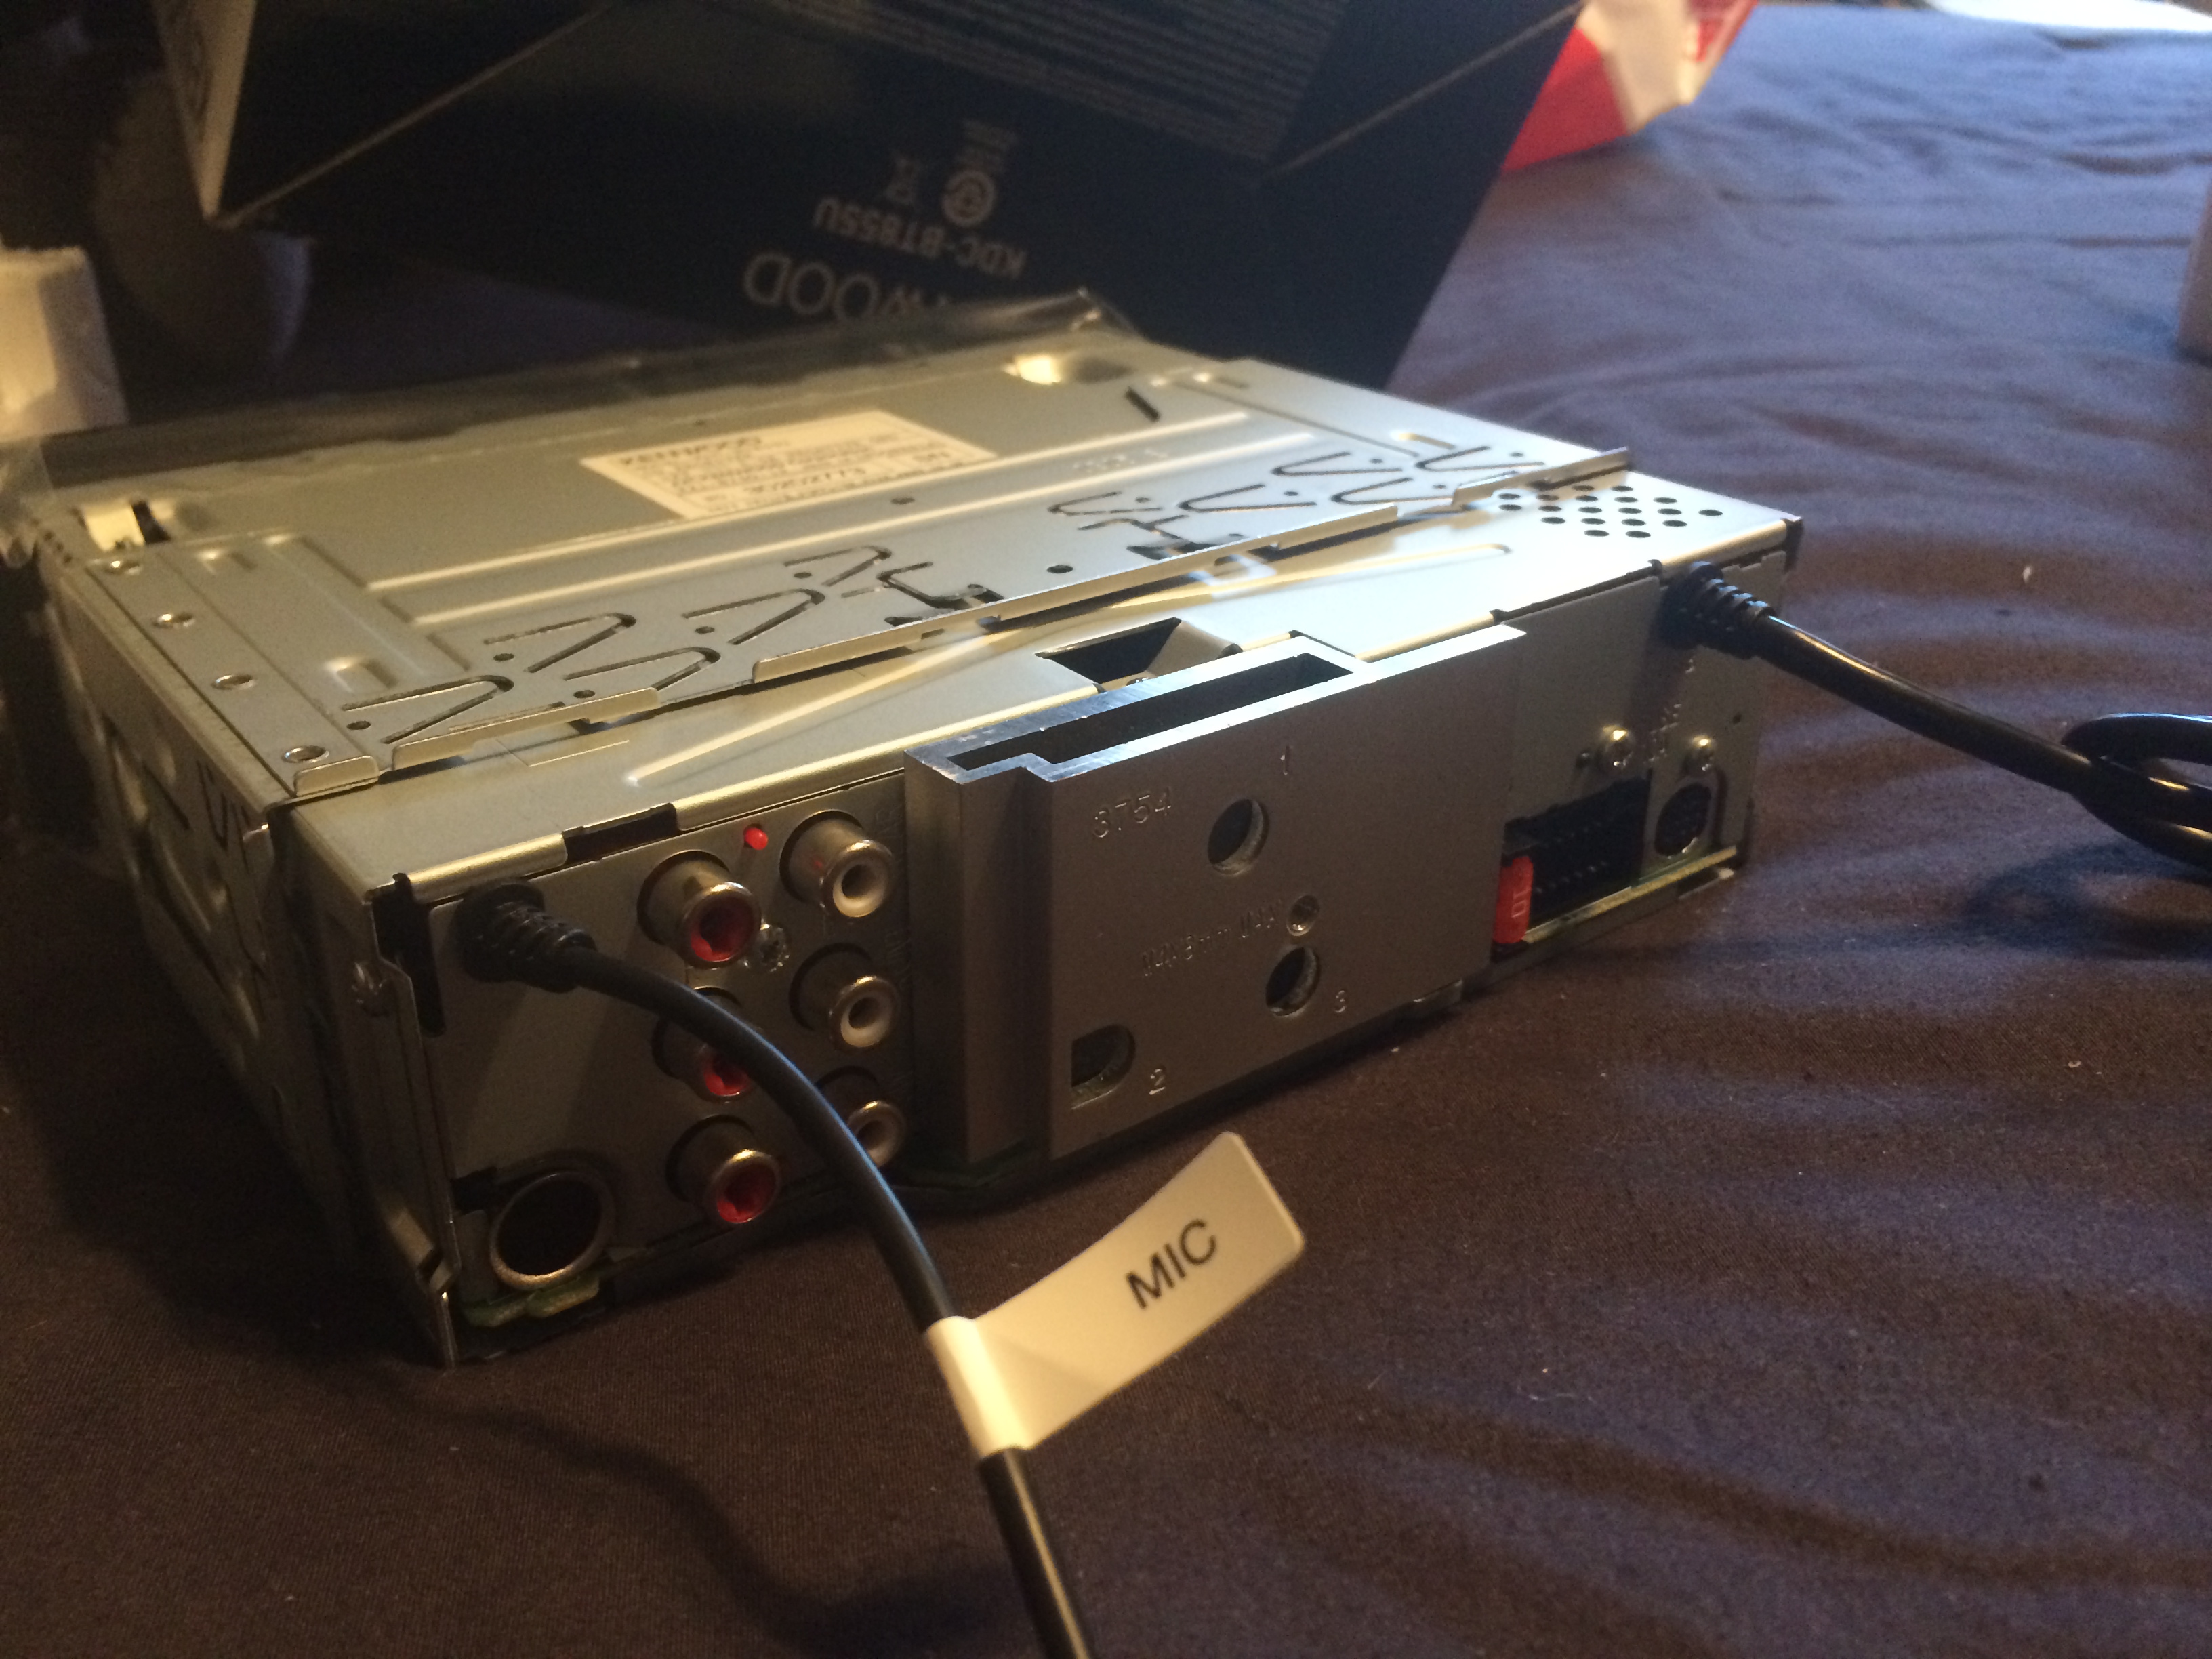
A look at the back of the newly purchased unit. Different type of high-quality RCA Cable ports for an amplifier as well as a Wiring Harness Clip. Antenna Plug visible in the bottom left. Heatsink in the middle.
An infrared remote, wiring harness, and other components that came with it.
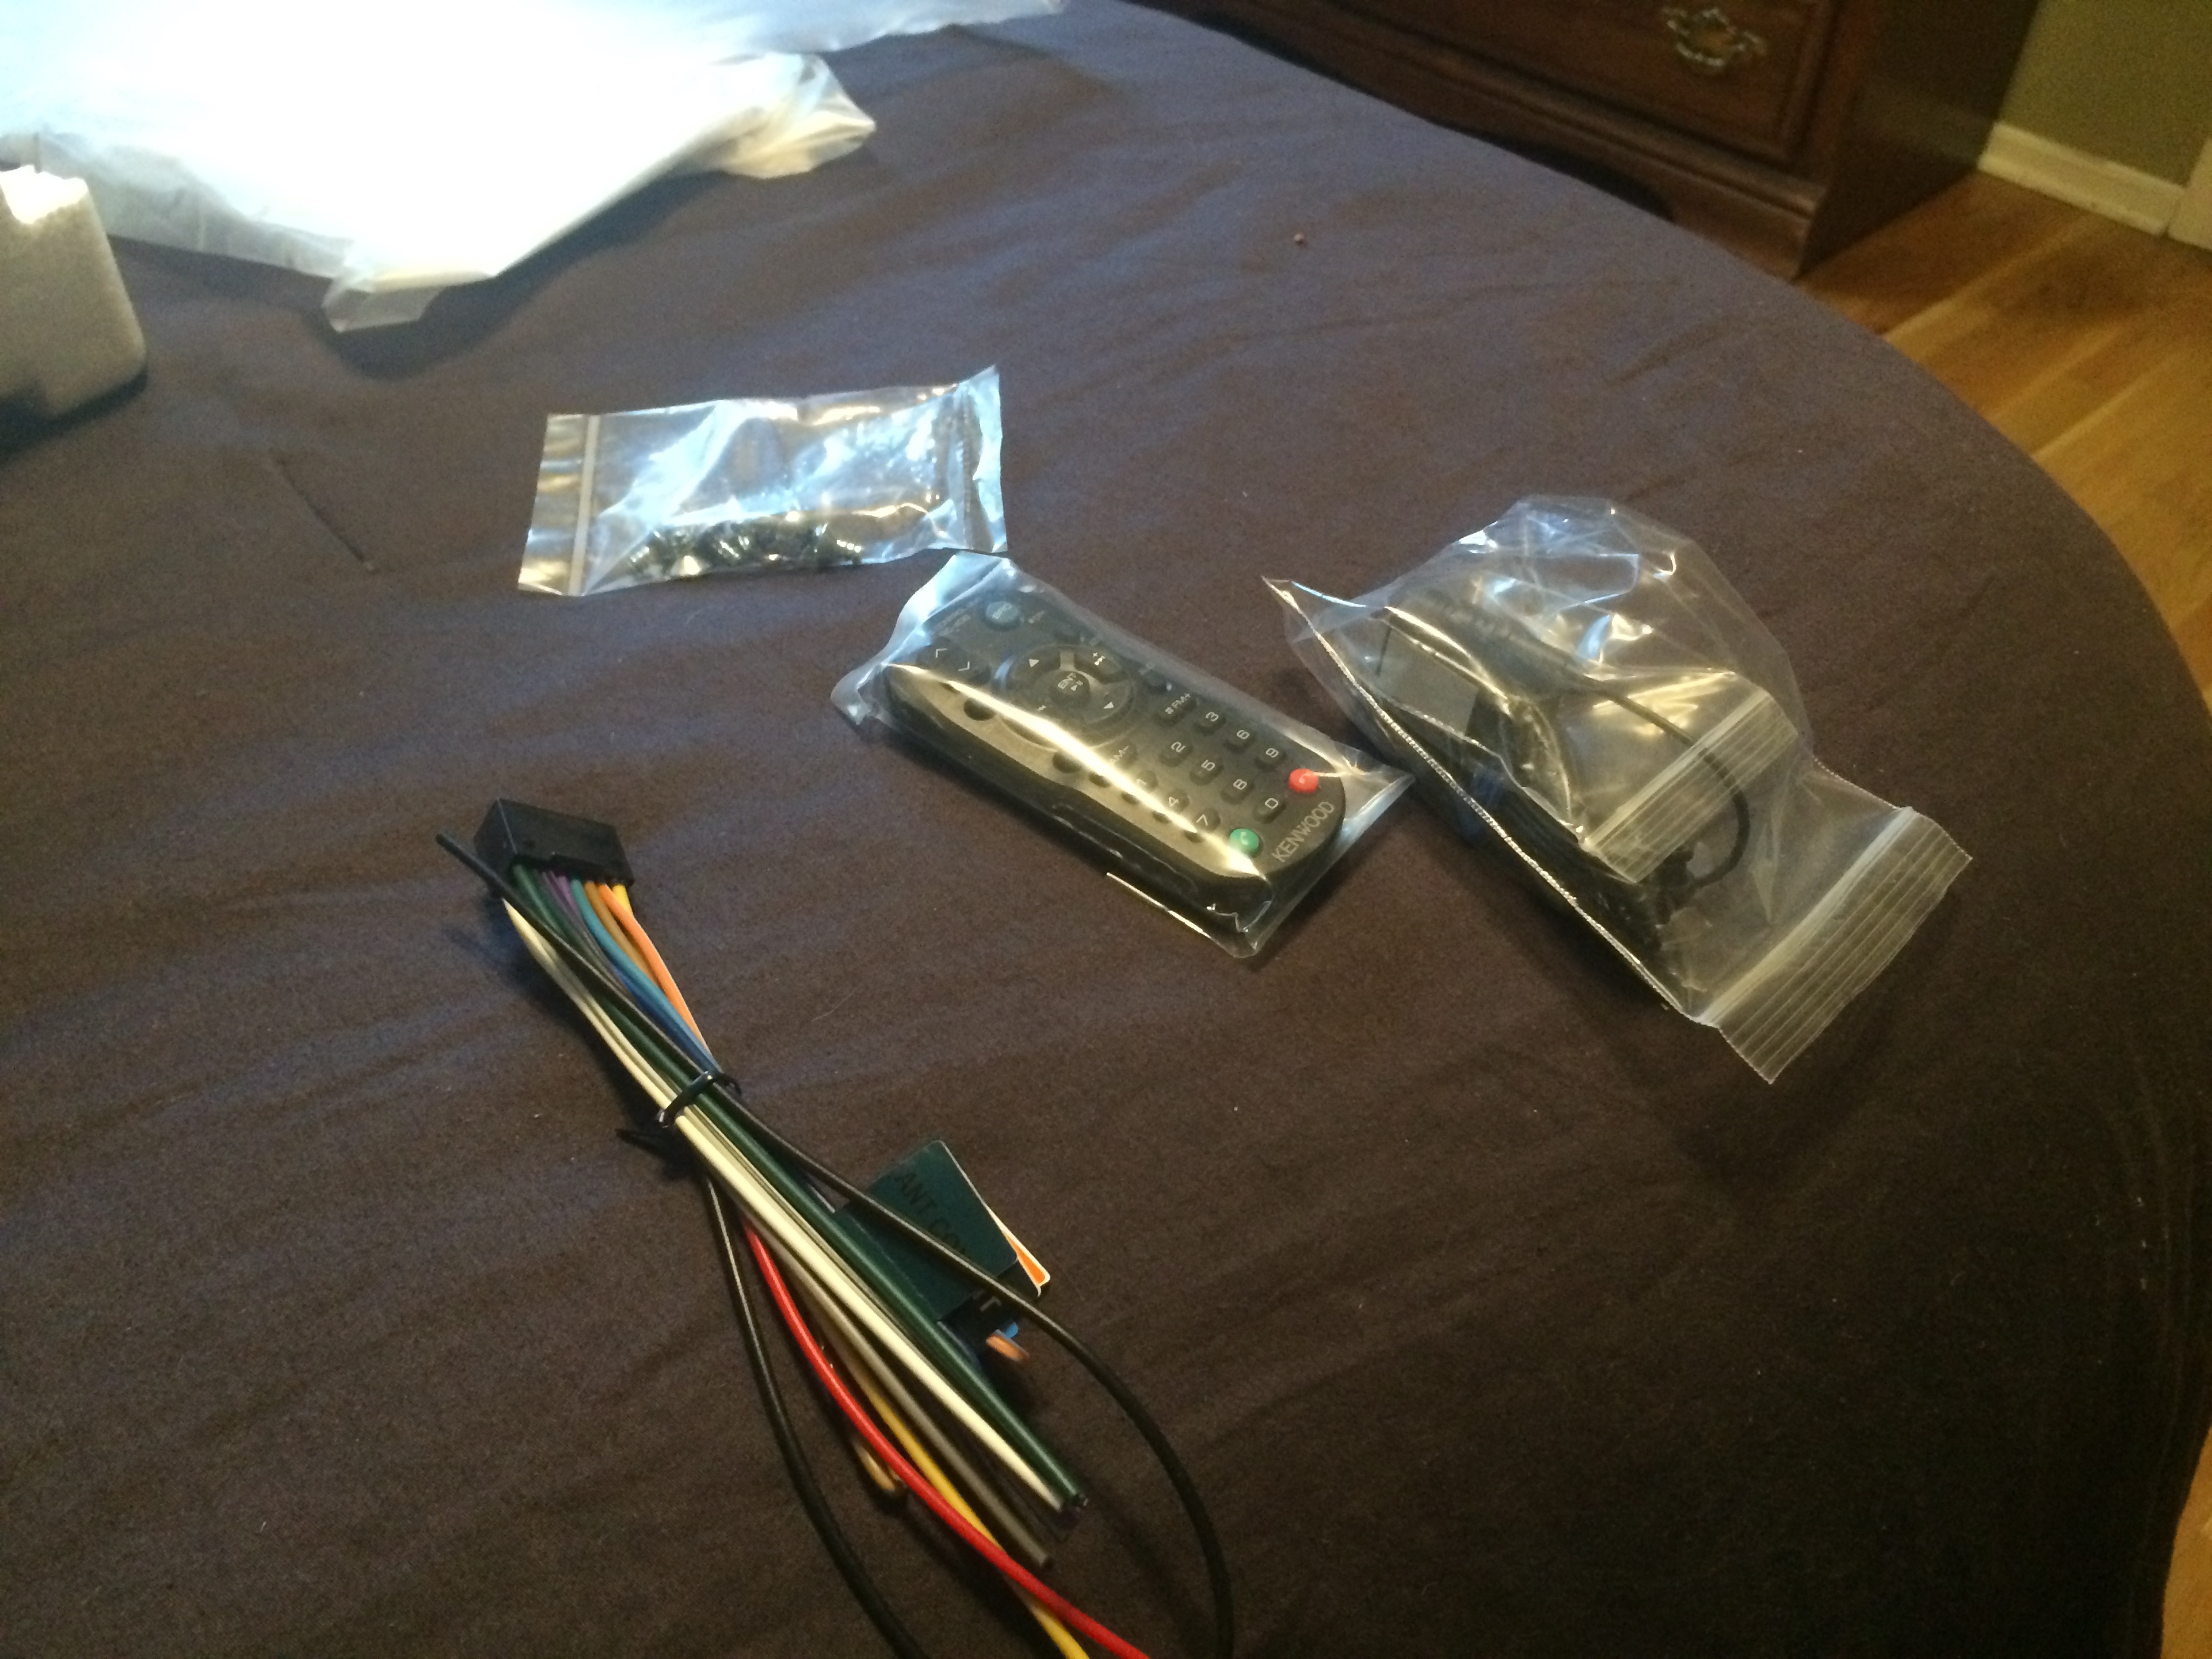
An infrared remote, wiring harness, and other components that came with it.
Higher Resolution picture of the back of the Stereo.
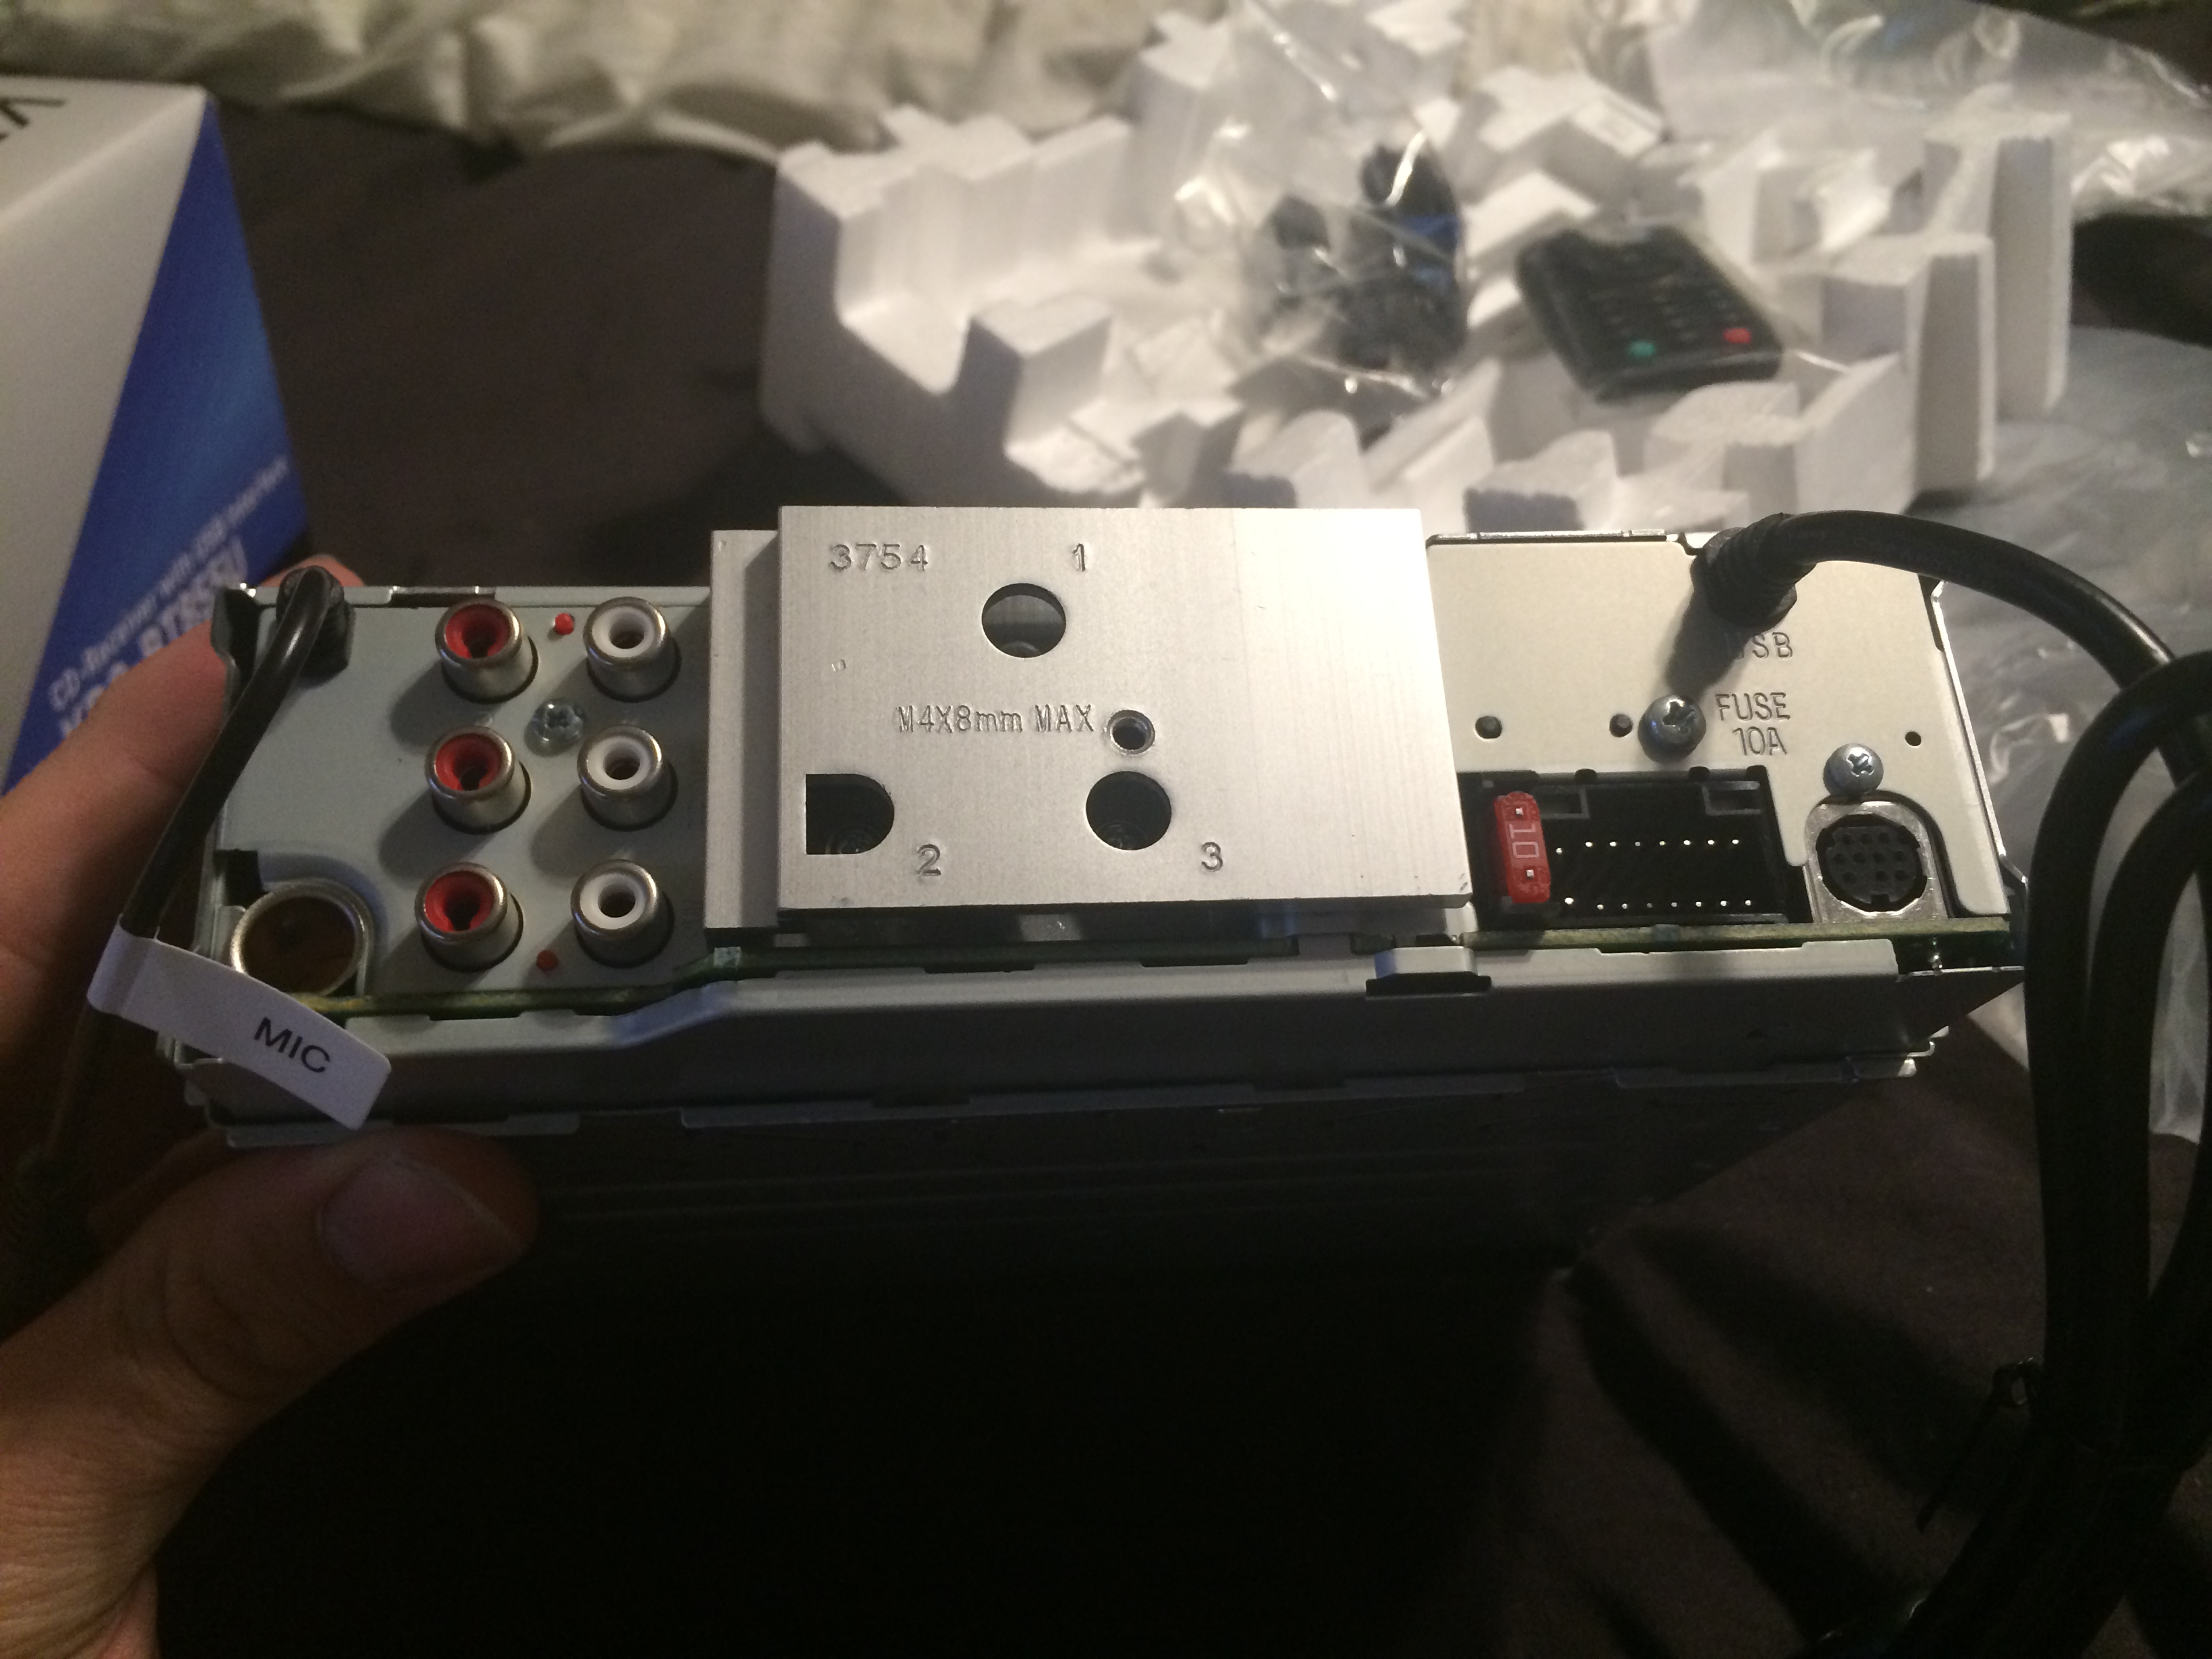
Higher Resolution picture of the back of the Stereo.
Successfully powering it on for the first time using a Desktop Power Supply.
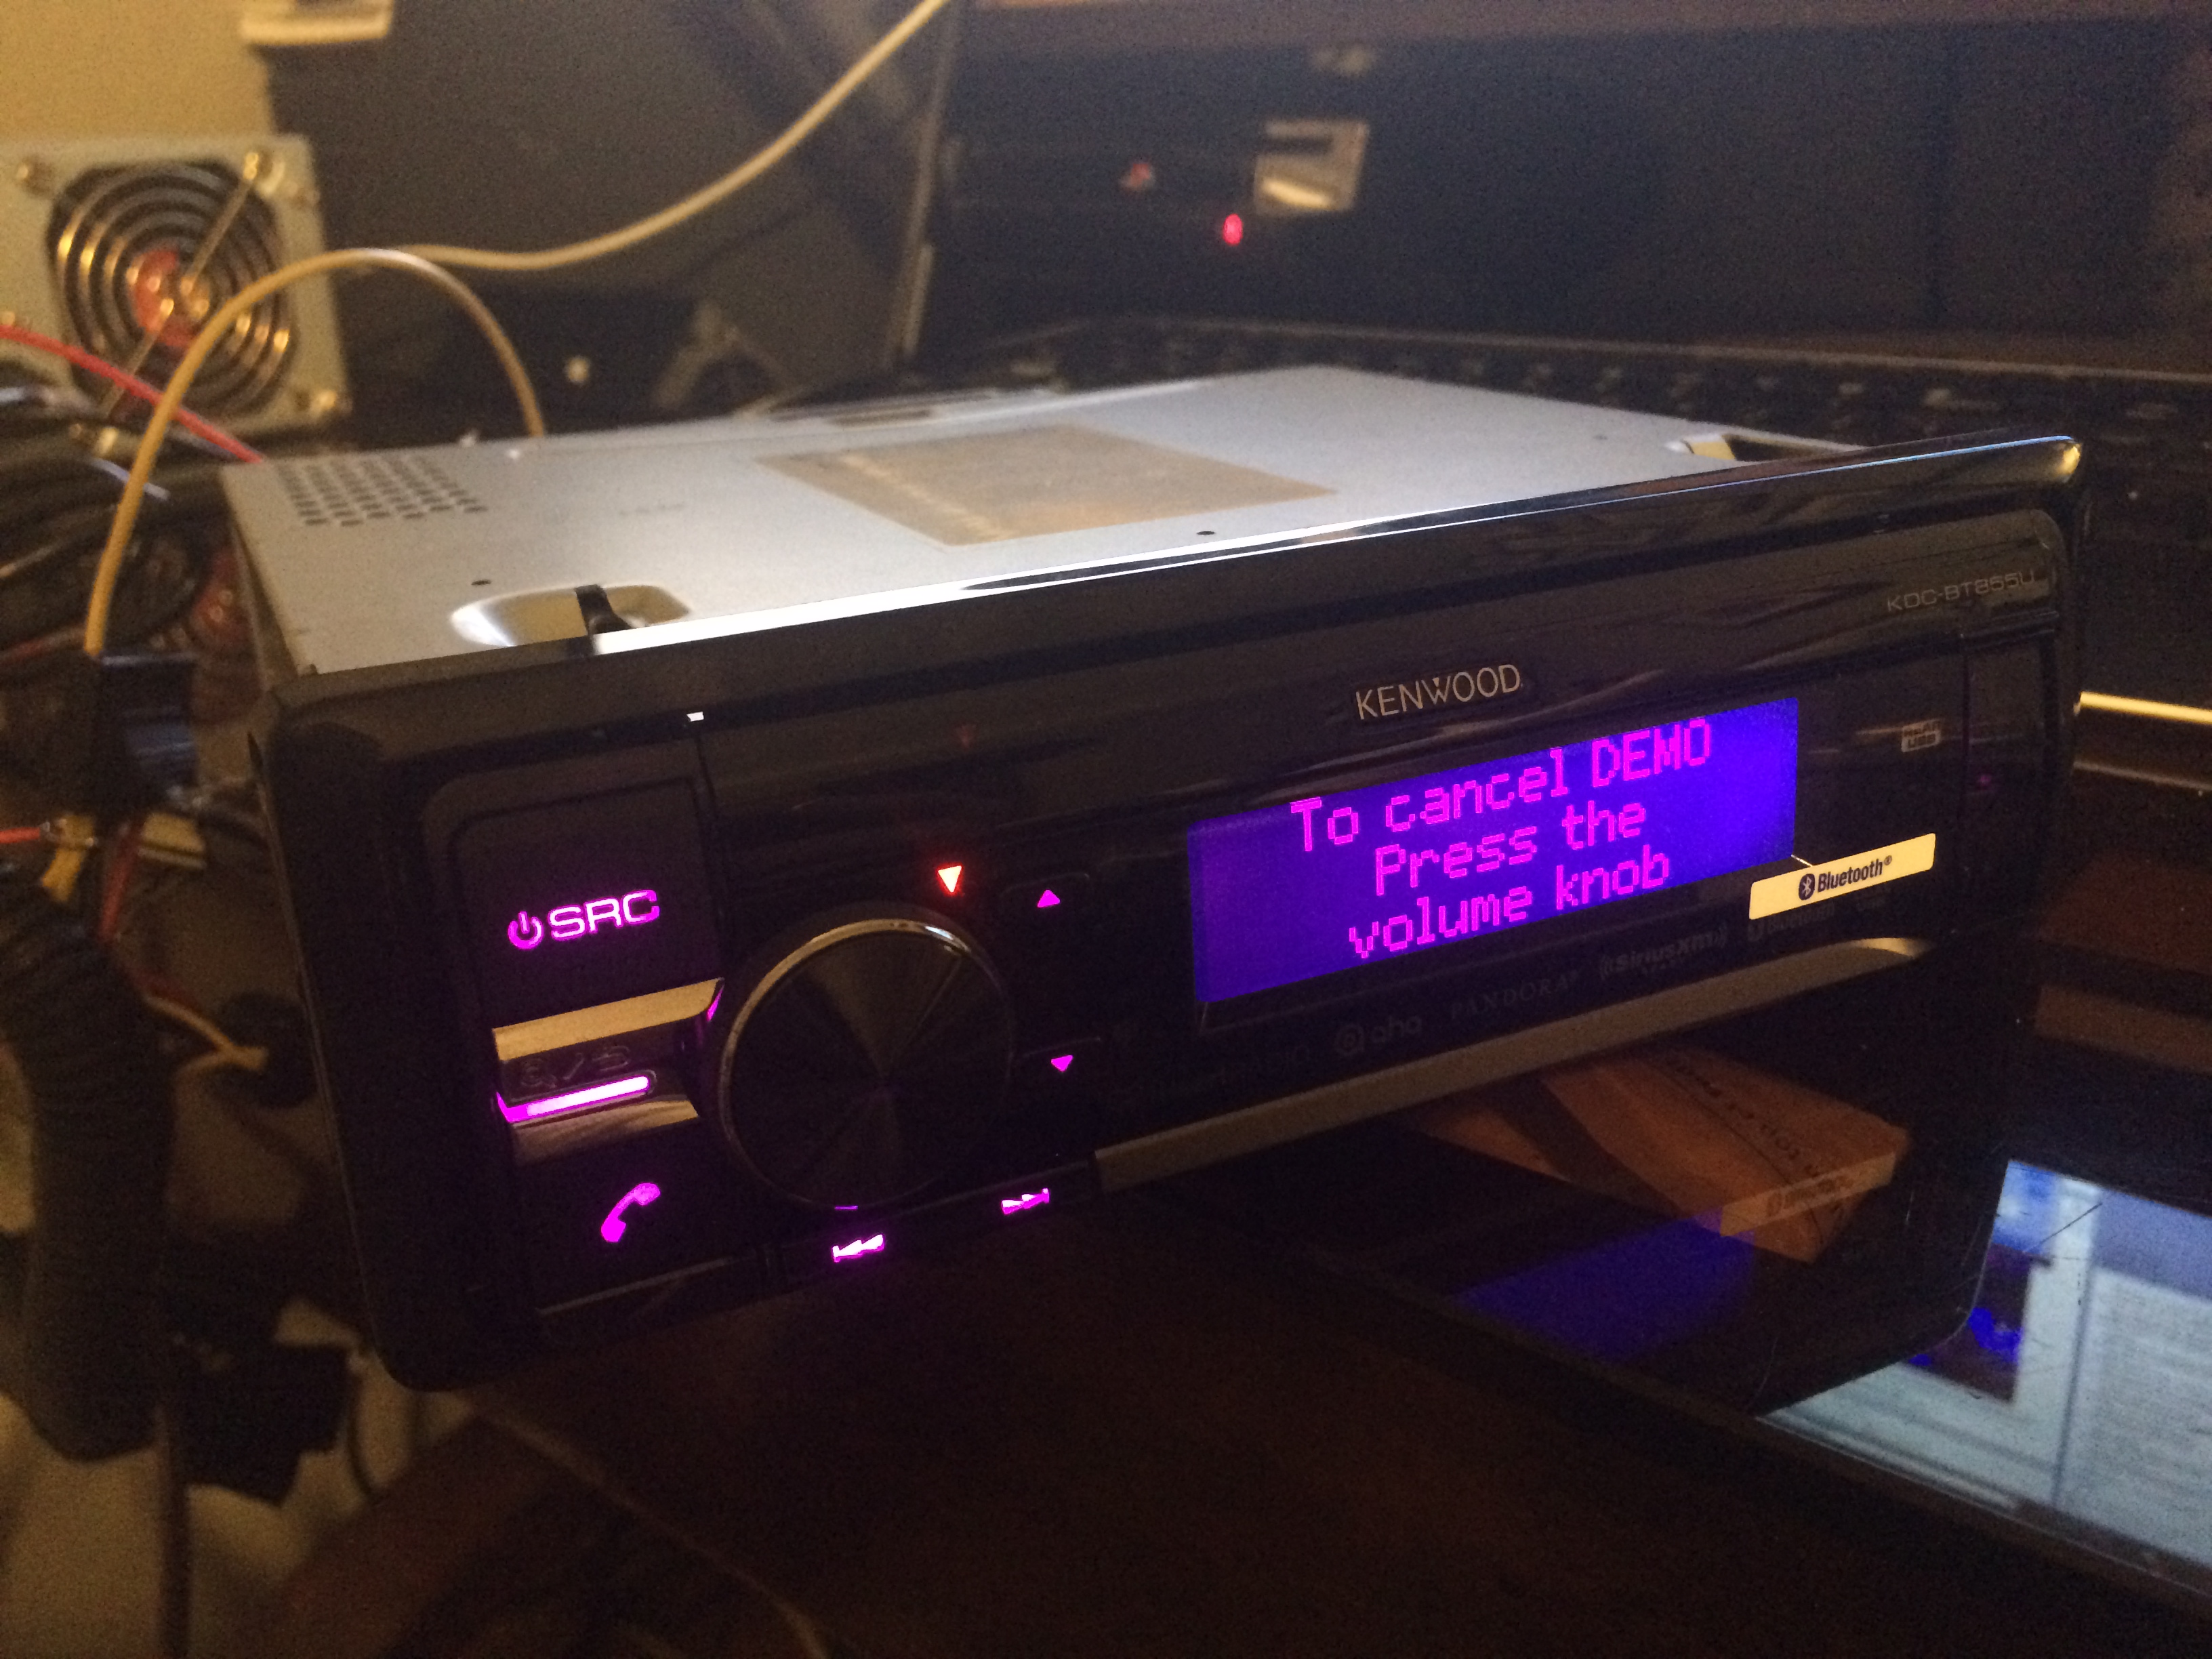
Successfully powering it on for the first time using a Desktop Power Supply.
This is an Instant Hot Water Heater. This particular one seen on the right, was a replacement unit due to a recall. The old unit was experiencing corrosion due to water exposure which could pose a potential risk if a gas line or water line cracks within the unit.
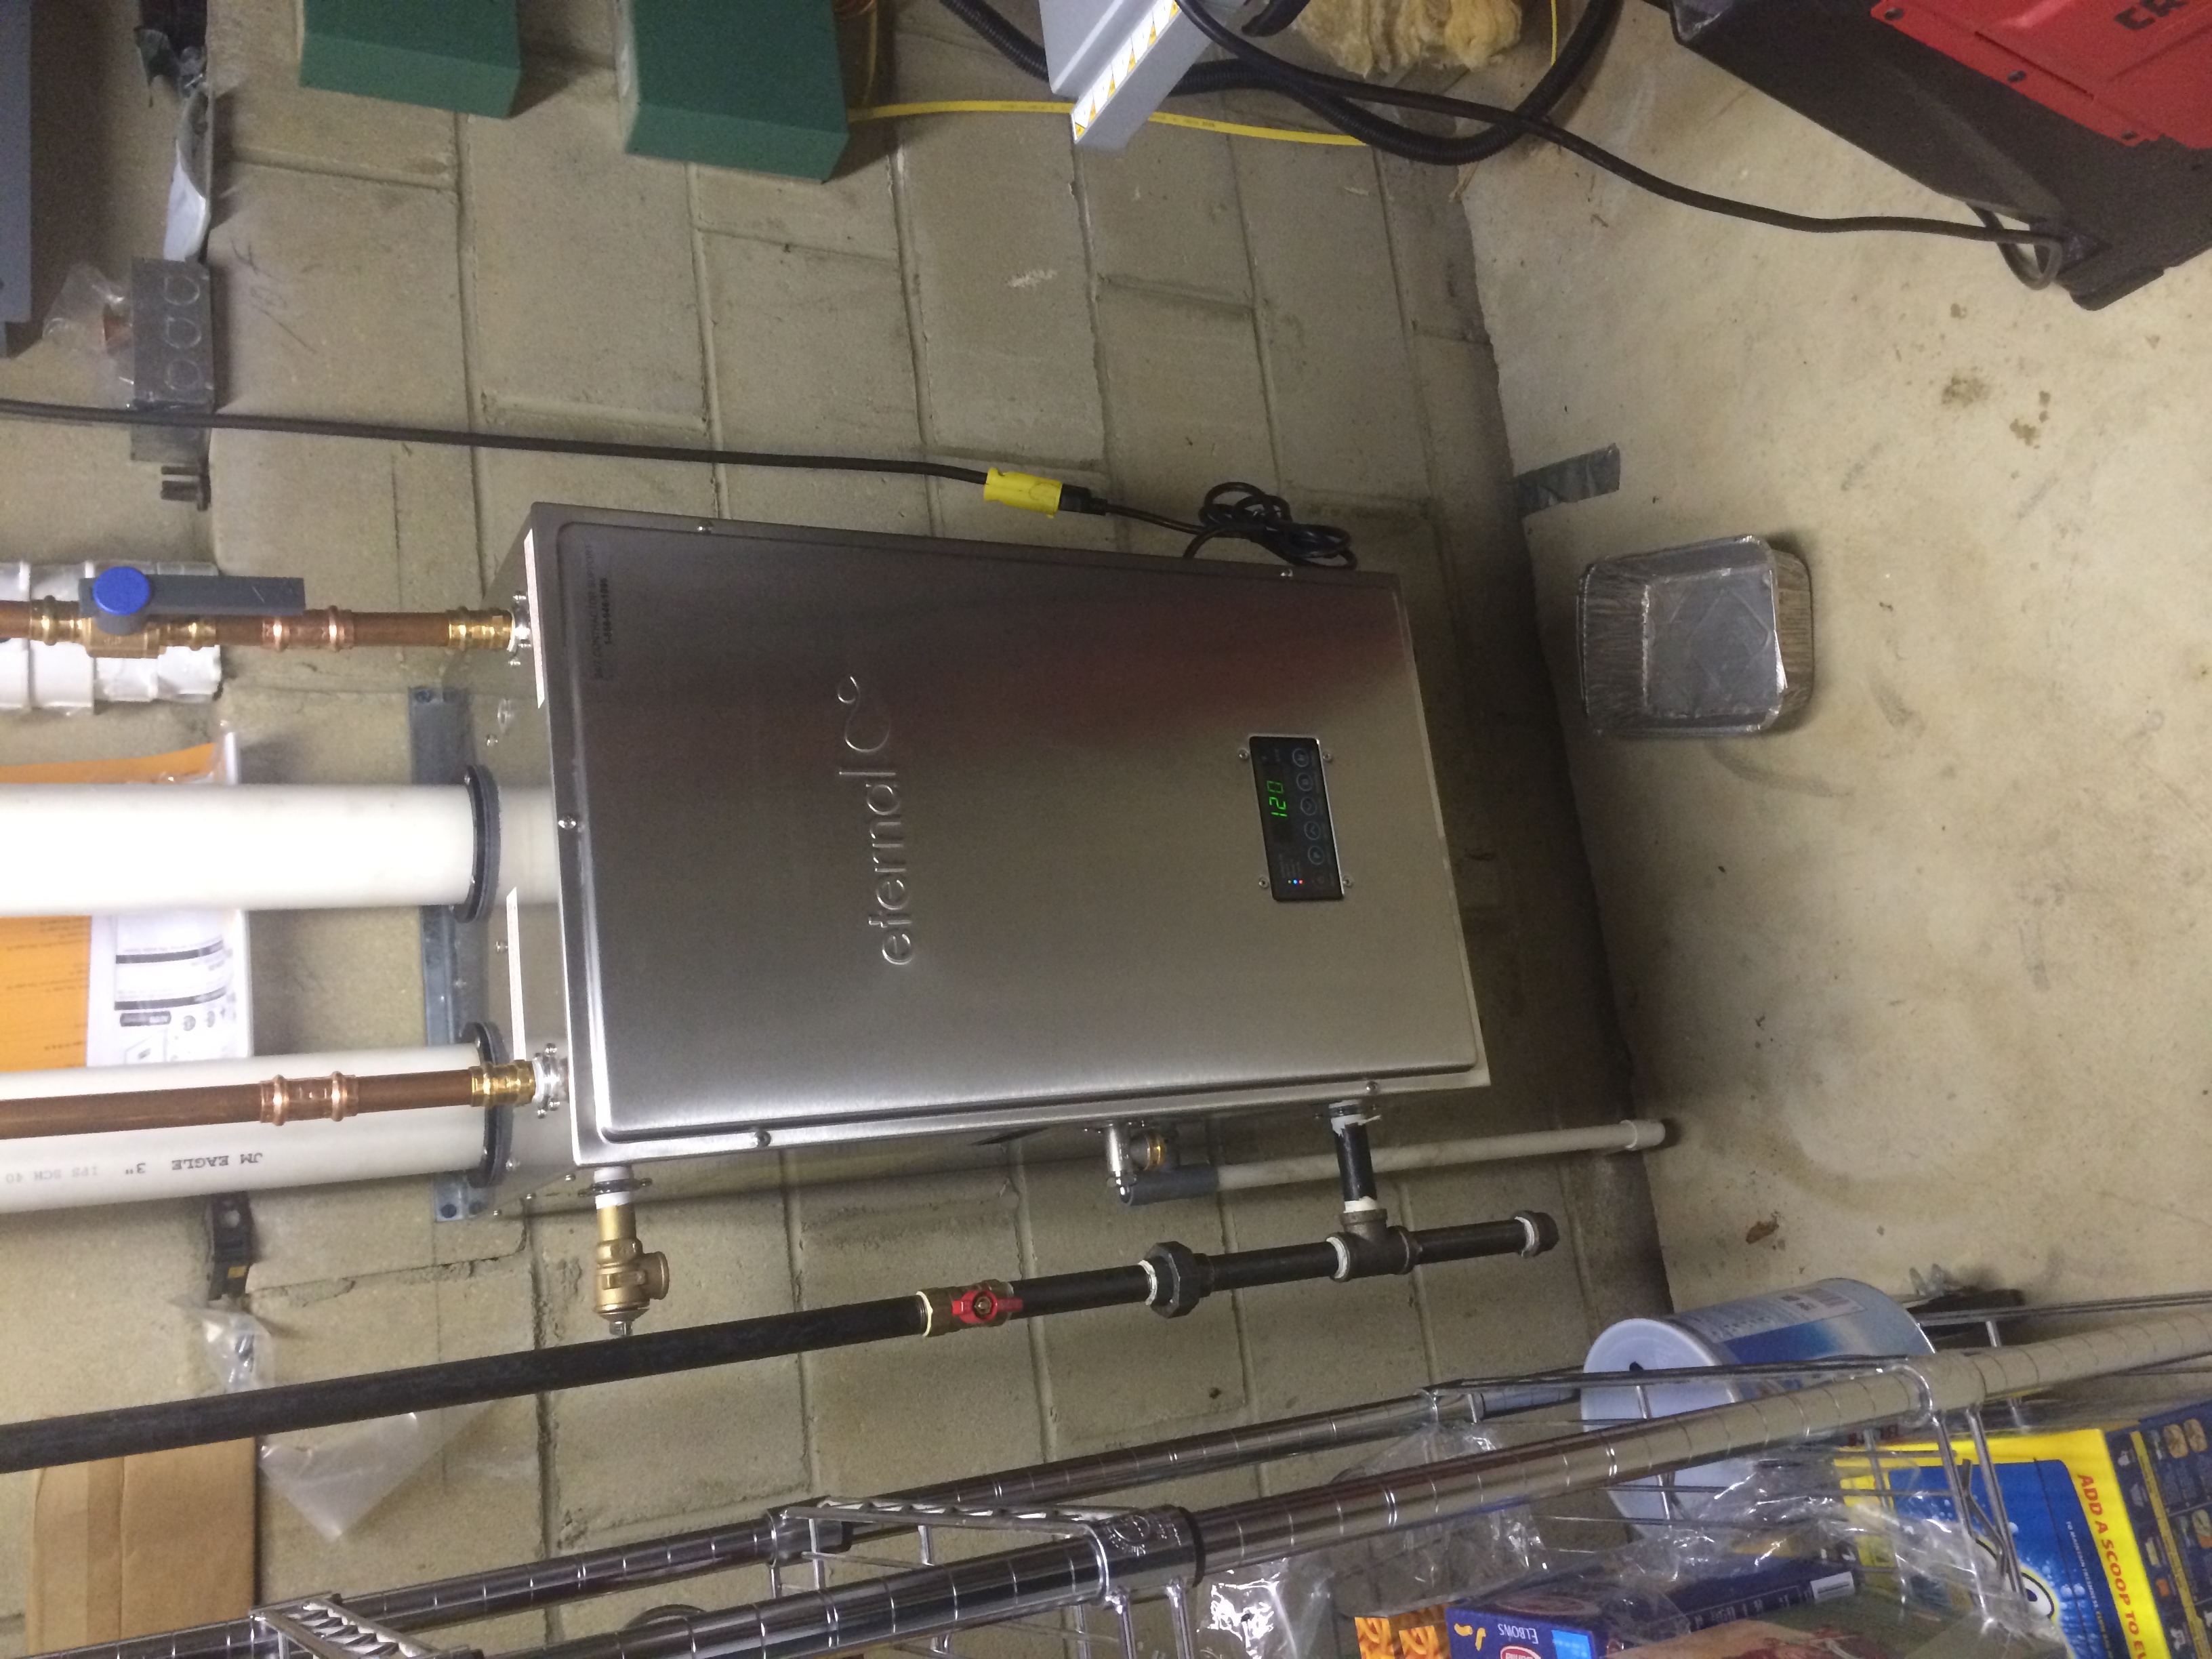
This is an Instant Hot Water Heater. This particular one seen on the right, was a replacement unit due to a recall. The old unit was experiencing corrosion due to water exposure which could pose a potential risk if a gas line or water line cracks within the unit.
Here is the old unit that was previously destined for a garbage dump for recycling.
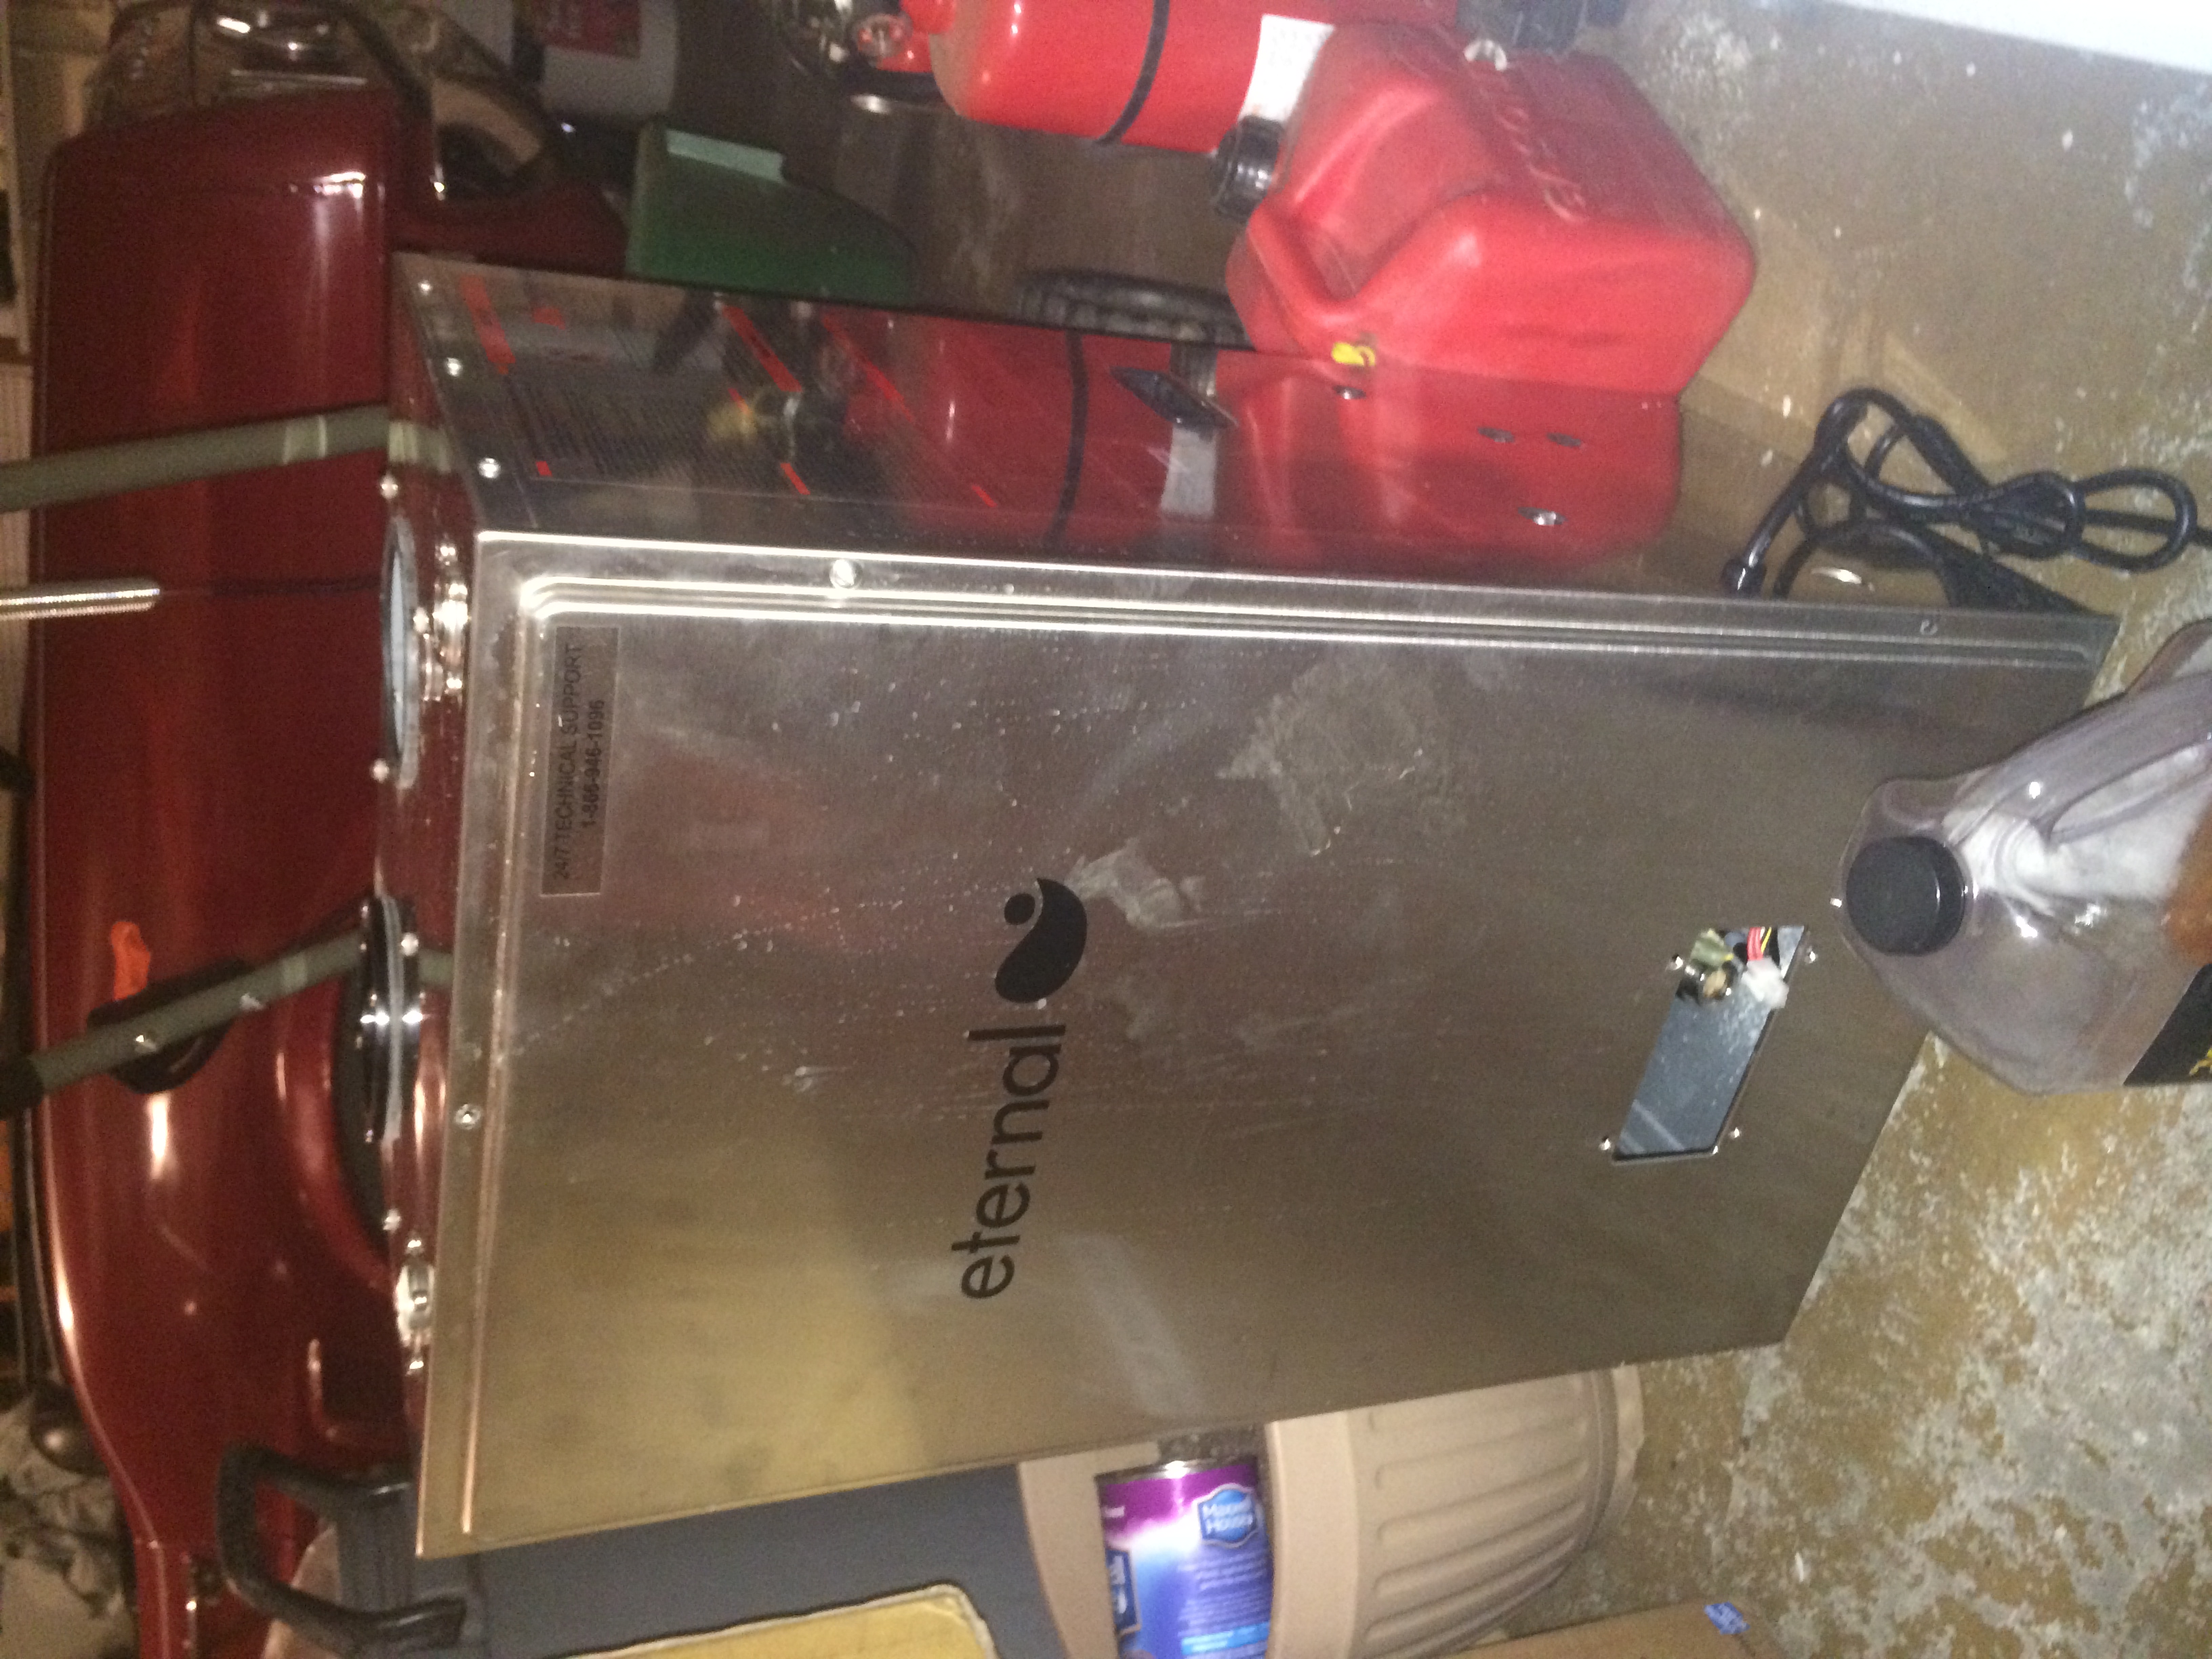
Here is the old unit that was previously destined for a garbage dump for recycling.
The unit comes with an existing Power Cord, I can definitely repurpose this to make a clean looking installation for powering the unit.
The unit comes with an existing Power Cord, I can definitely repurpose this to make a clean looking installation for powering the unit.
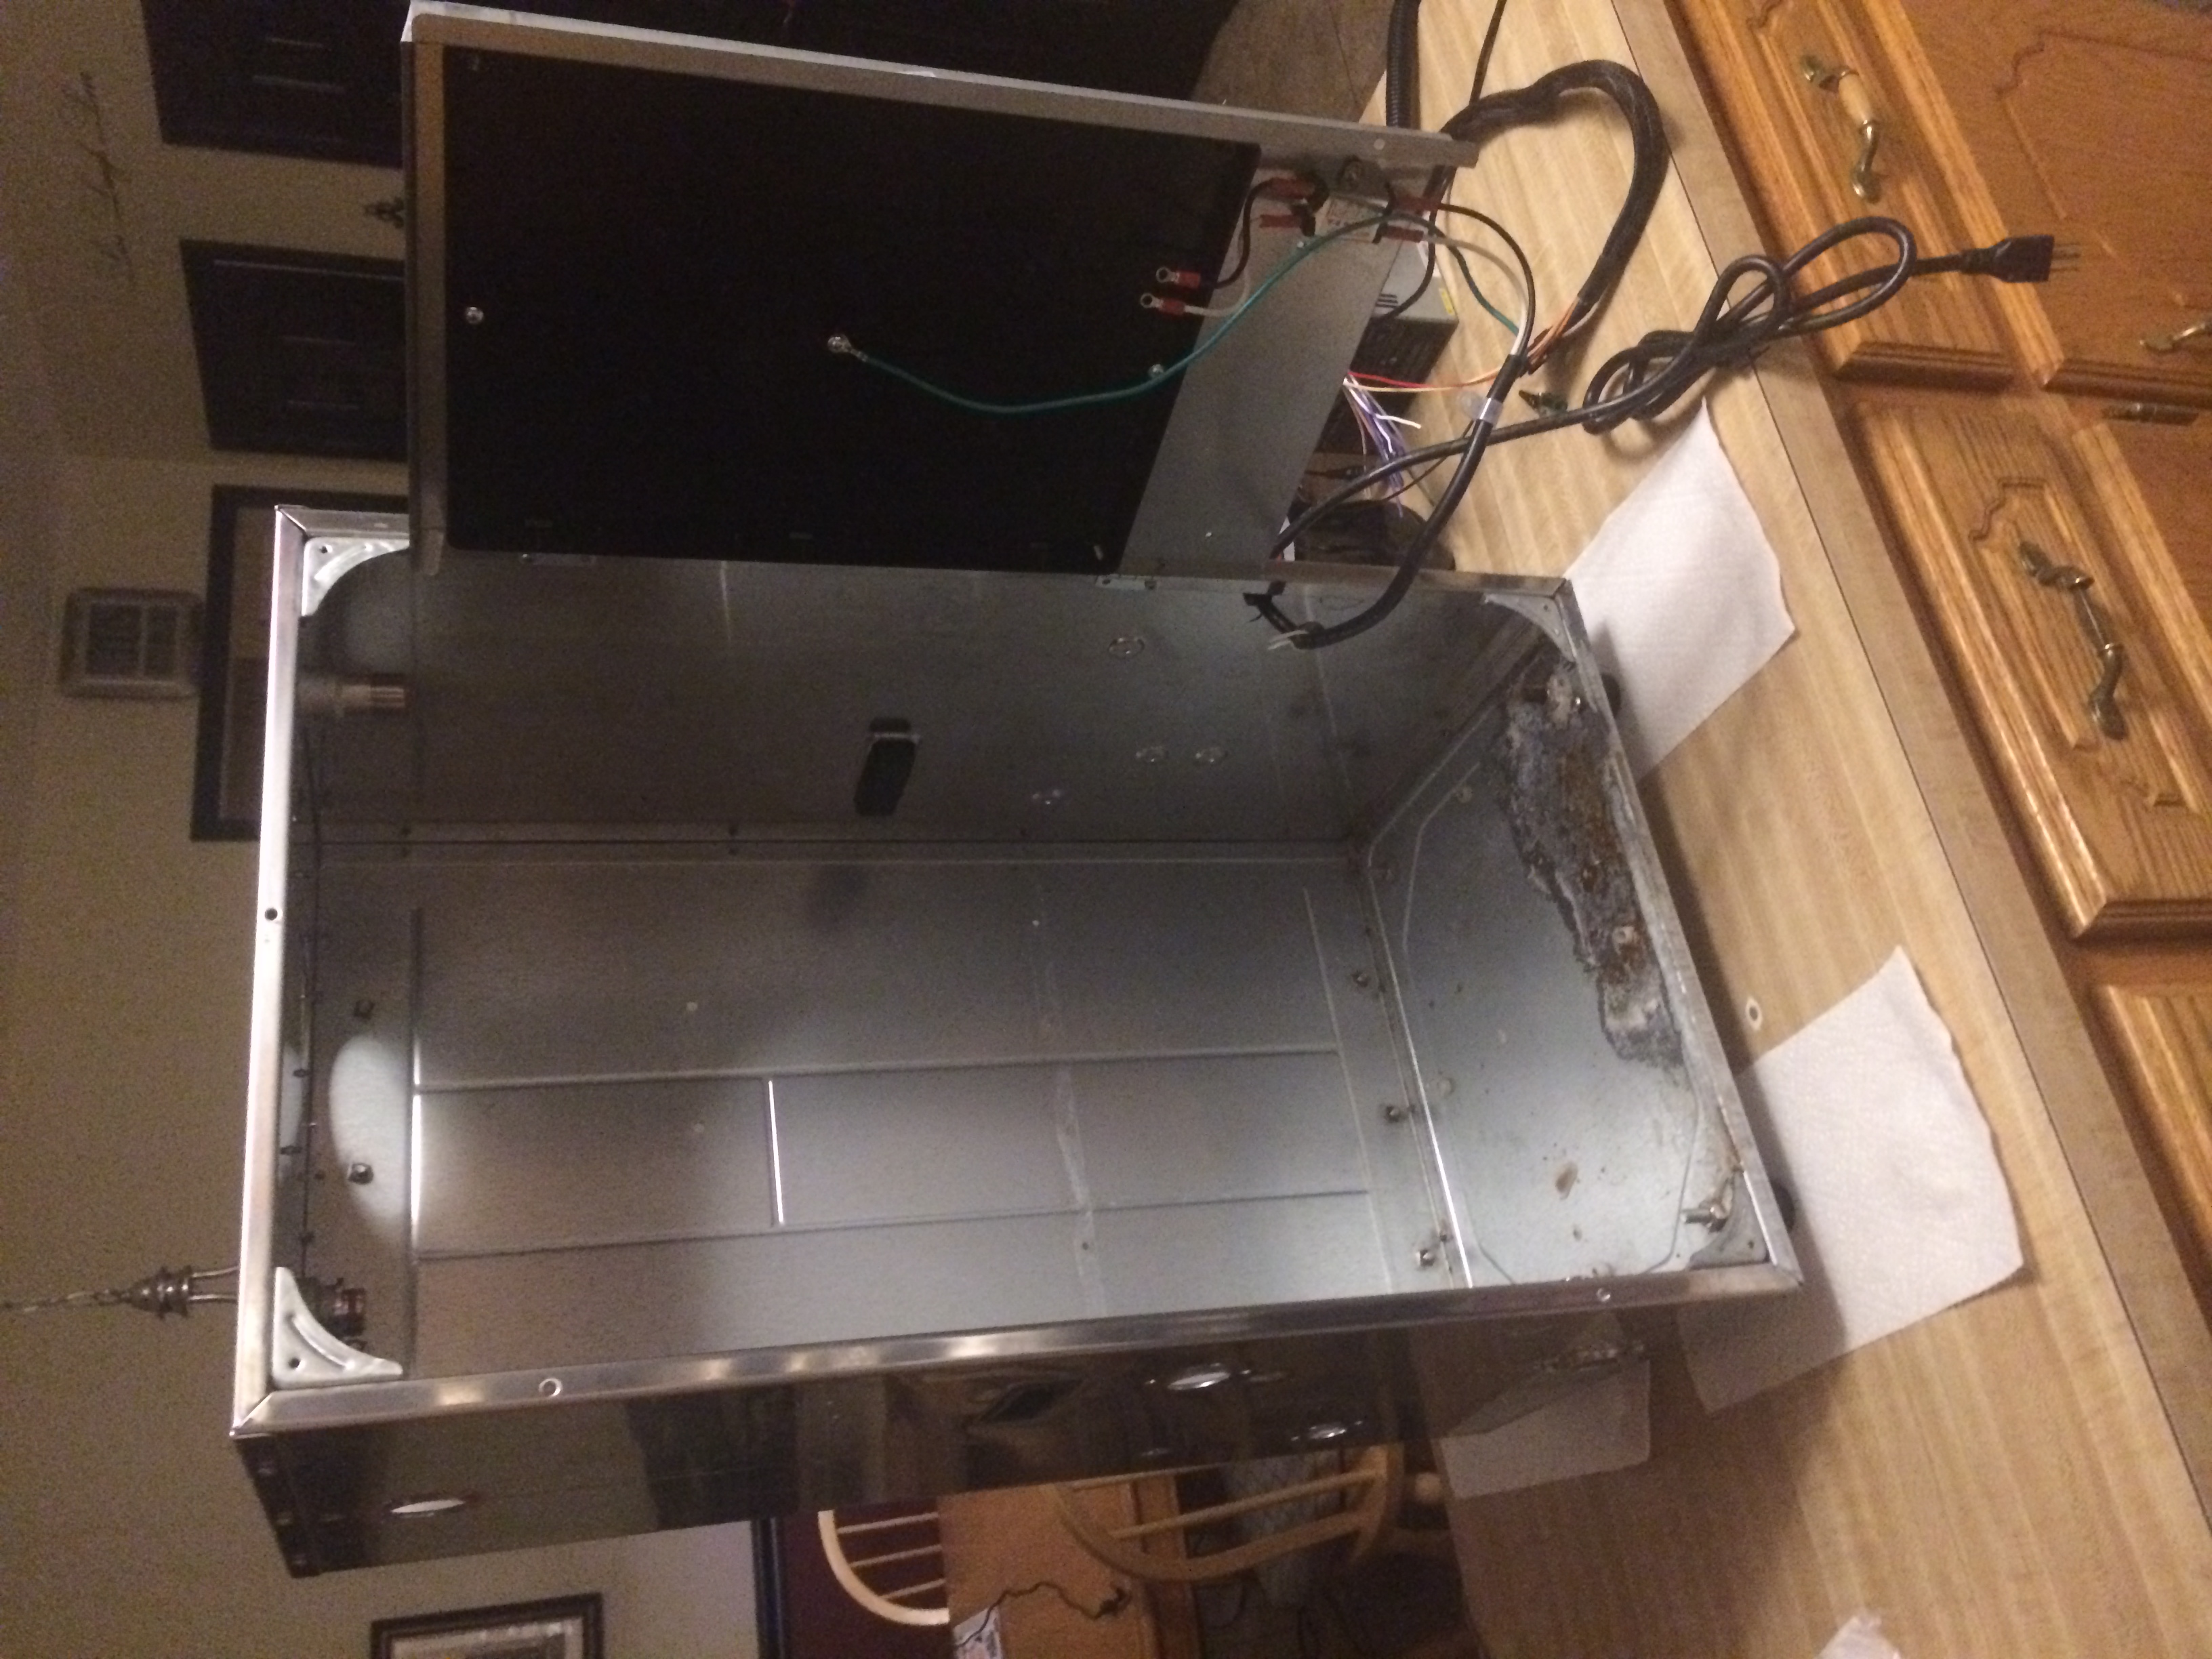
Here are the internal components. The insulated cylinder has a coiled pipe running around it. Below it a burner would heat up the water as it travelled through the coil. This would flow out on the left side in the middle.
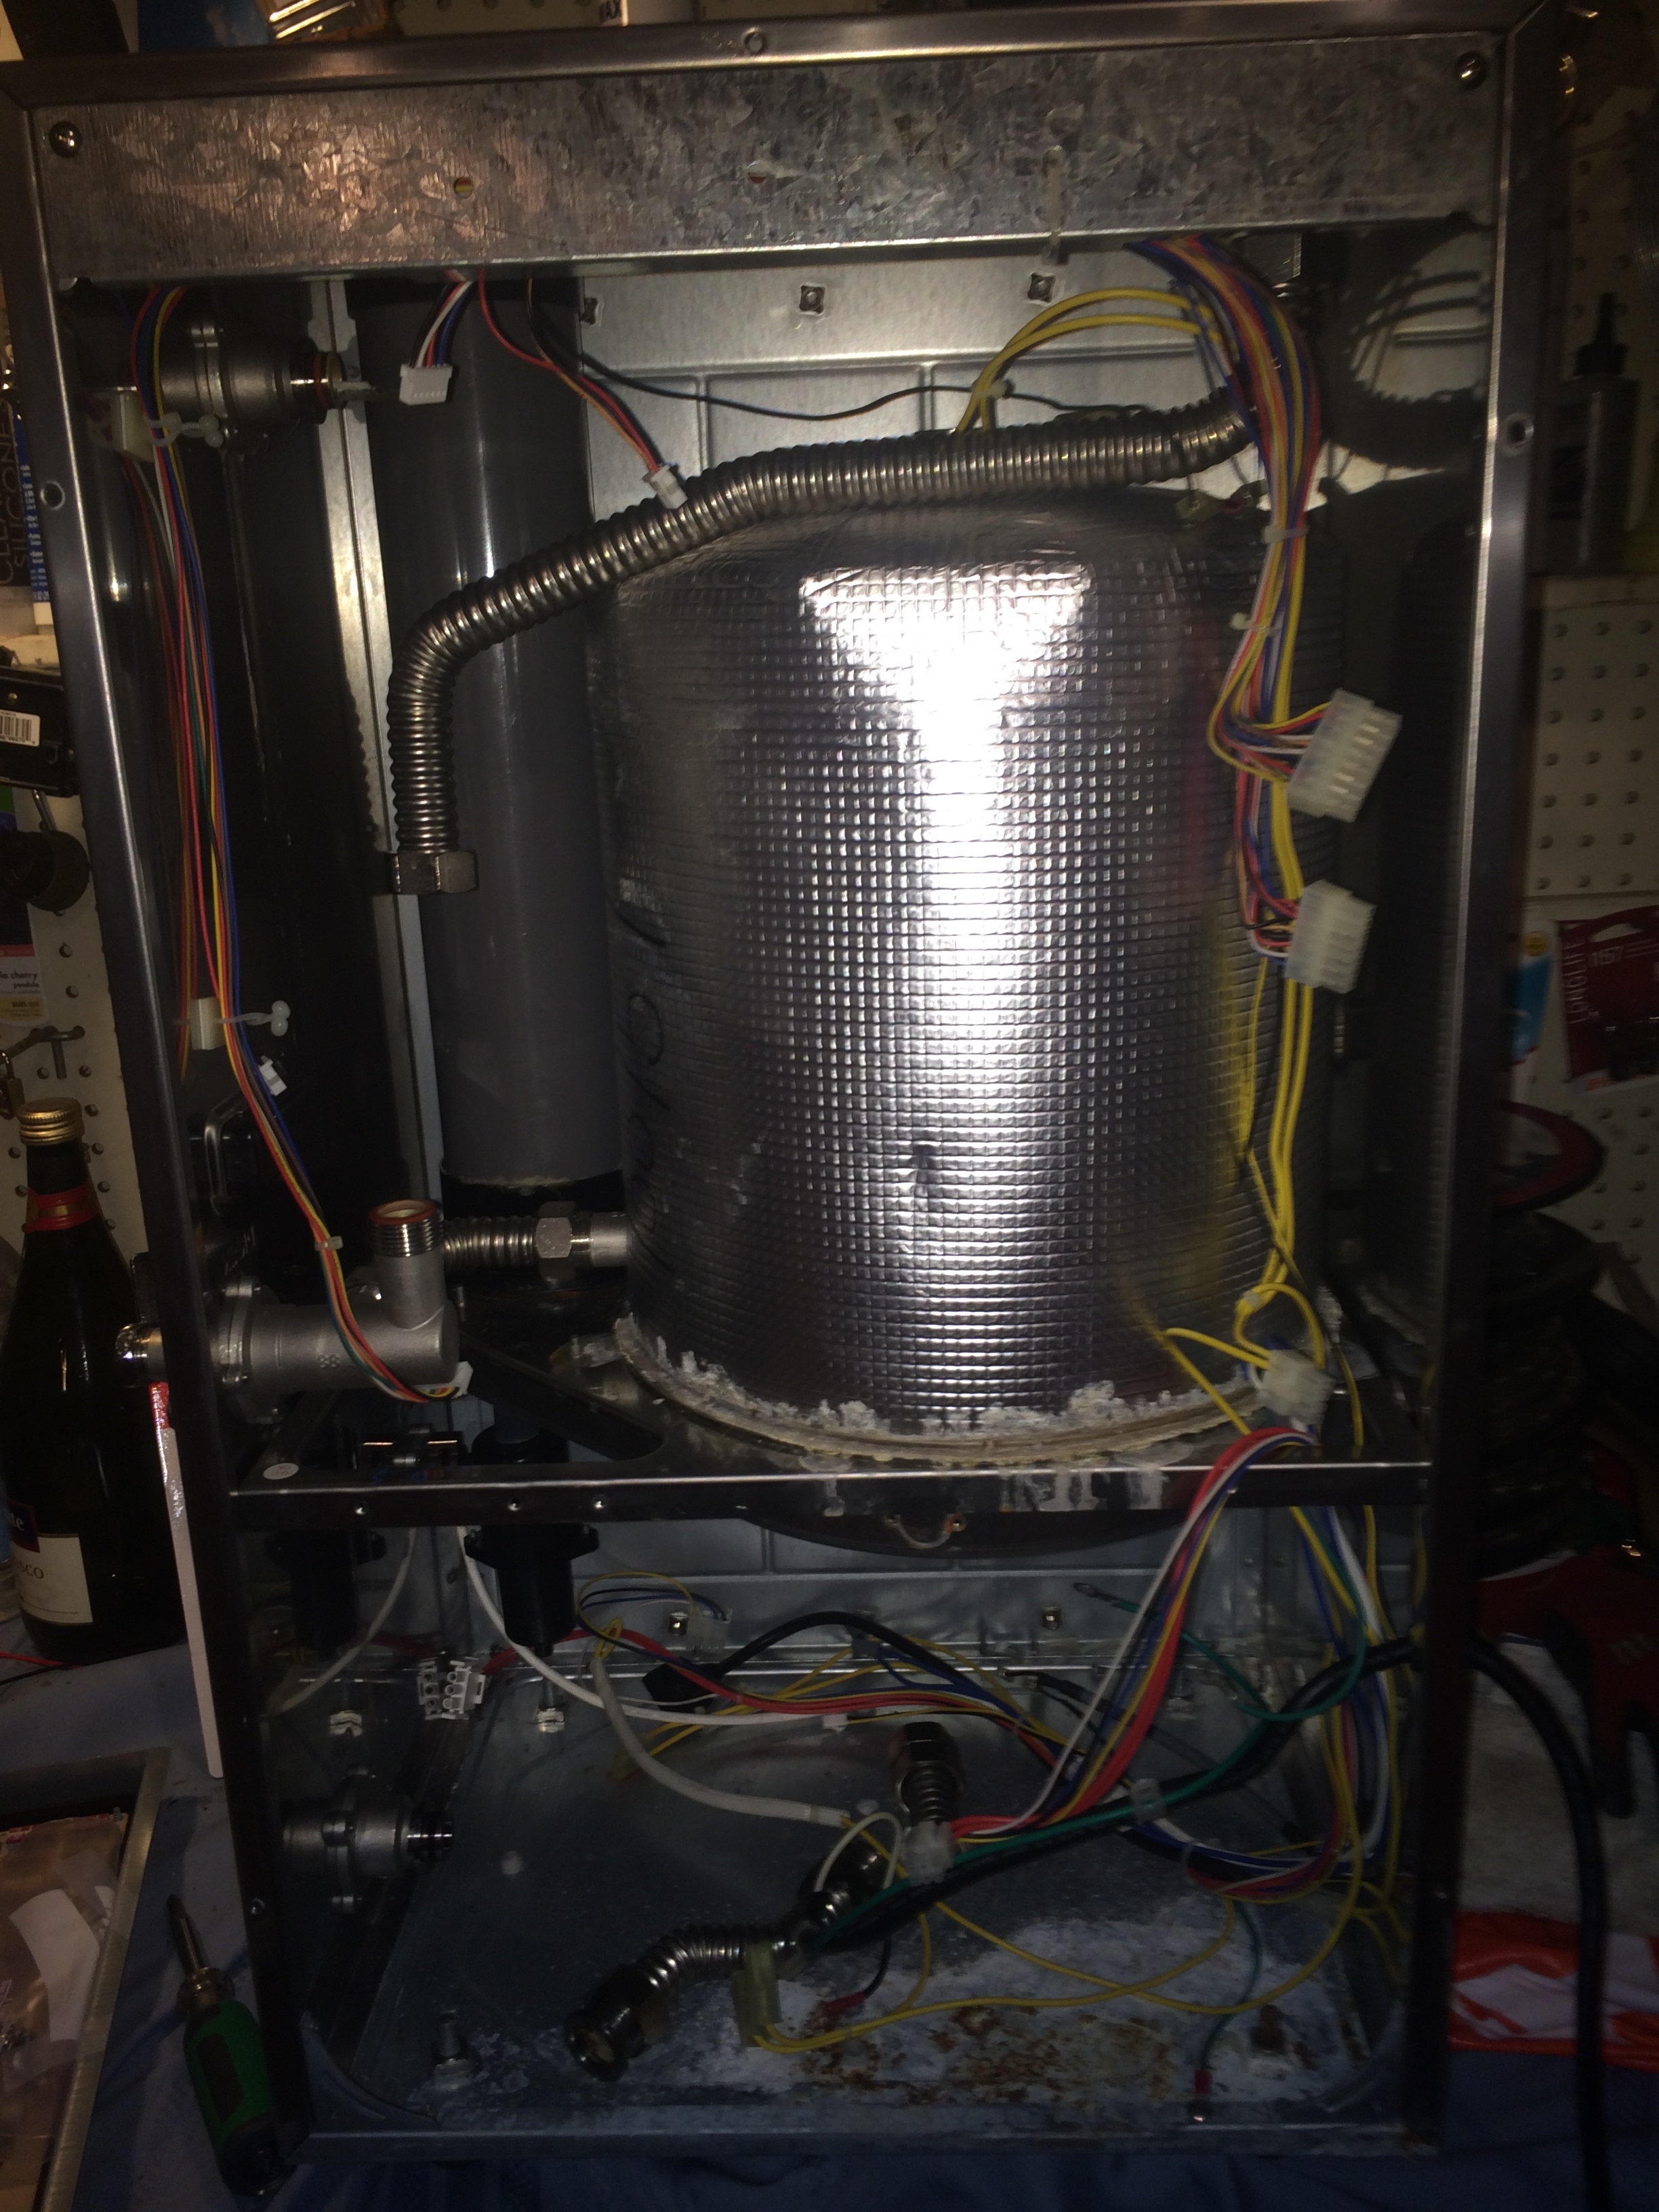
Here are the internal components. The insulated cylinder has a coiled pipe running around it. Below it a burner would heat up the water as it travelled through the coil. This would flow out on the left side in the middle.
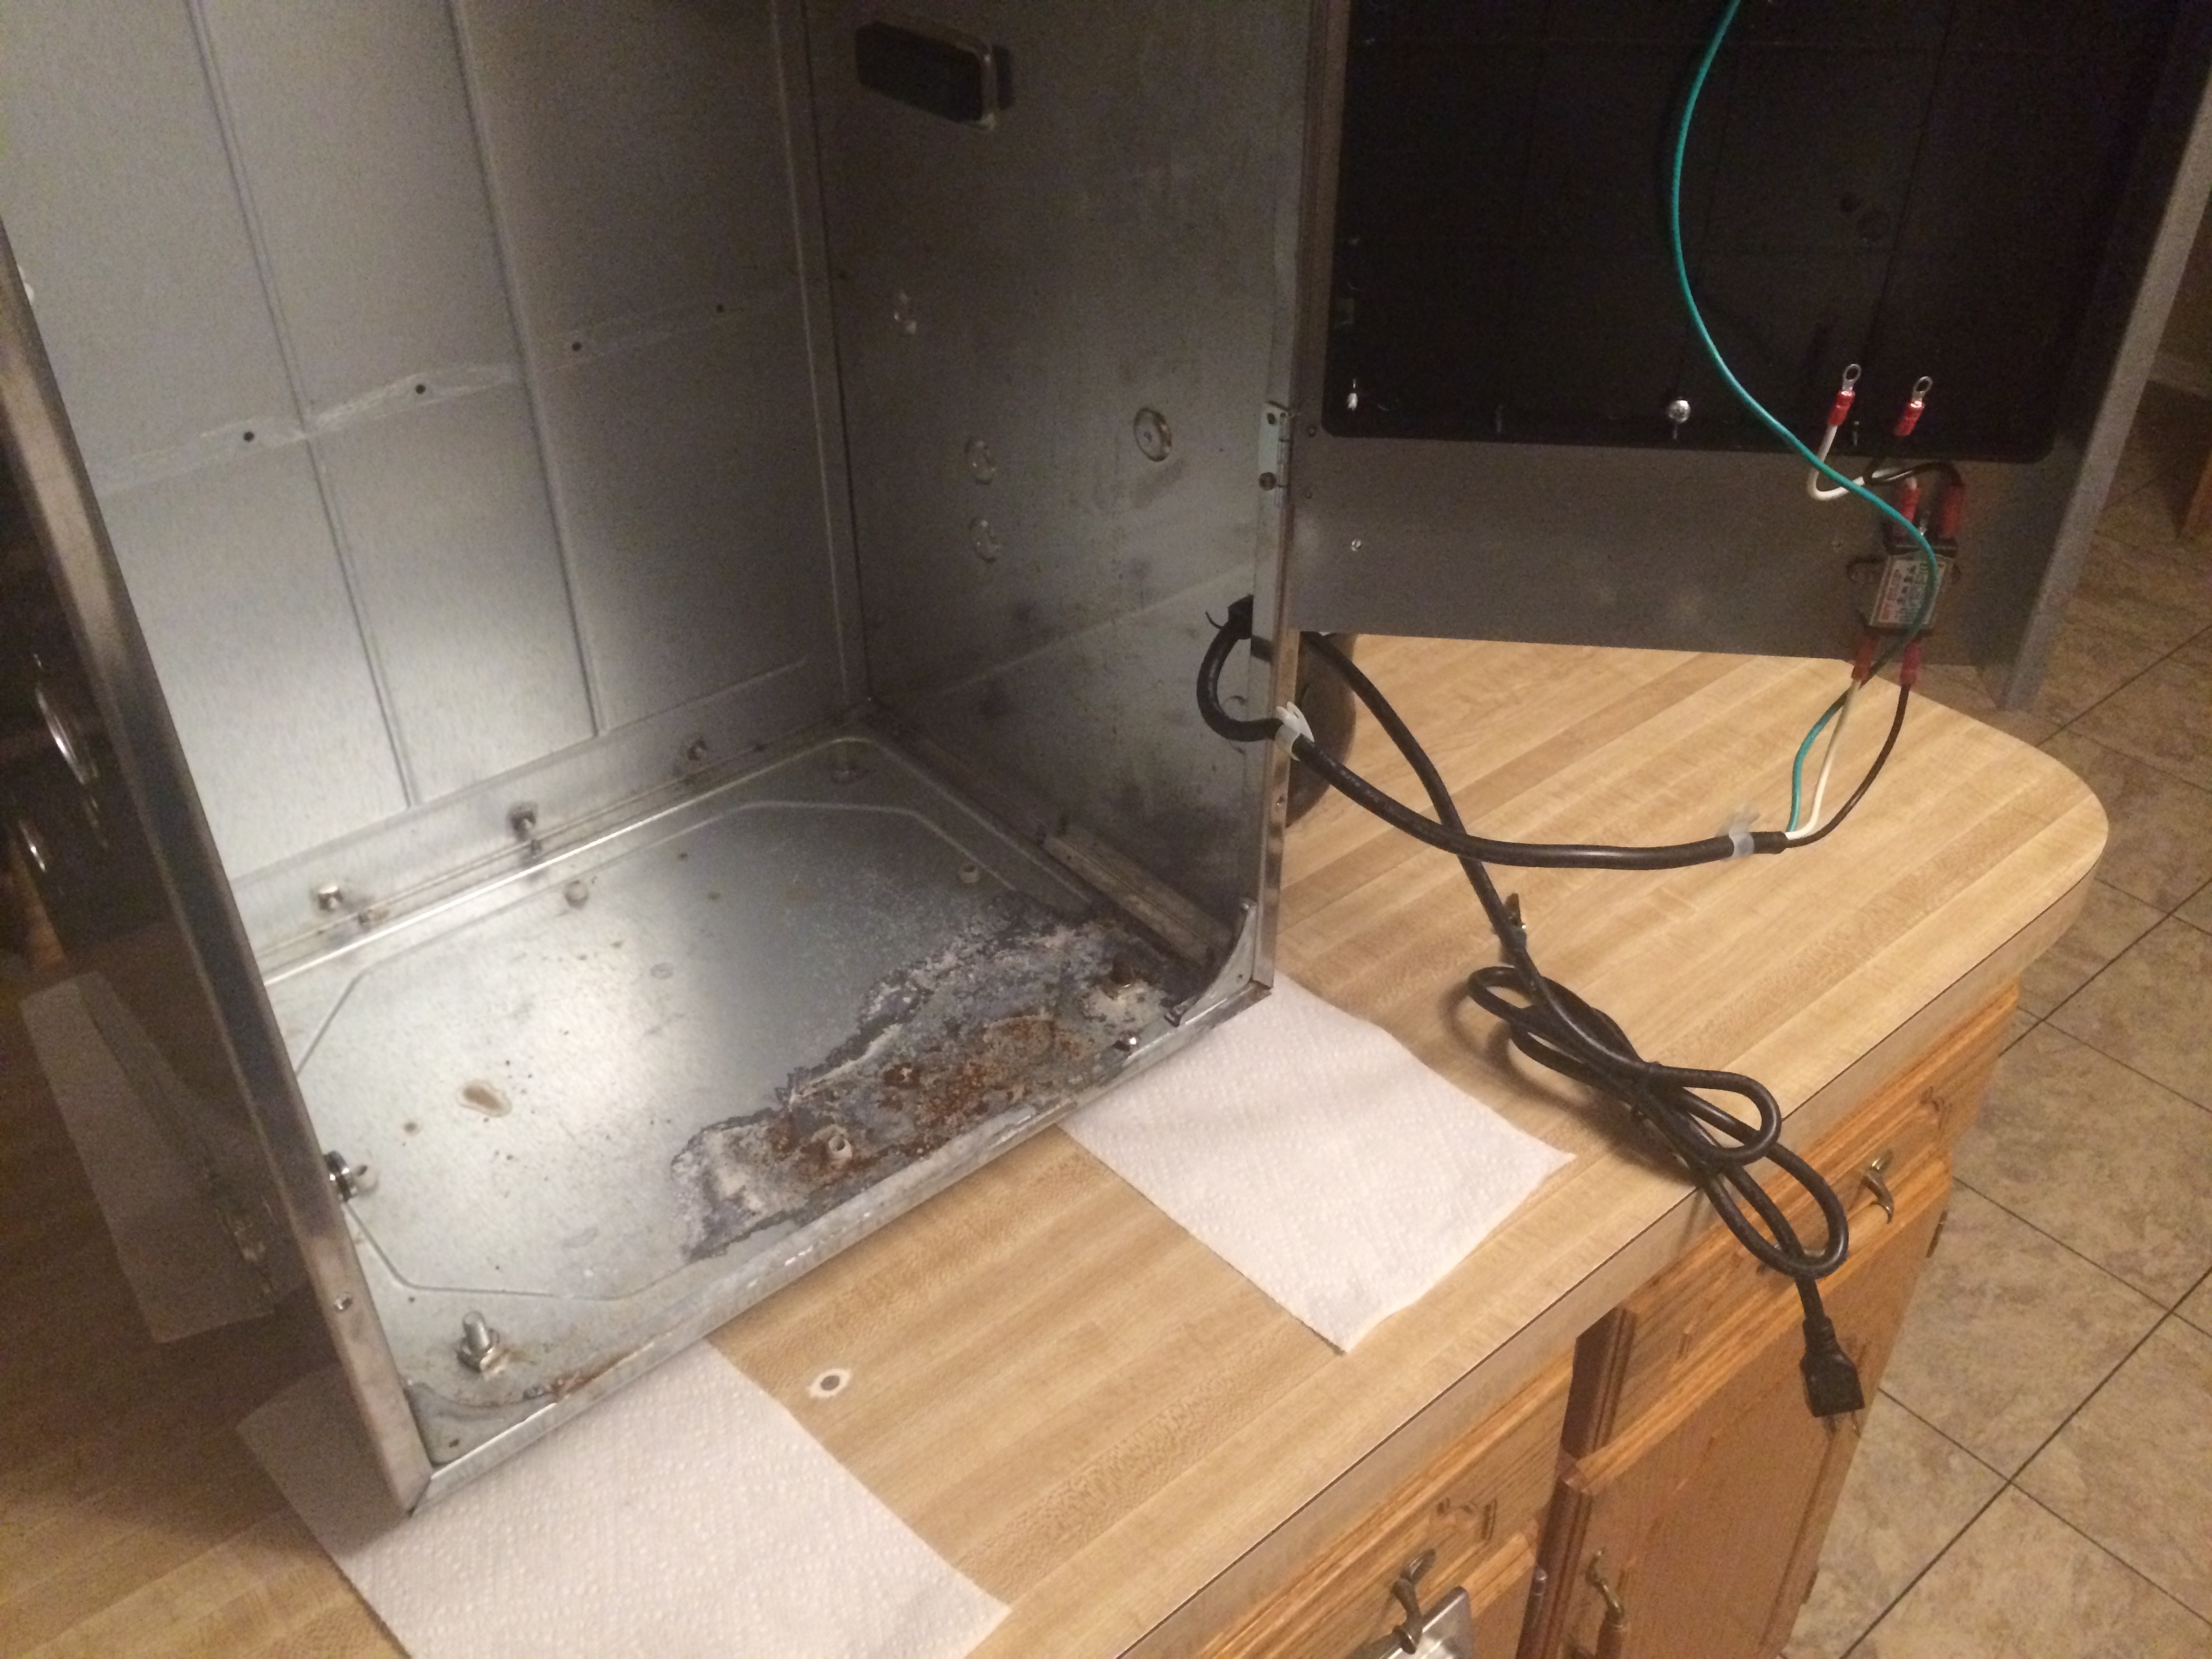
All internal water heating elements were removed and put aside for recycling. There is visible corrosion on the bottom of the unit which should be addressed.
All internal water heating elements were removed and put aside for recycling. There is visible corrosion on the bottom of the unit which should be addressed.
Little more corrosion marks on the side, as well as a better photo of the bottom pan.
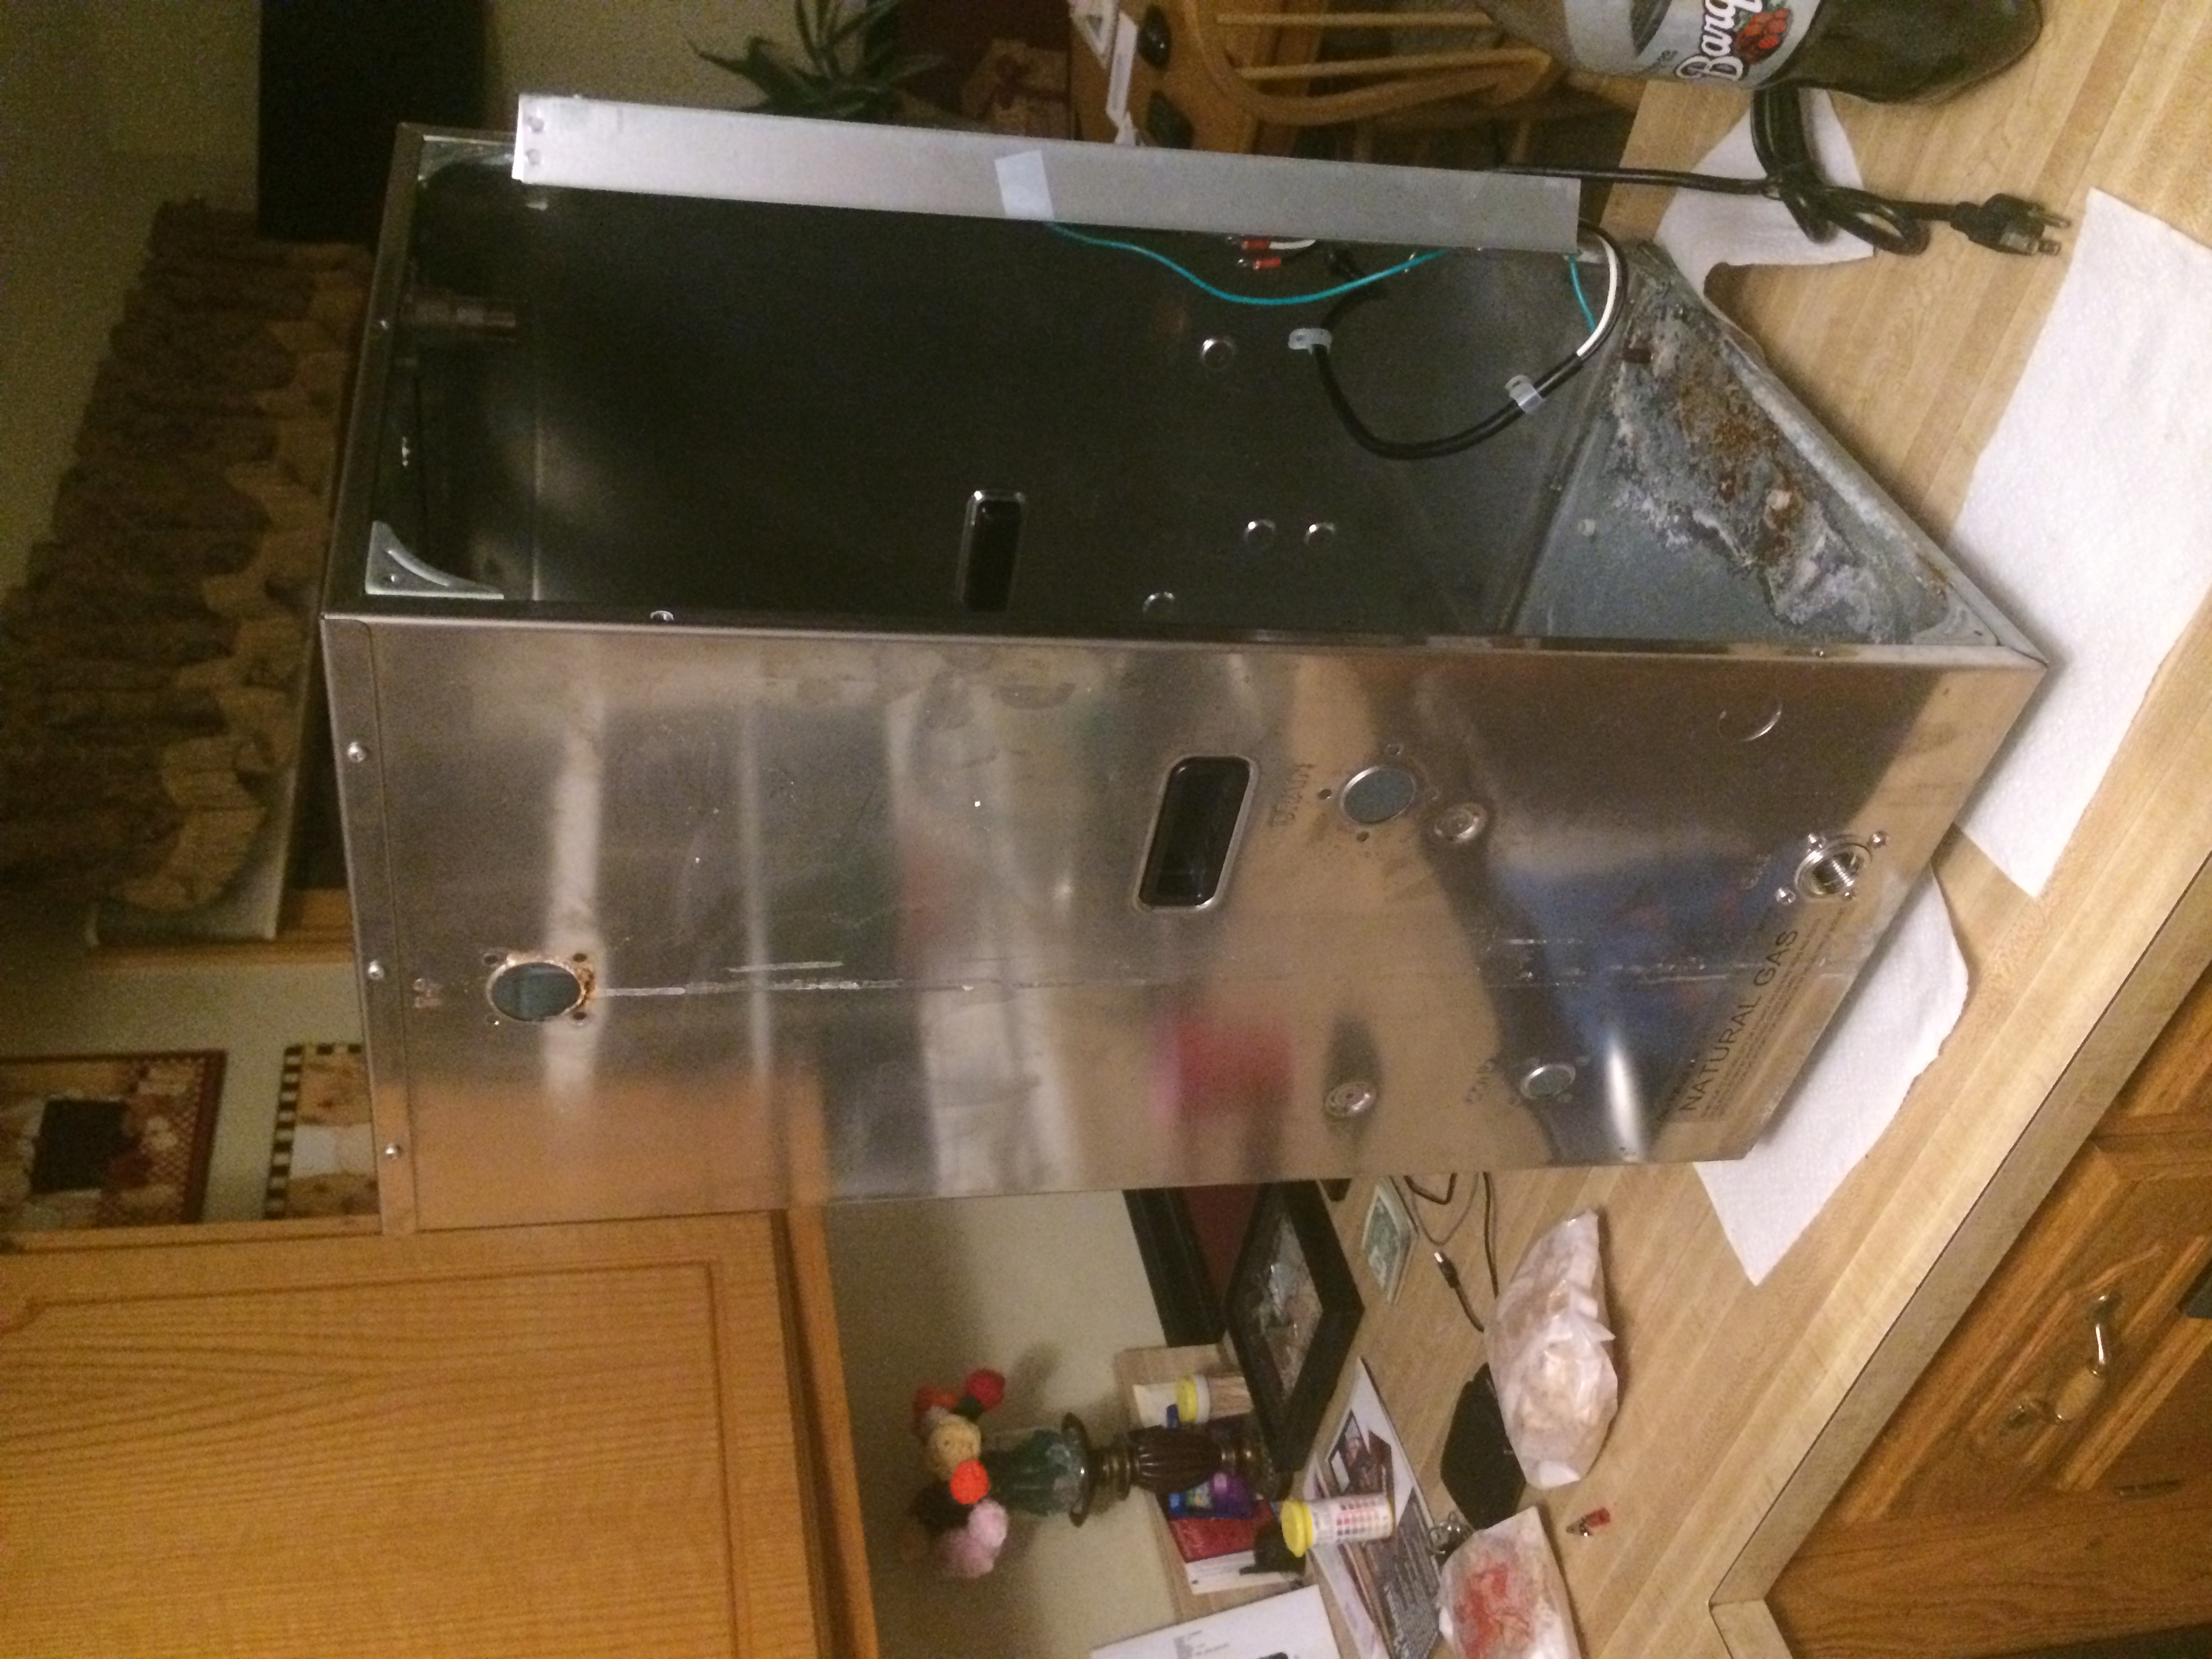
Little more corrosion marks on the side, as well as a better photo of the bottom pan.
The left side of the unit (looking outwards) where the Power Cord is visible. The Exterior of the unit looks great!
The left side of the unit (looking outwards) where the Power Cord is visible. The Exterior of the unit looks great!
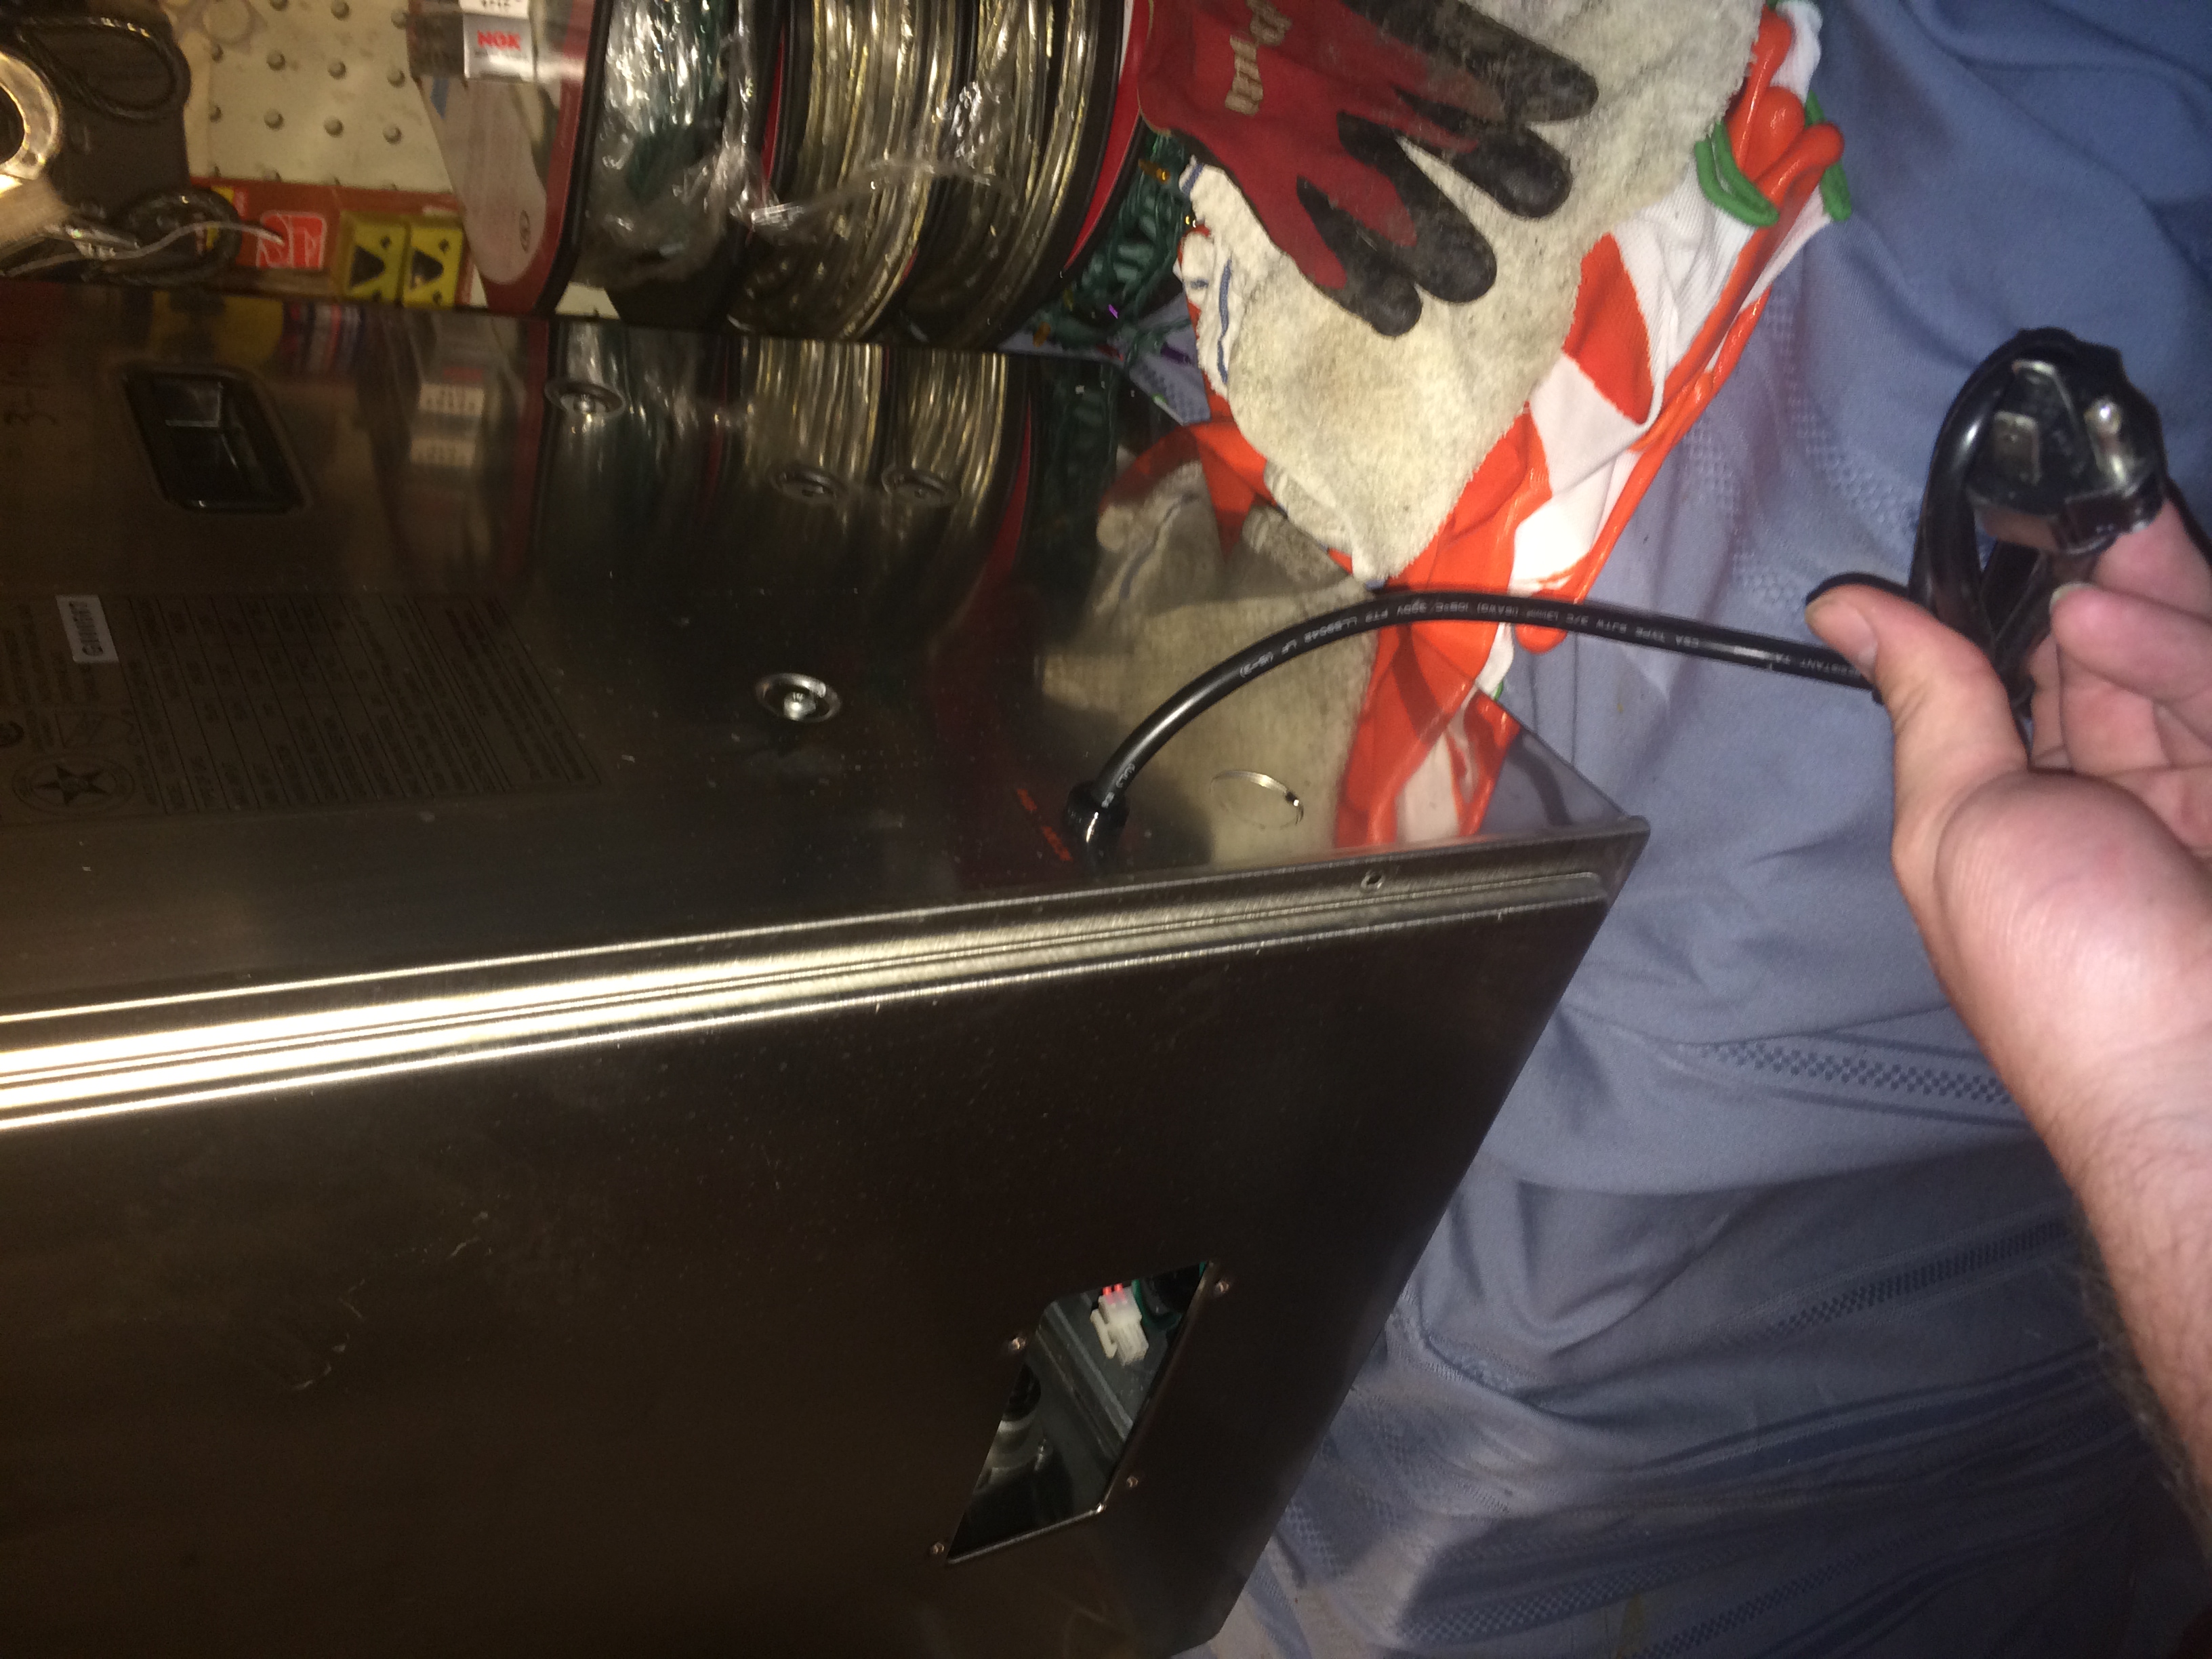
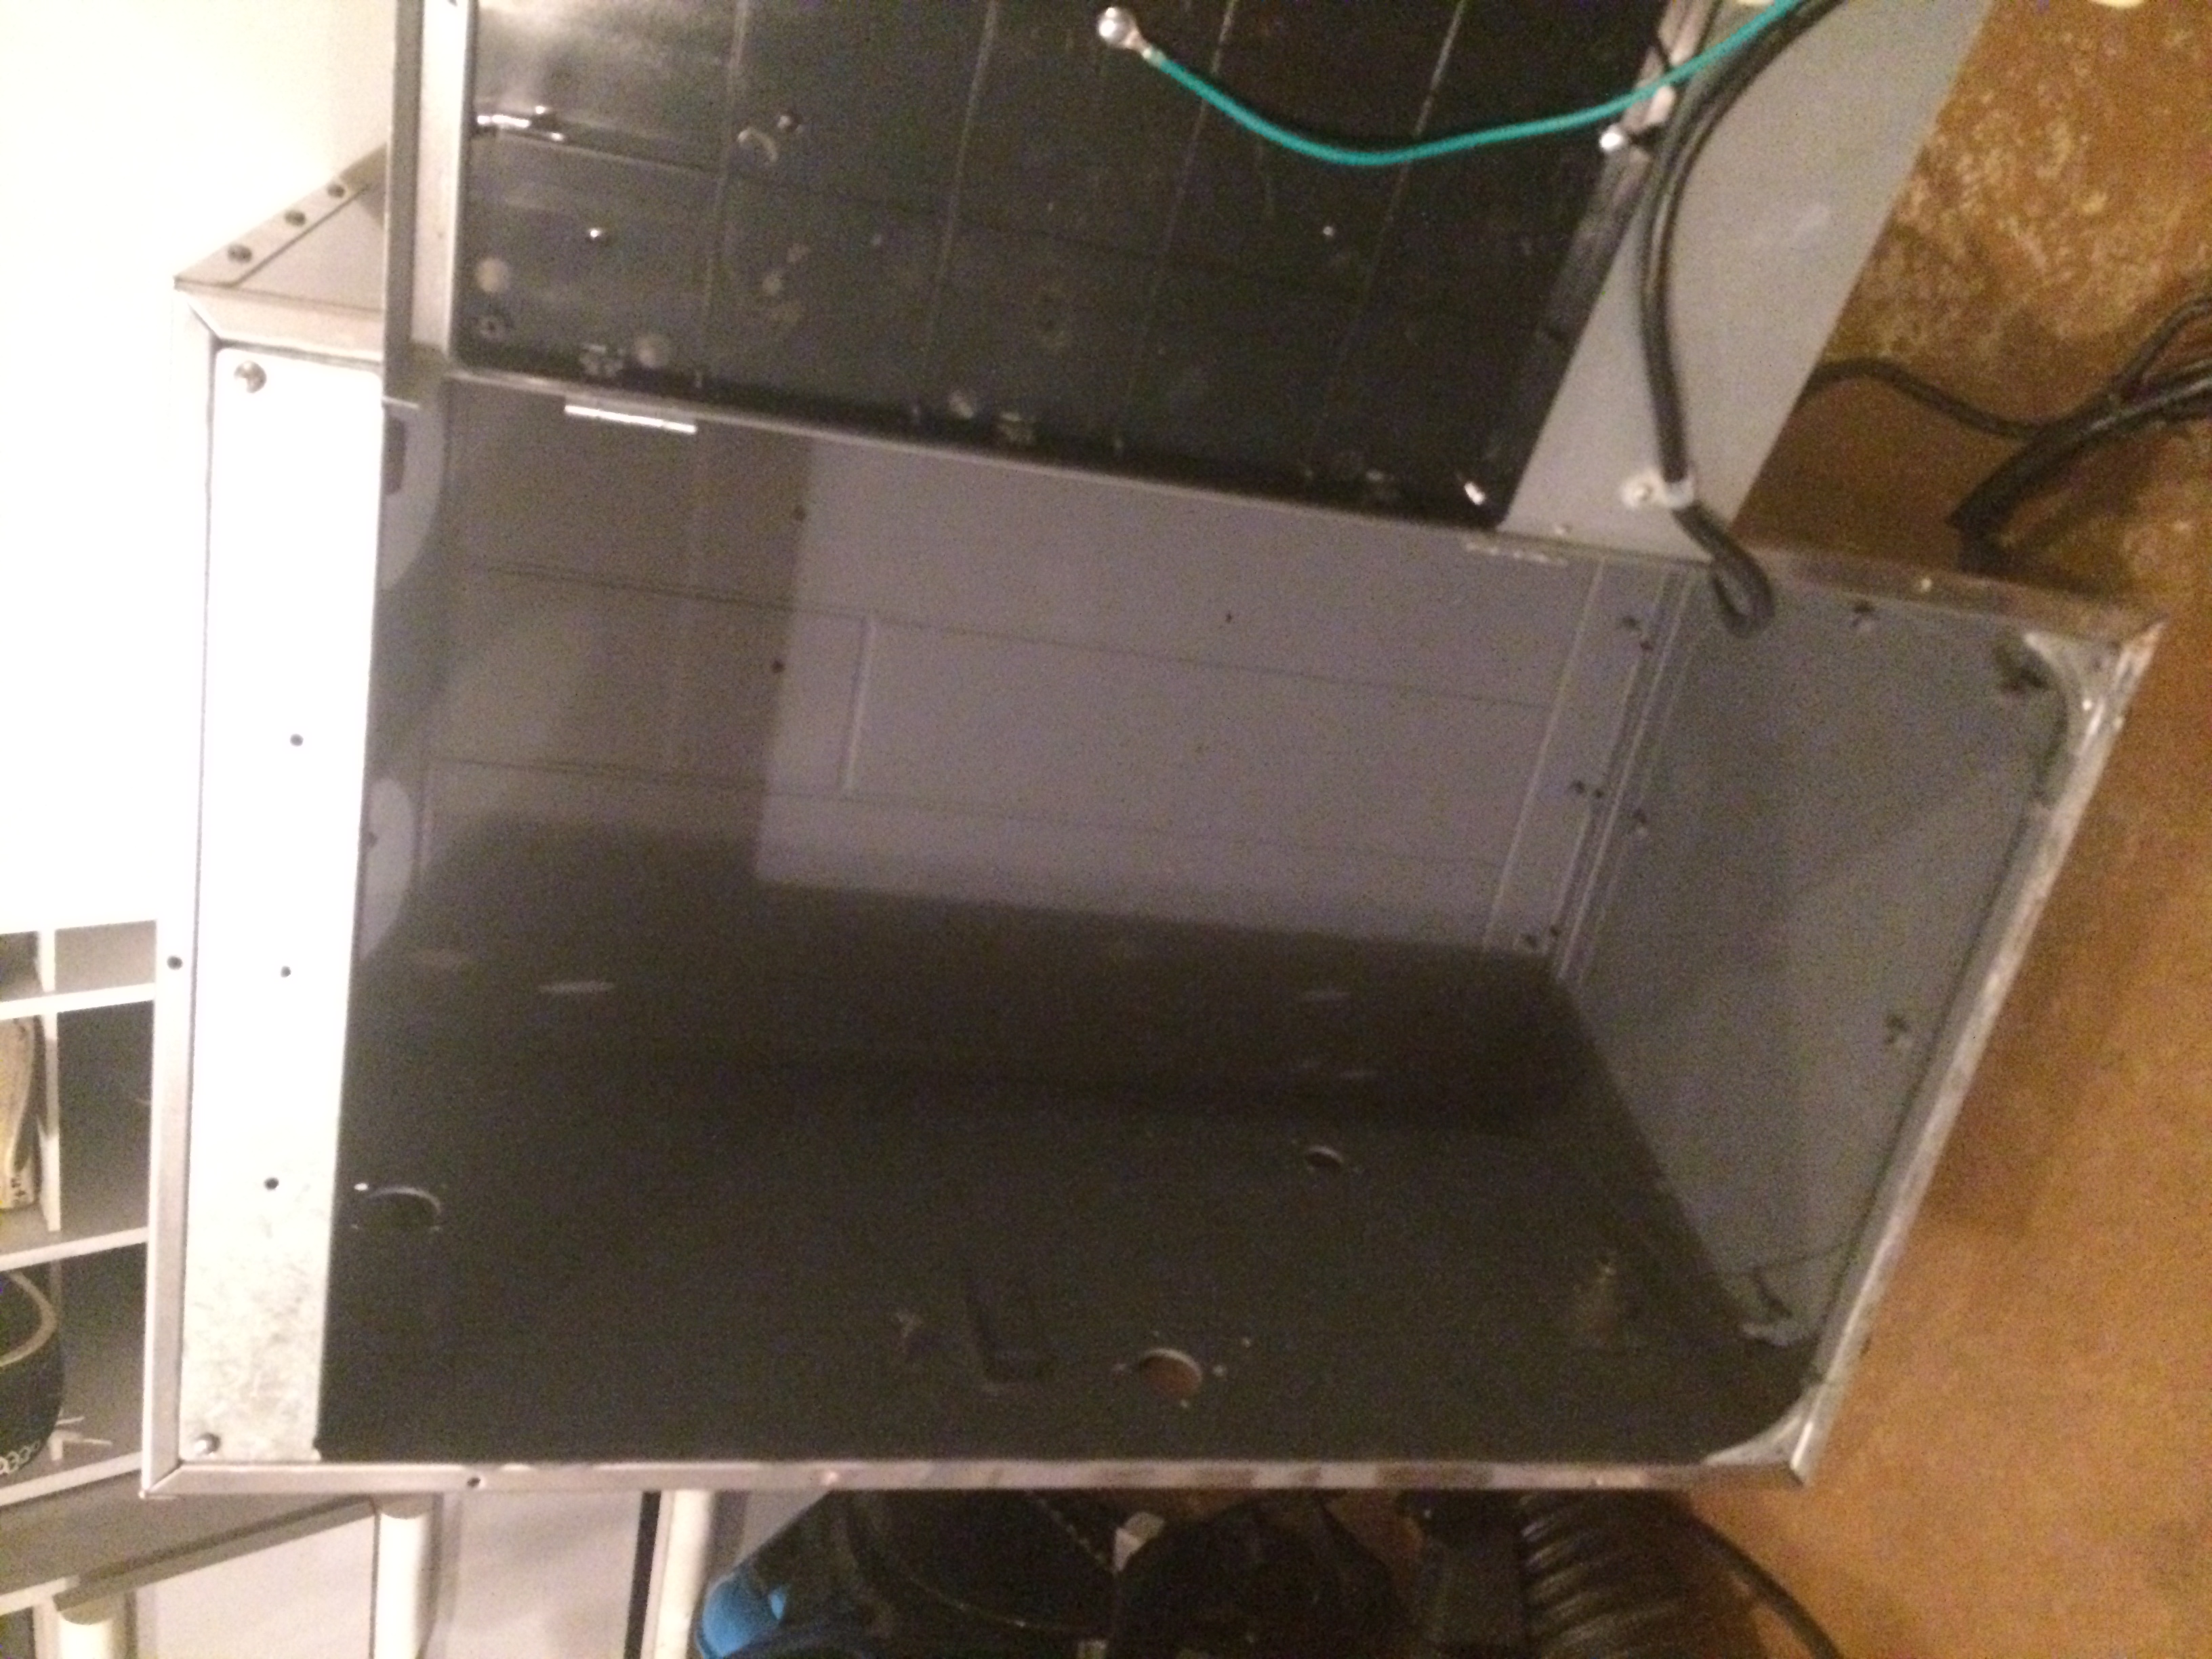
Front door was removed (using 6 screws). There was a control panel on the bottom which is why there is a hole there. I can repurpose this for something. Possibly an Infrared Receiver / Transmitter for the remote.
Front door was removed (using 6 screws). There was a control panel on the bottom which is why there is a hole there. I can repurpose this for something. Possibly an Infrared Receiver / Transmitter for the remote.
Time to address the corrosion now that the door is out of the way.
Time to address the corrosion now that the door is out of the way.
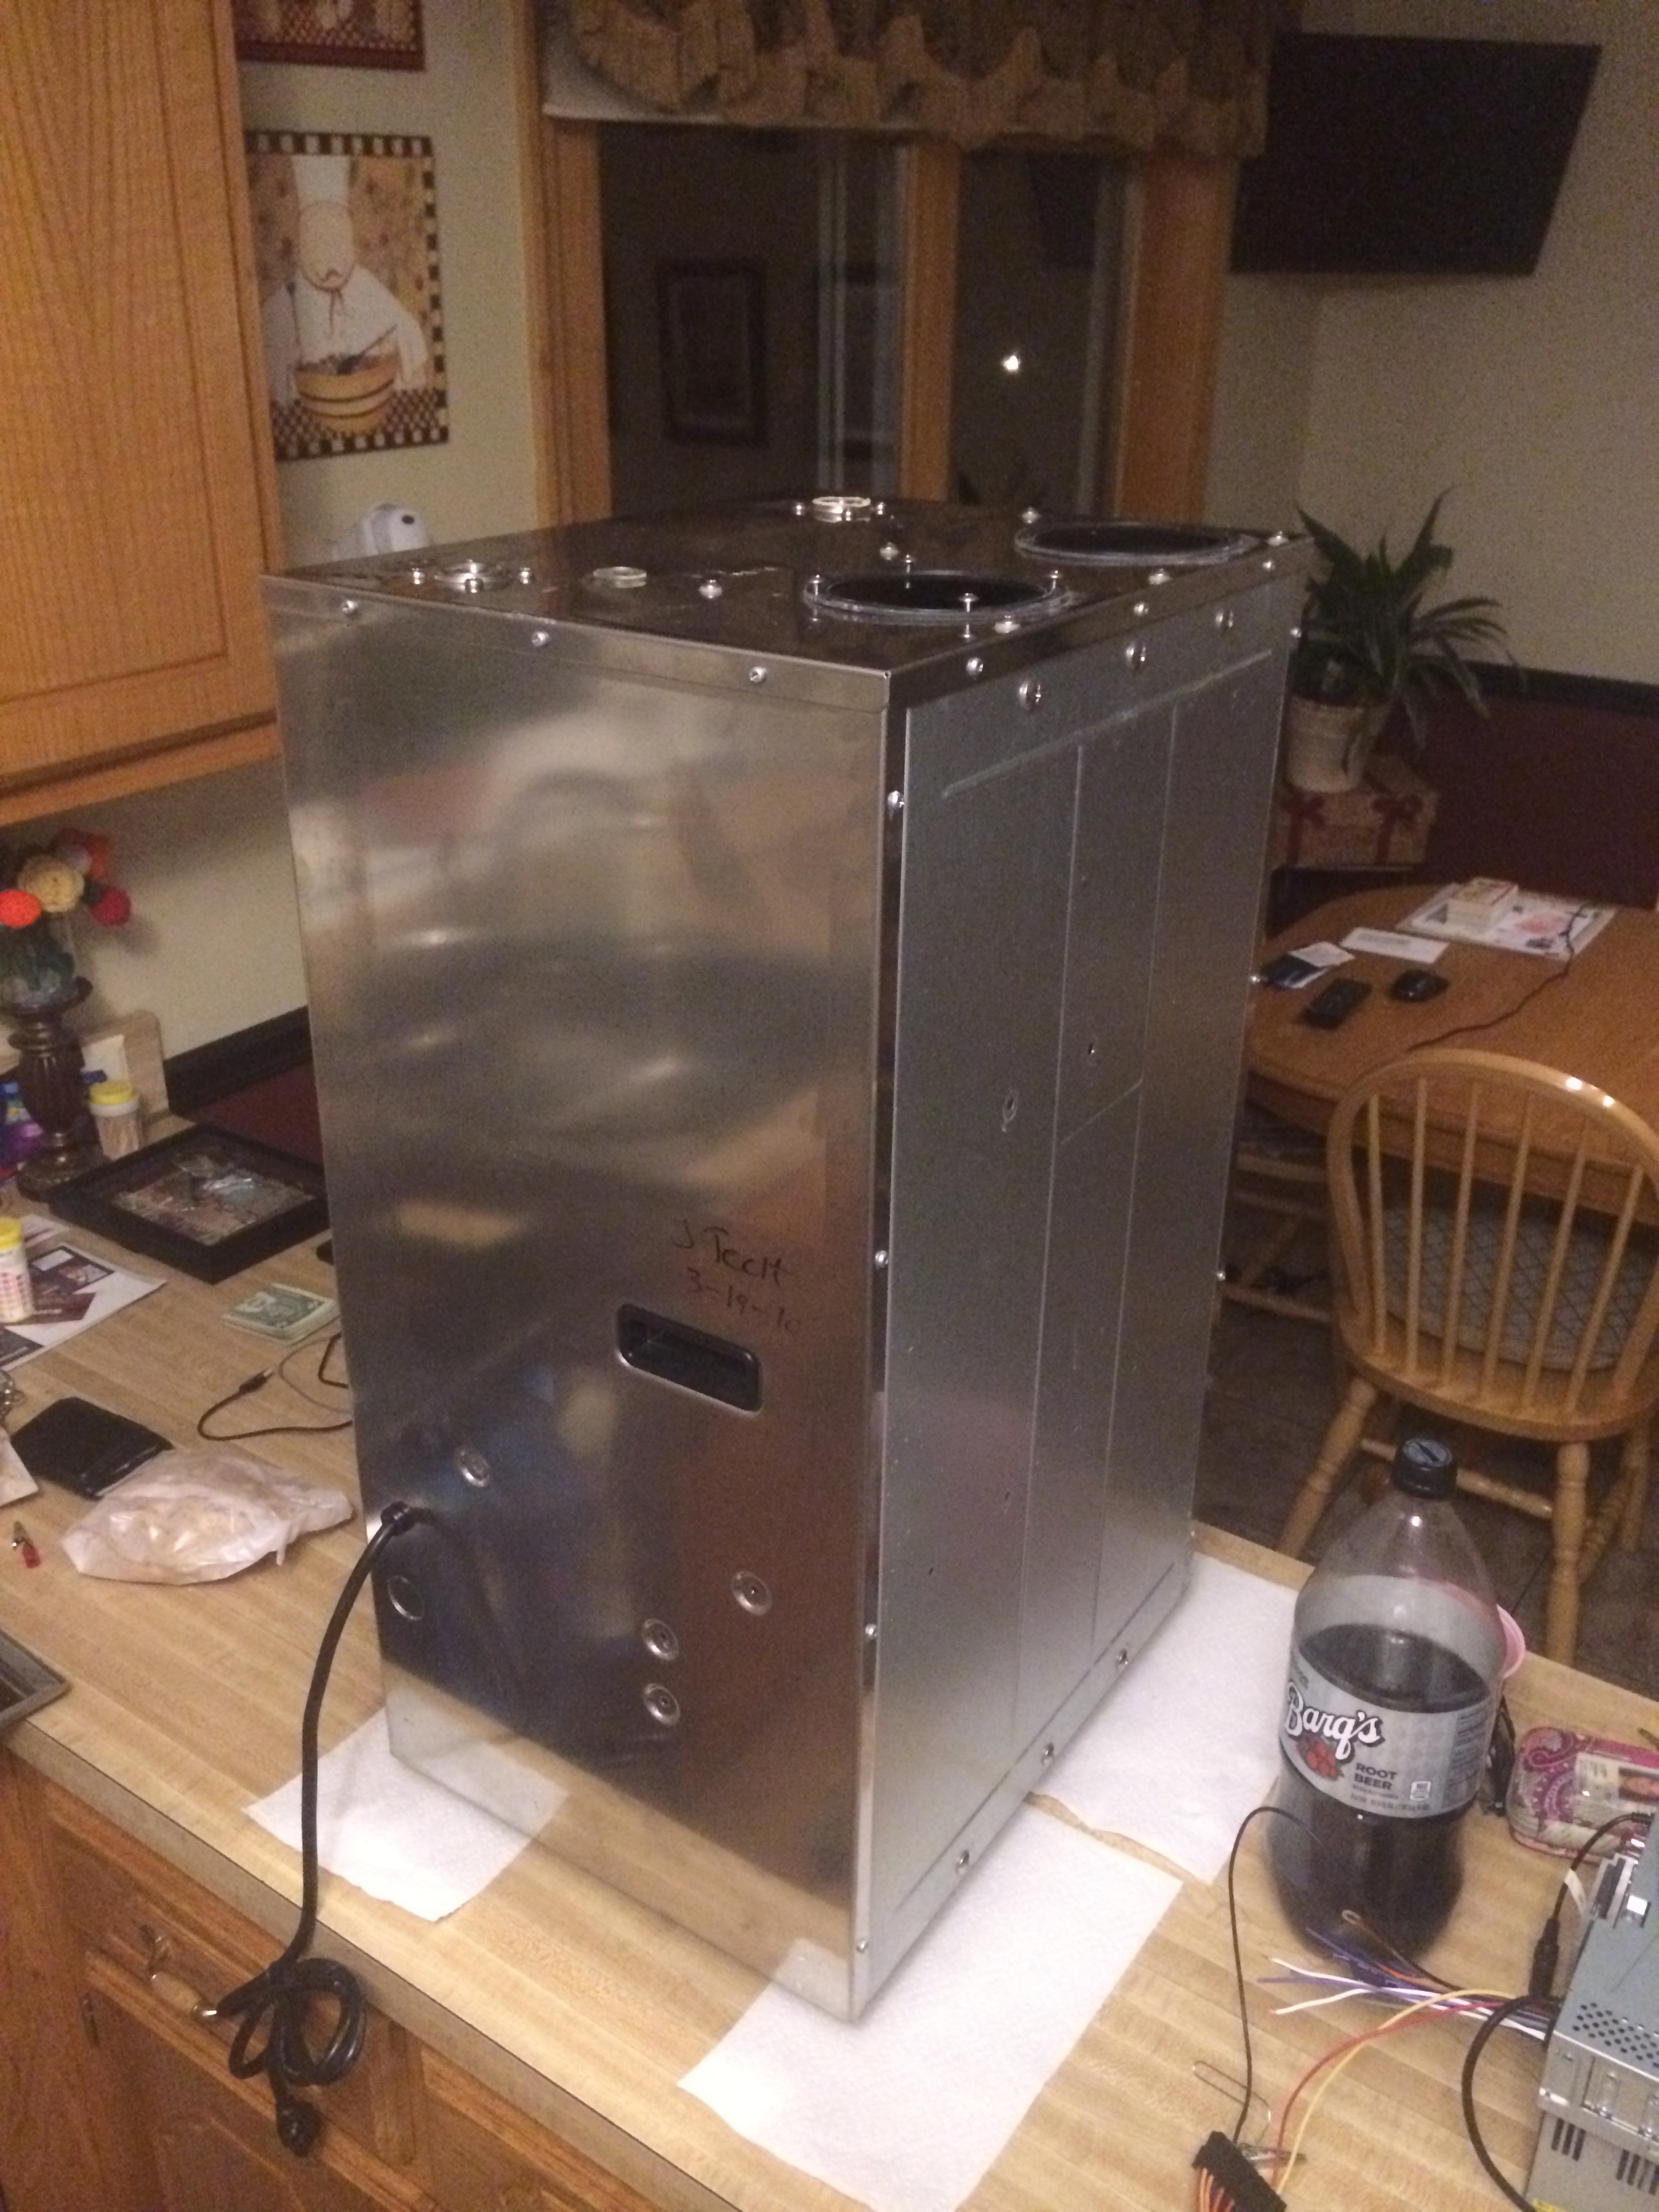
The top also had intake and exhaust PVC Connections which need to be patched. These were dimensioned for 3D printing brackets later. The other 2 are intake and output of water, which can be sealed with standard plumbing fittings.
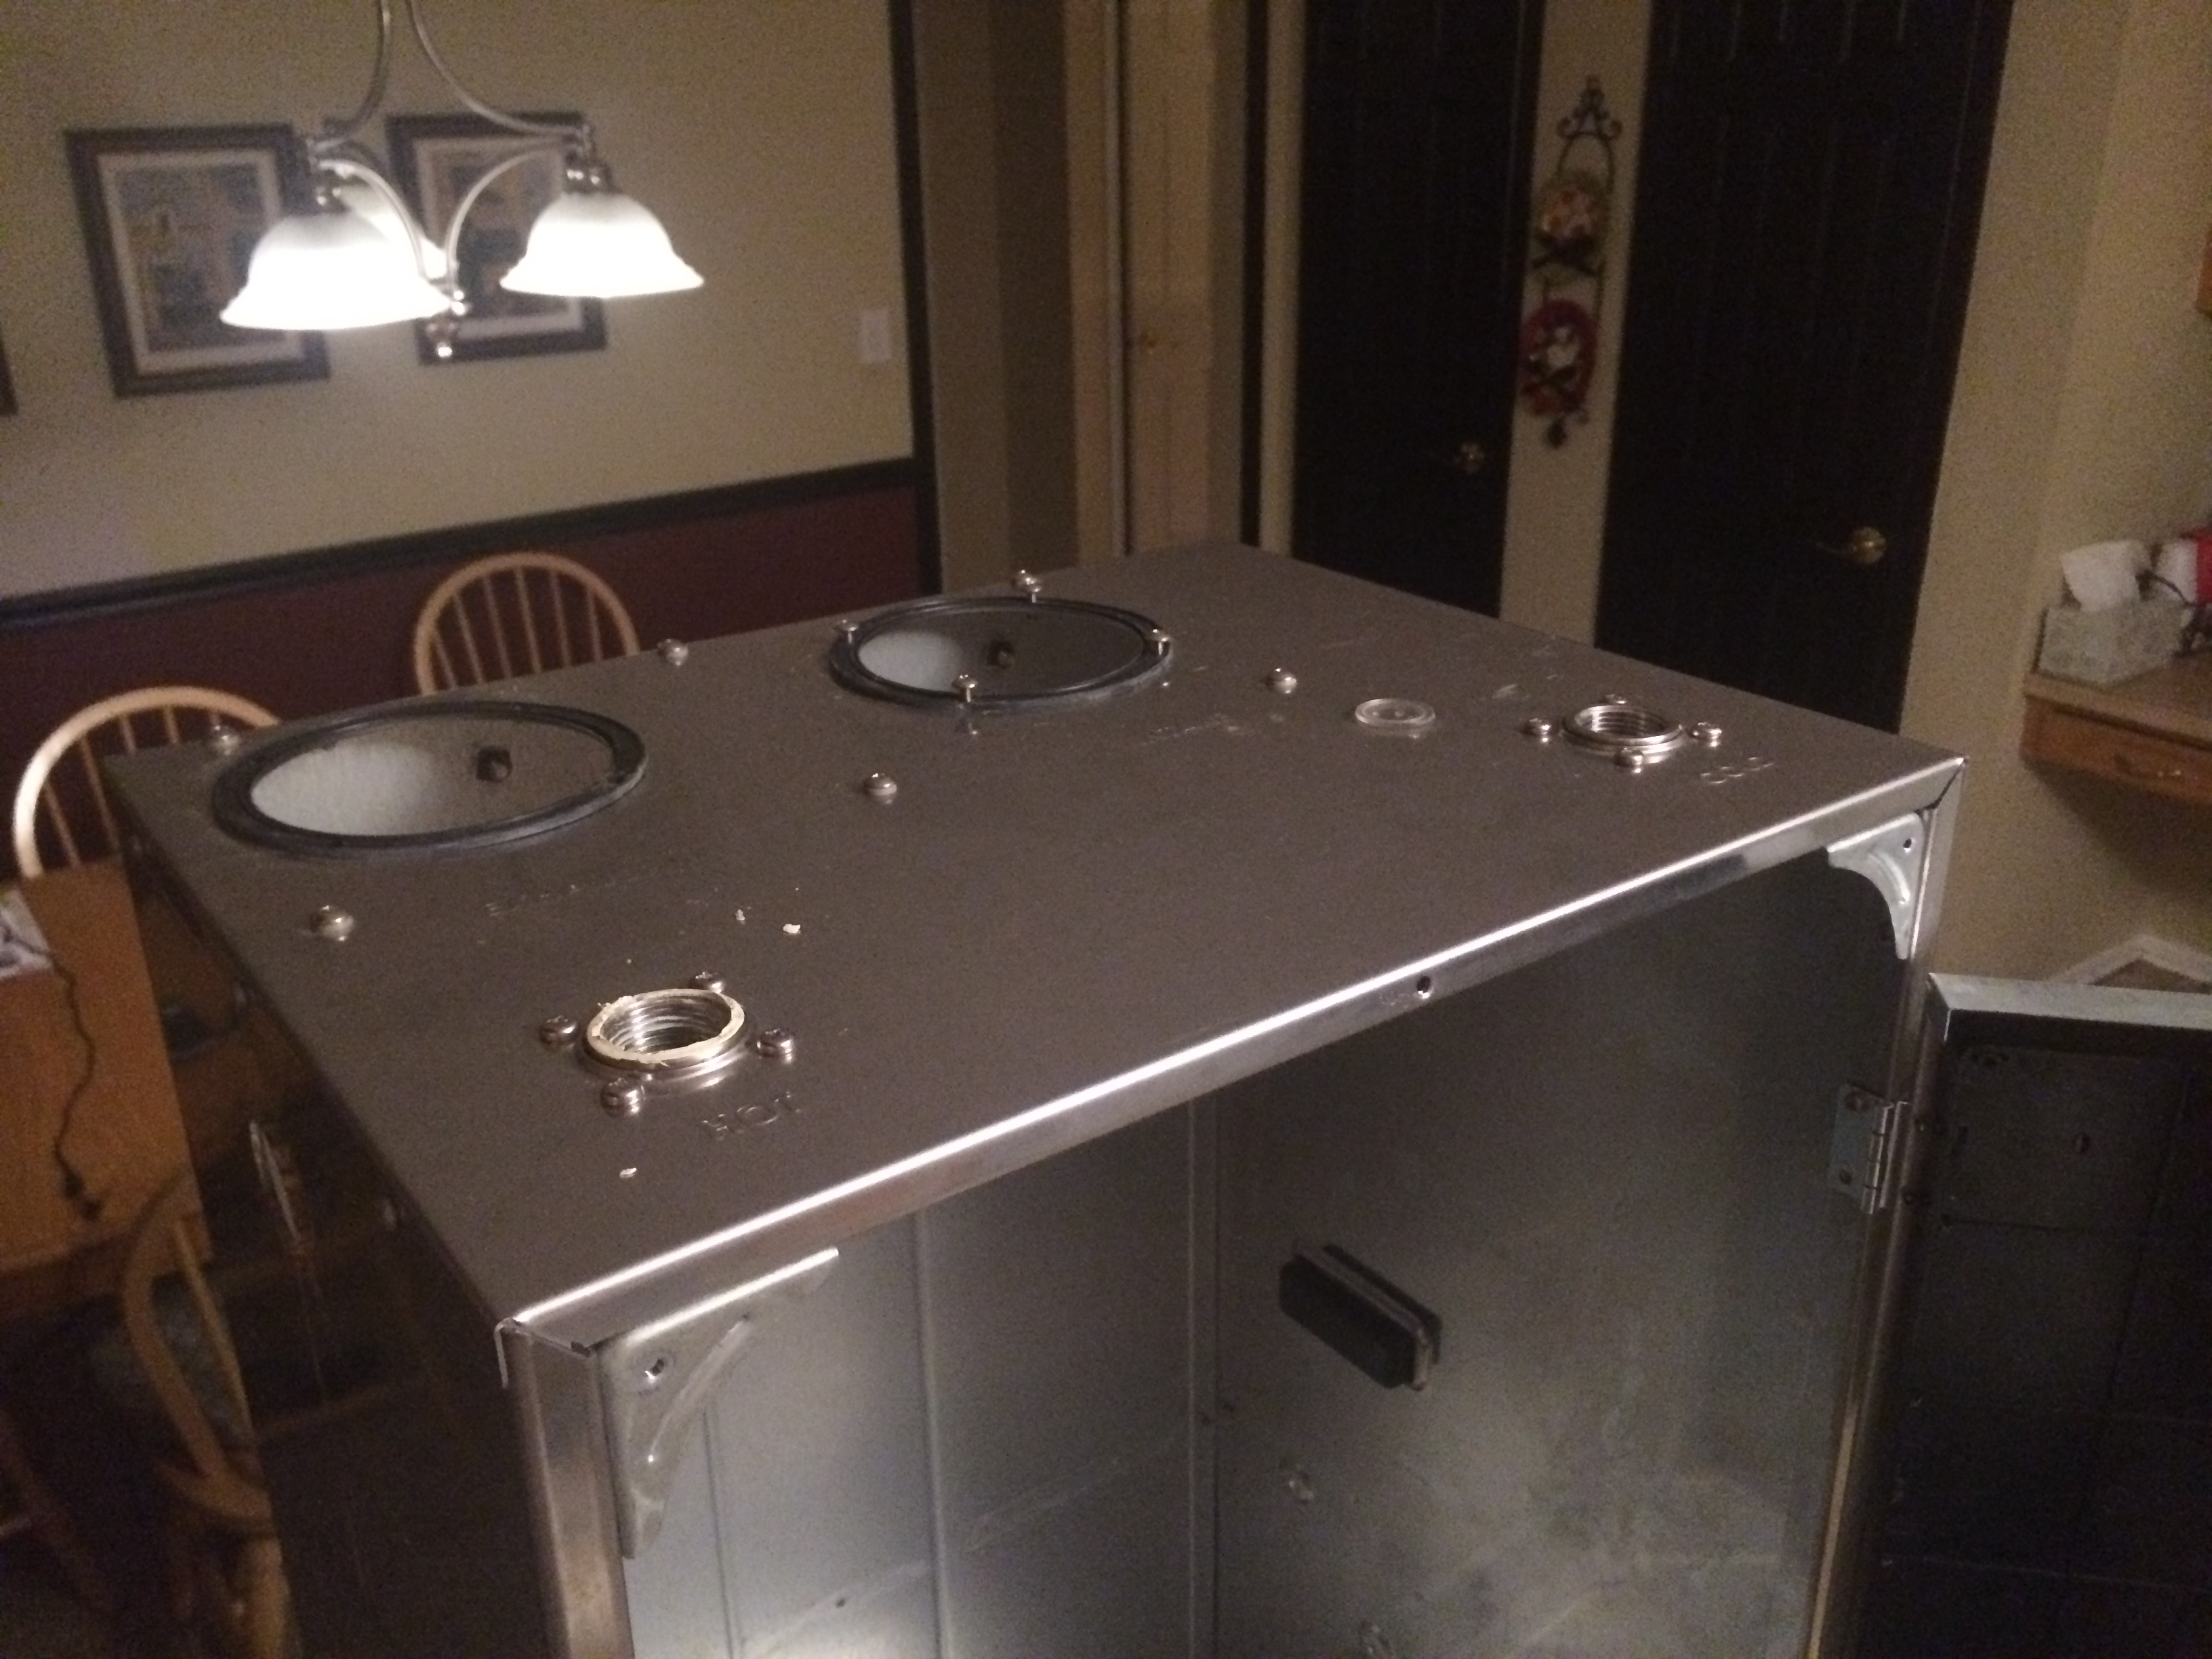
The top also had intake and exhaust PVC Connections which need to be patched. These were dimensioned for 3D printing brackets later. The other 2 are intake and output of water, which can be sealed with standard plumbing fittings.
The unit interior was sprayed with a few coats of Plasti-dip, which is removable, if ever need be. Plasti-dip is a sprayable plastic which waterproofs the seams and ensures insulation from any potential conductive surfaces.
The unit interior was sprayed with a few coats of Plasti-dip, which is removable, if ever need be. Plasti-dip is a sprayable plastic which waterproofs the seams and ensures insulation from any potential conductive surfaces.
A Fast-Action GFI (Circuit Breaker) was installed on the right side using existing holes. A 6-port Surge Protector was also installed on the bottom. There are rubber feet, so the unit will not experience pooling of water underneath. GFI would trip if ever exposed to water just in case.
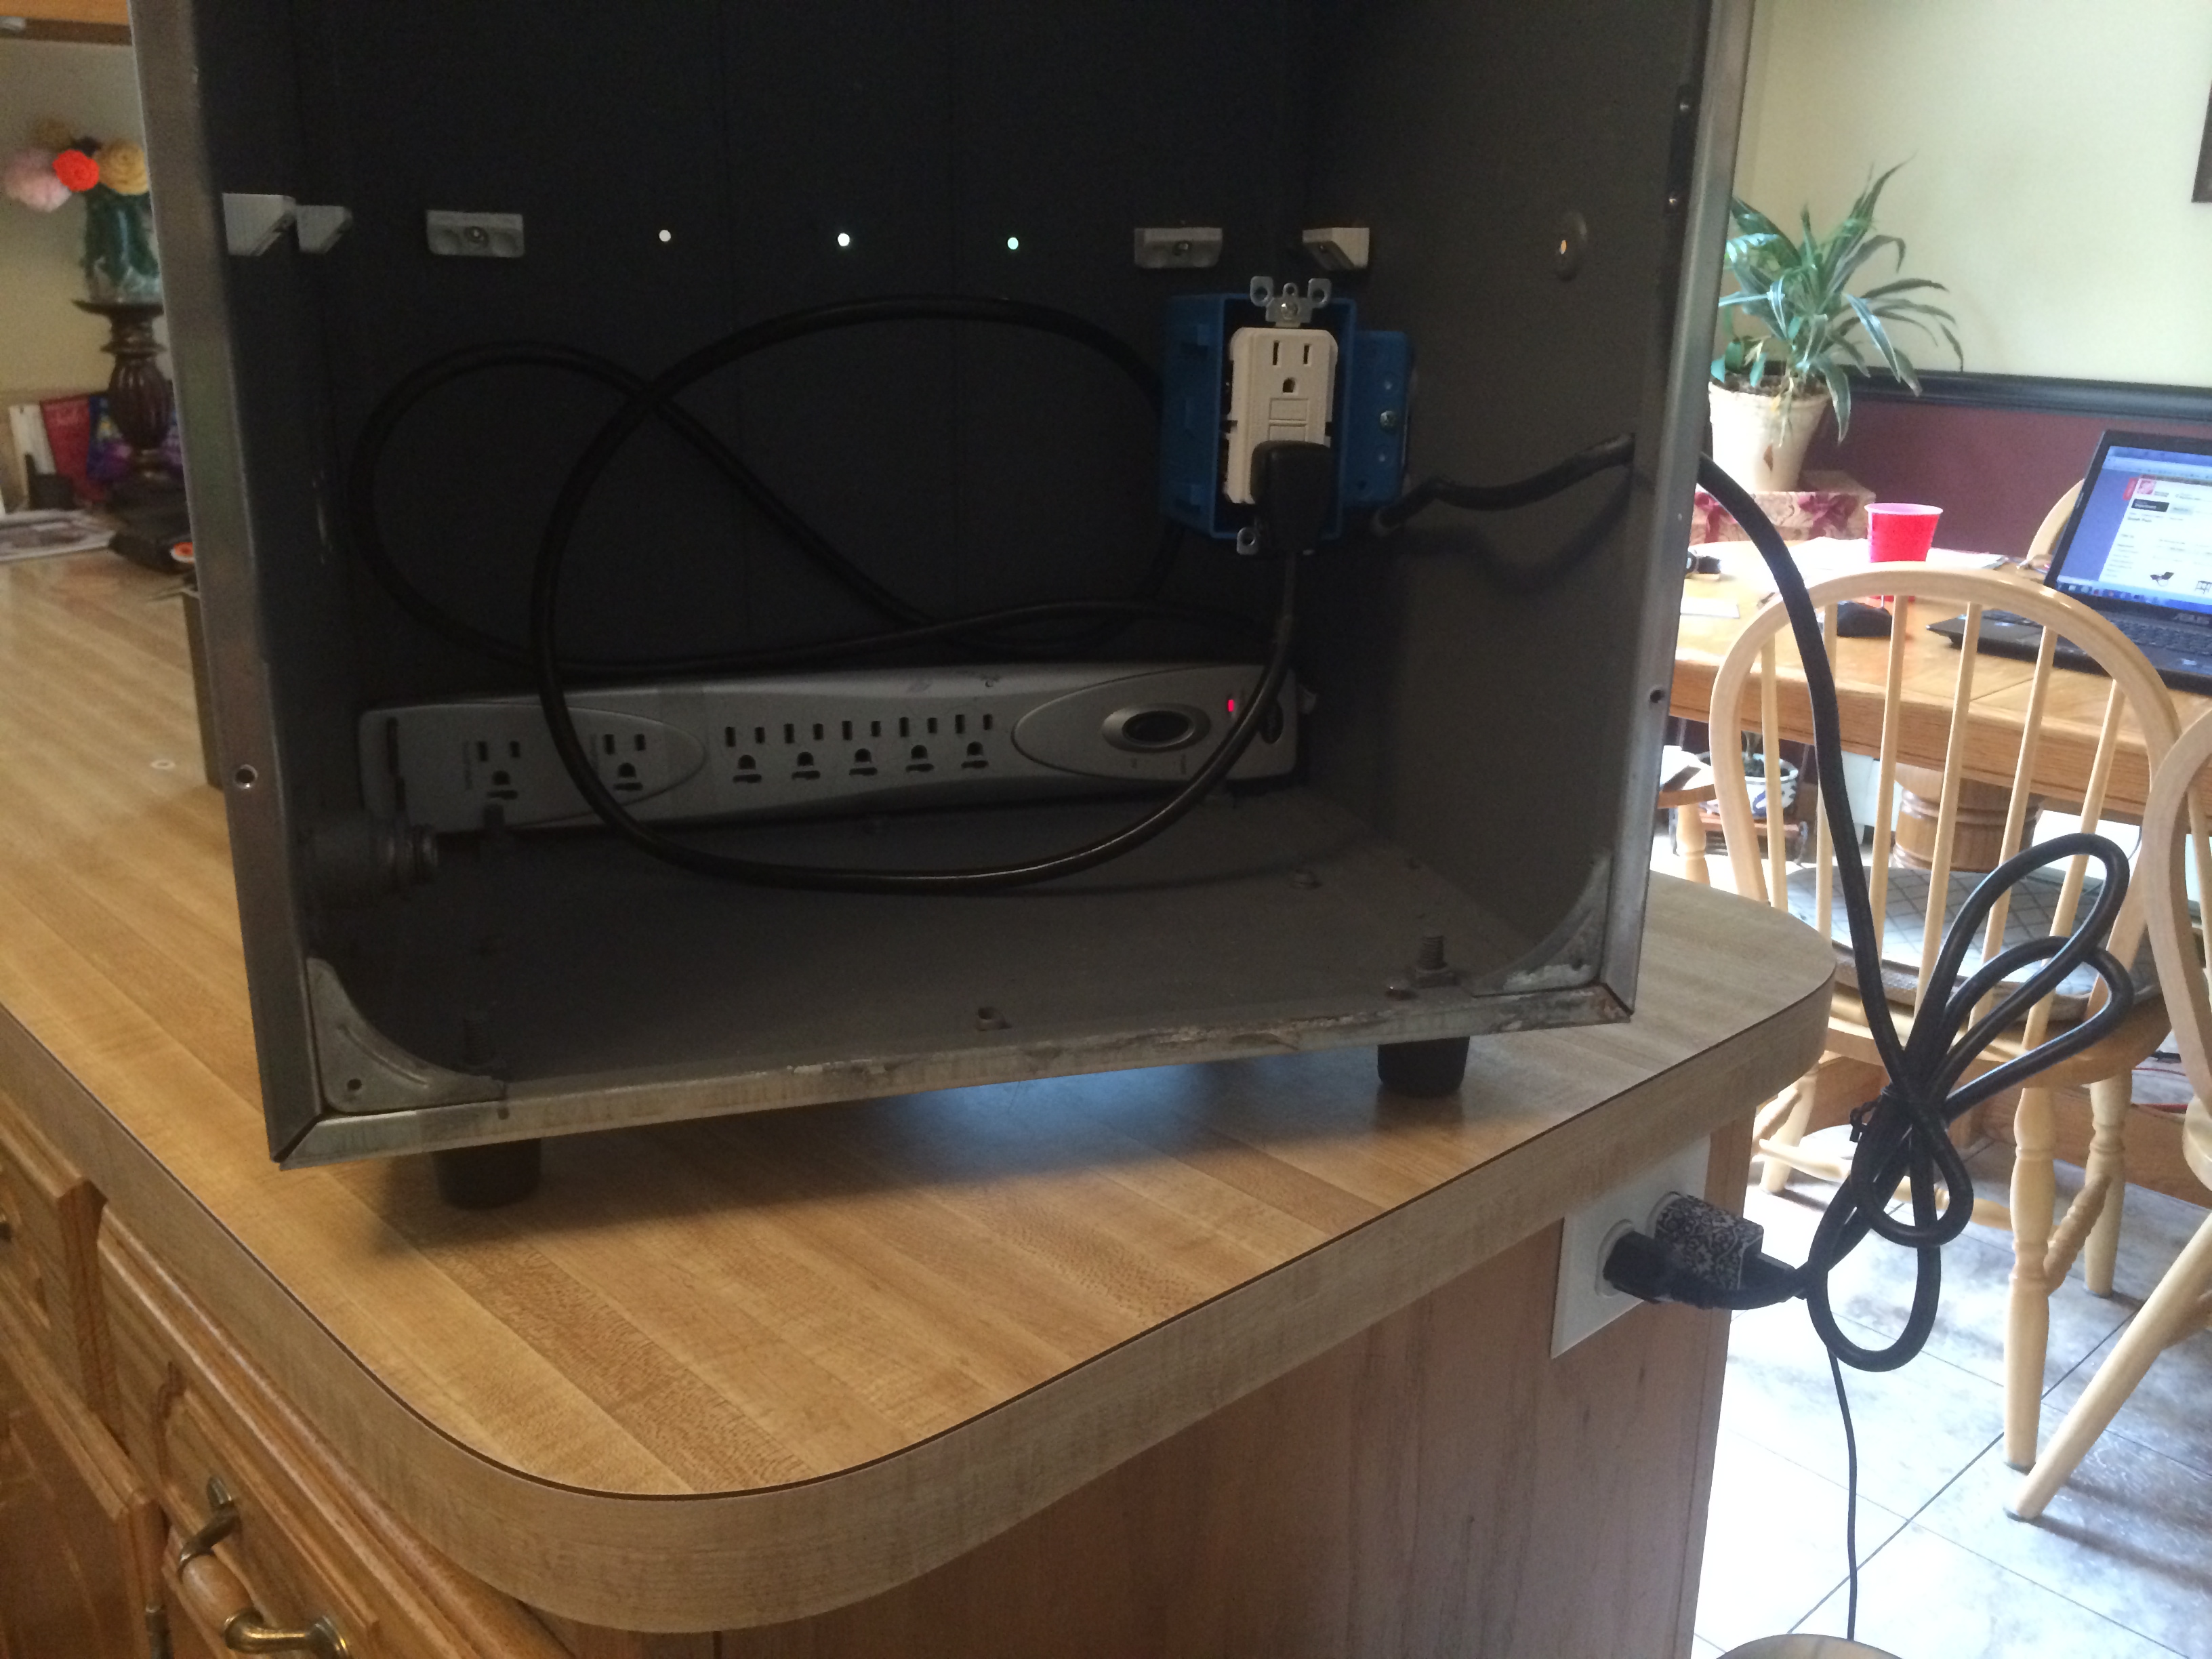
A Fast-Action GFI (Circuit Breaker) was installed on the right side using existing holes. A 6-port Surge Protector was also installed on the bottom. There are rubber feet, so the unit will not experience pooling of water underneath. GFI would trip if ever exposed to water just in case.
Lights are on, on the Surge Protector - Power Success! 1st MDF Shelf is now in place on top of 3D Printed Right Angle Brackets (Also seen in Mendel90).

Lights are on, on the Surge Protector - Power Success! 1st MDF Shelf is now in place on top of 3D Printed Right Angle Brackets (Also seen in Mendel90).
A Second shelf was created by inserting 6" Blocks (The Height of the Desktop PSU).

A Second shelf was created by inserting 6" Blocks (The Height of the Desktop PSU).
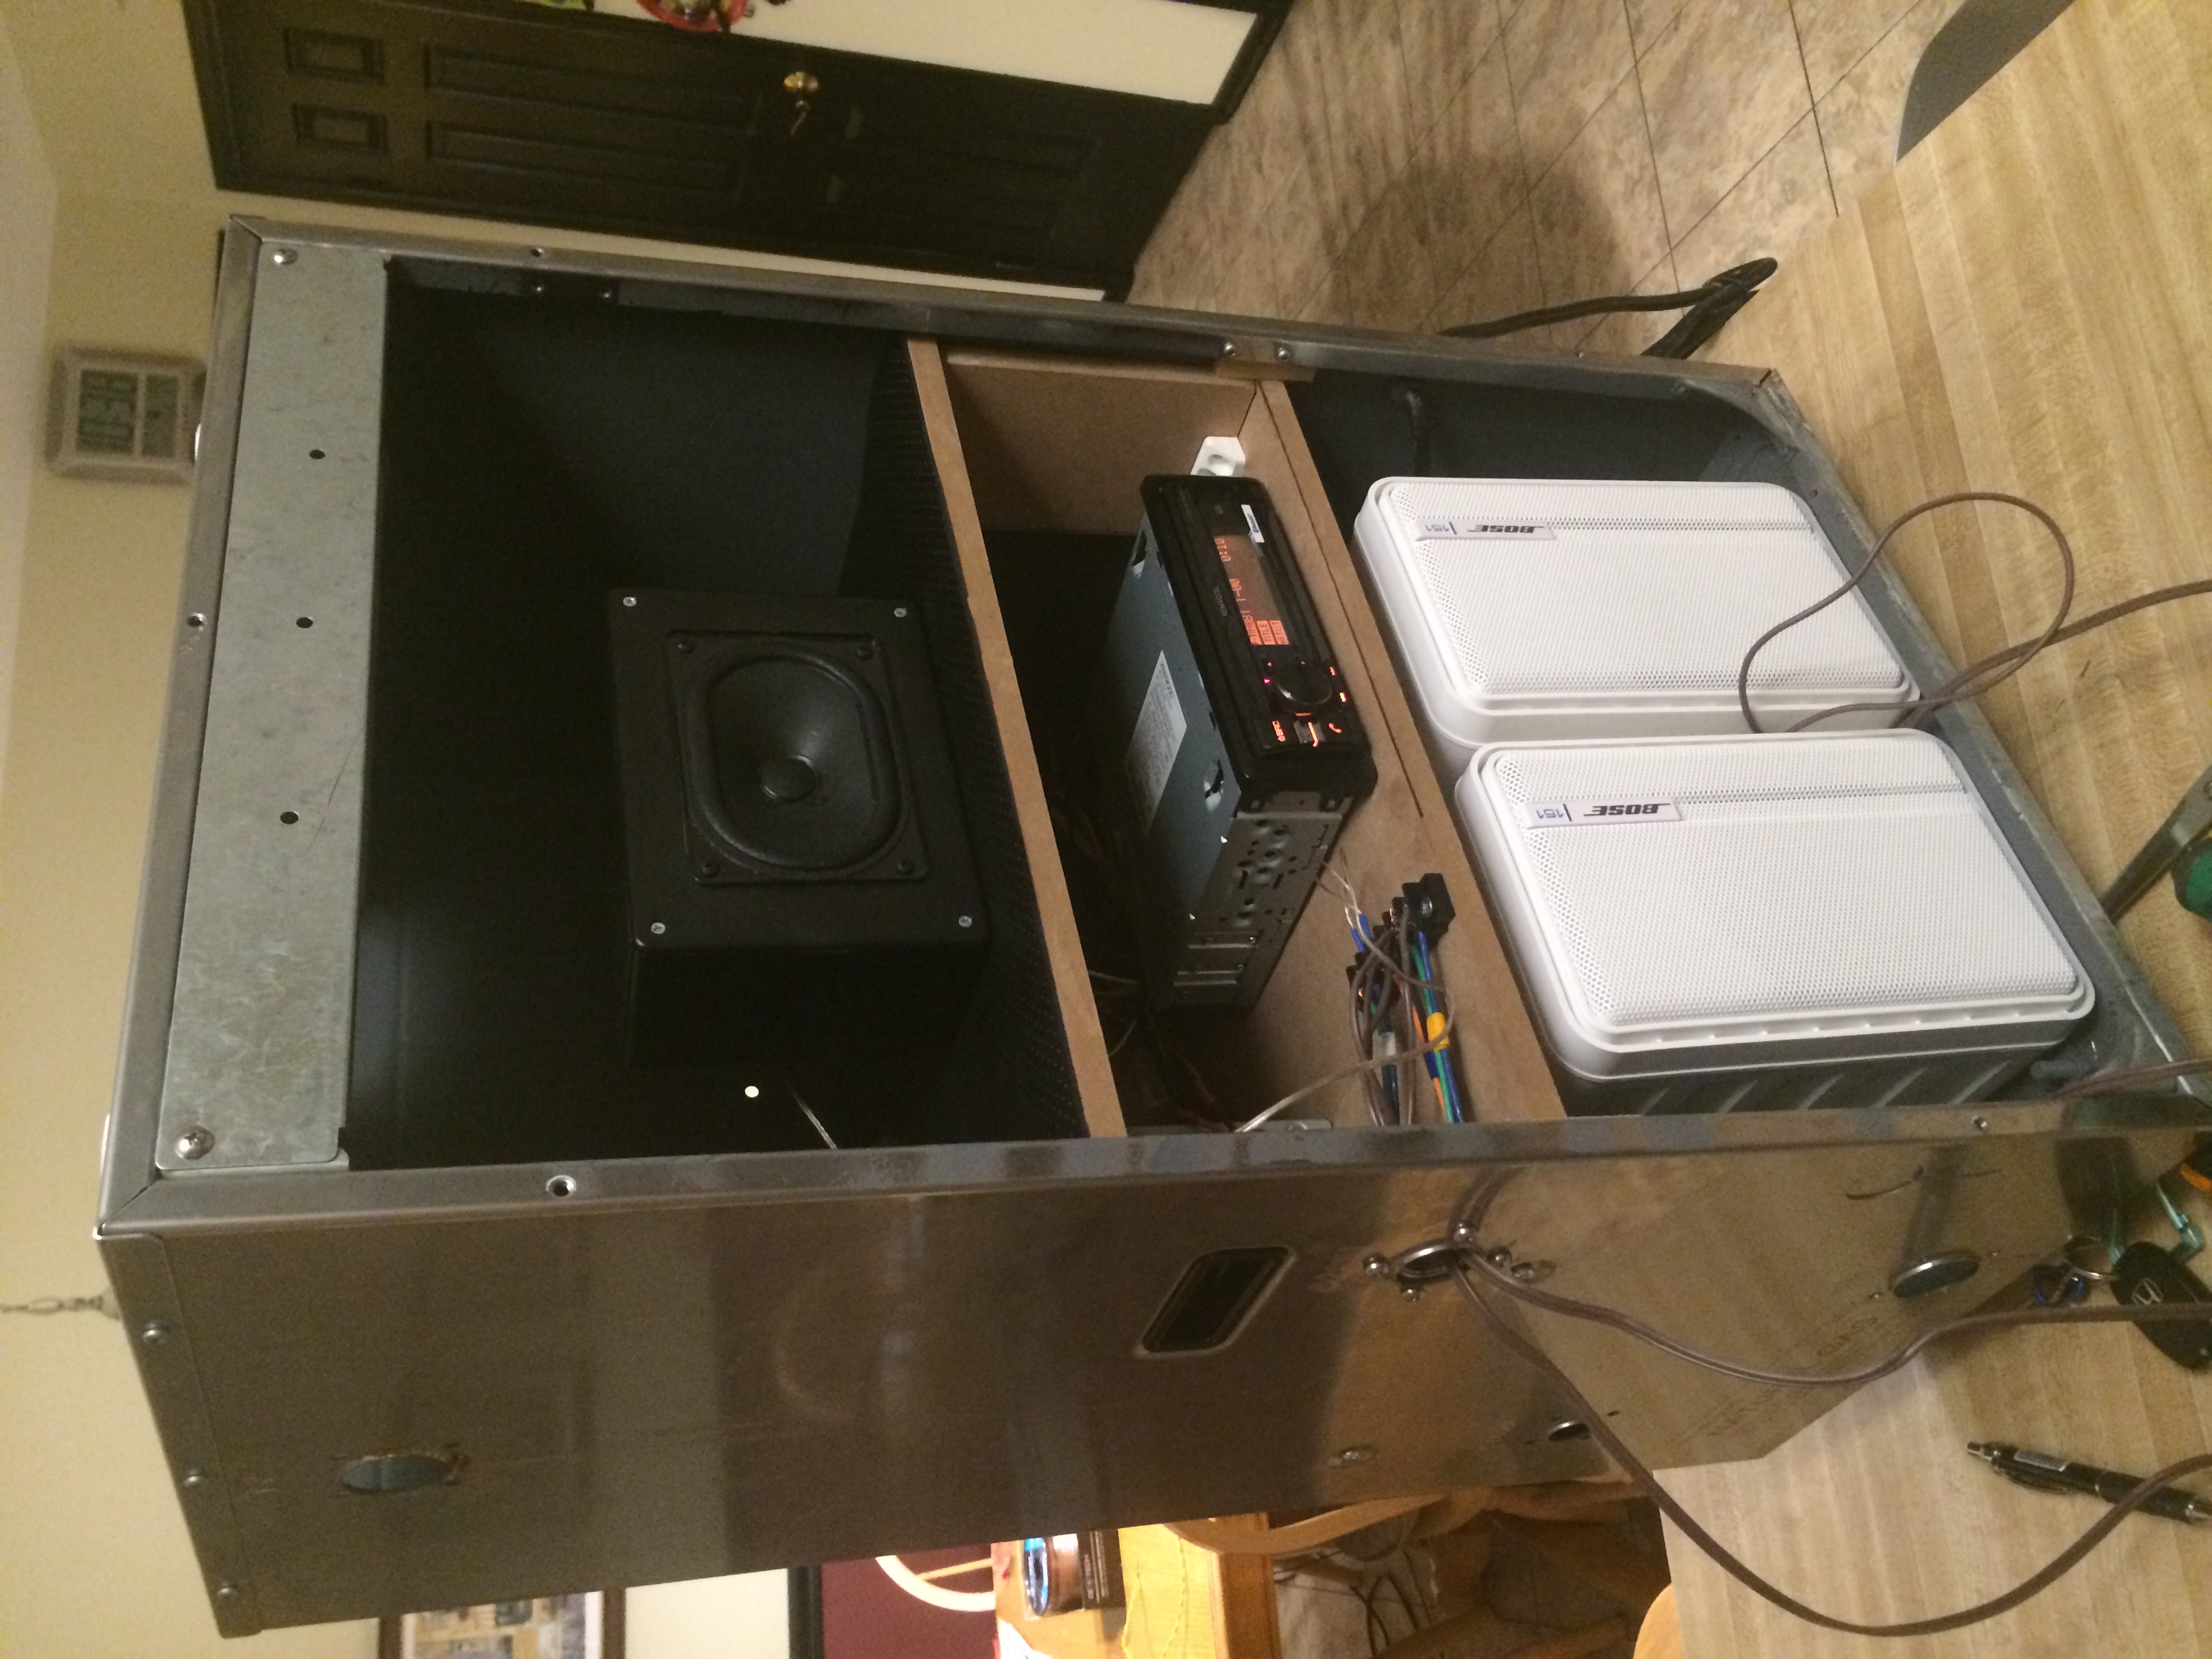
Now with a Bottom Compartment and Two MDF Shelves, the unit is starting to come together!

Now with a Bottom Compartment and Two MDF Shelves, the unit is starting to come together!
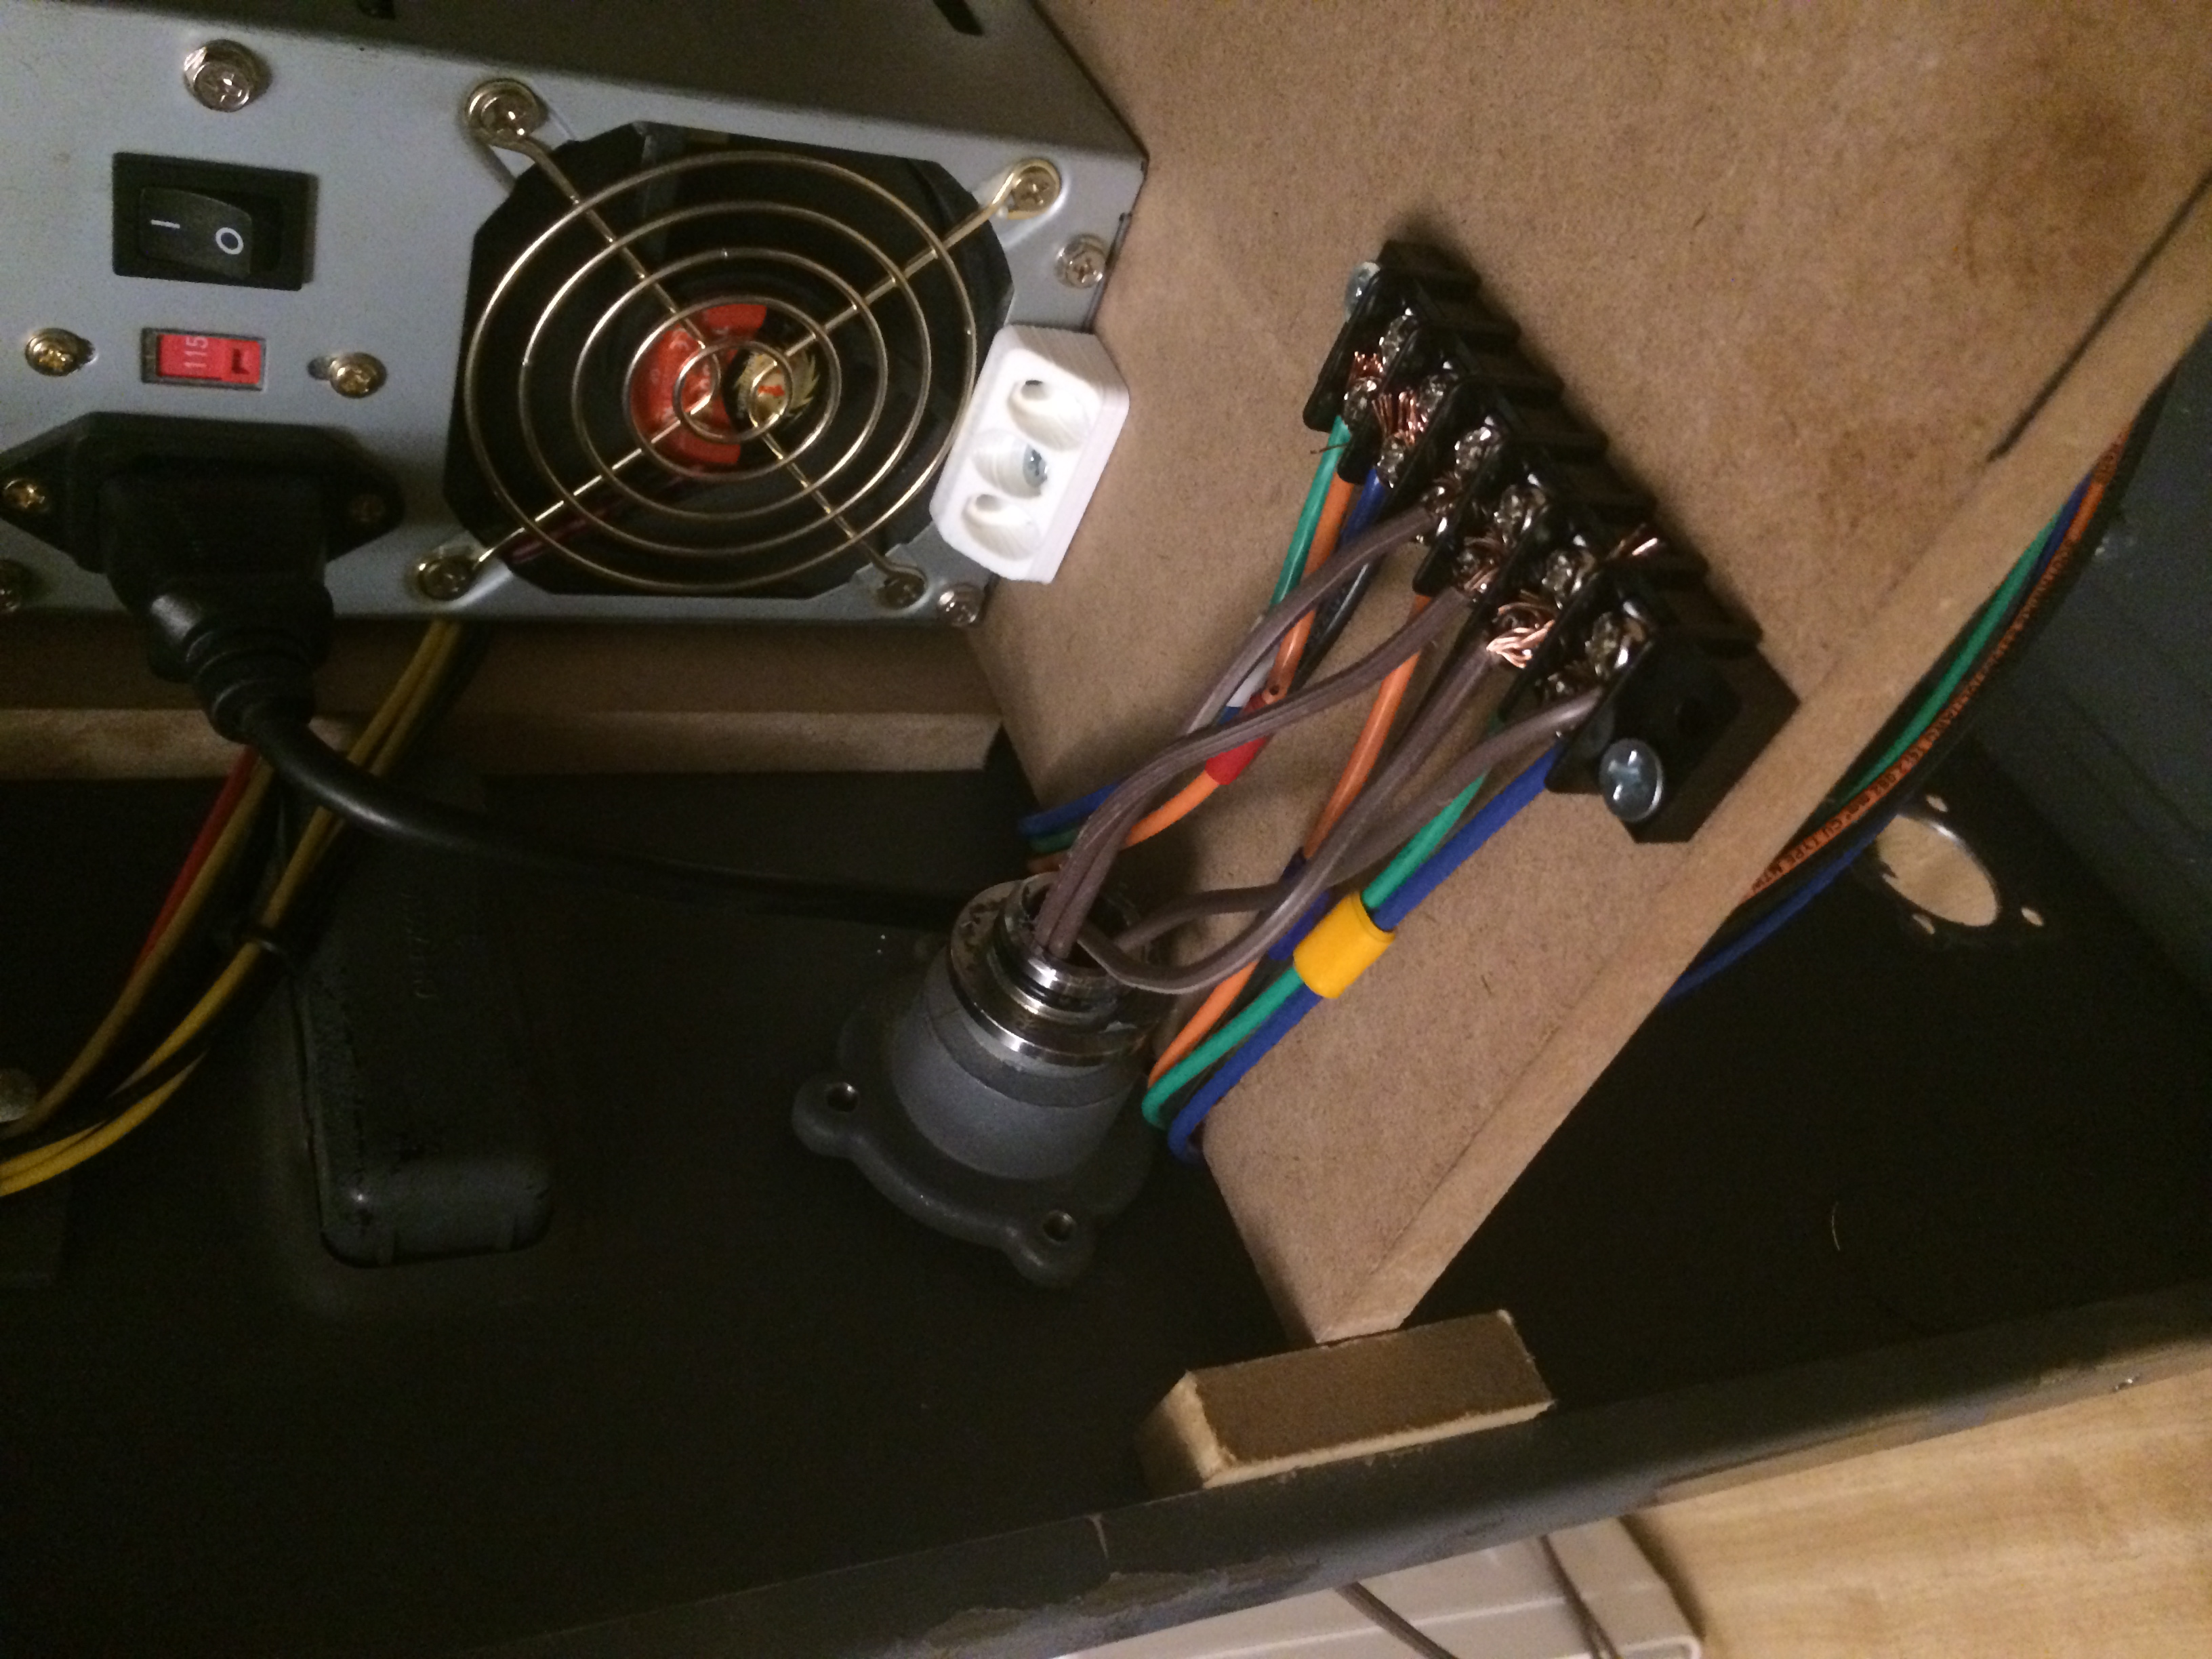
This Unit may be brought in during the winter months, so to make connections easy to remove, yet modular, I'm using a Screw-post Terminal Block. Speakers can be added and disconnected easily.
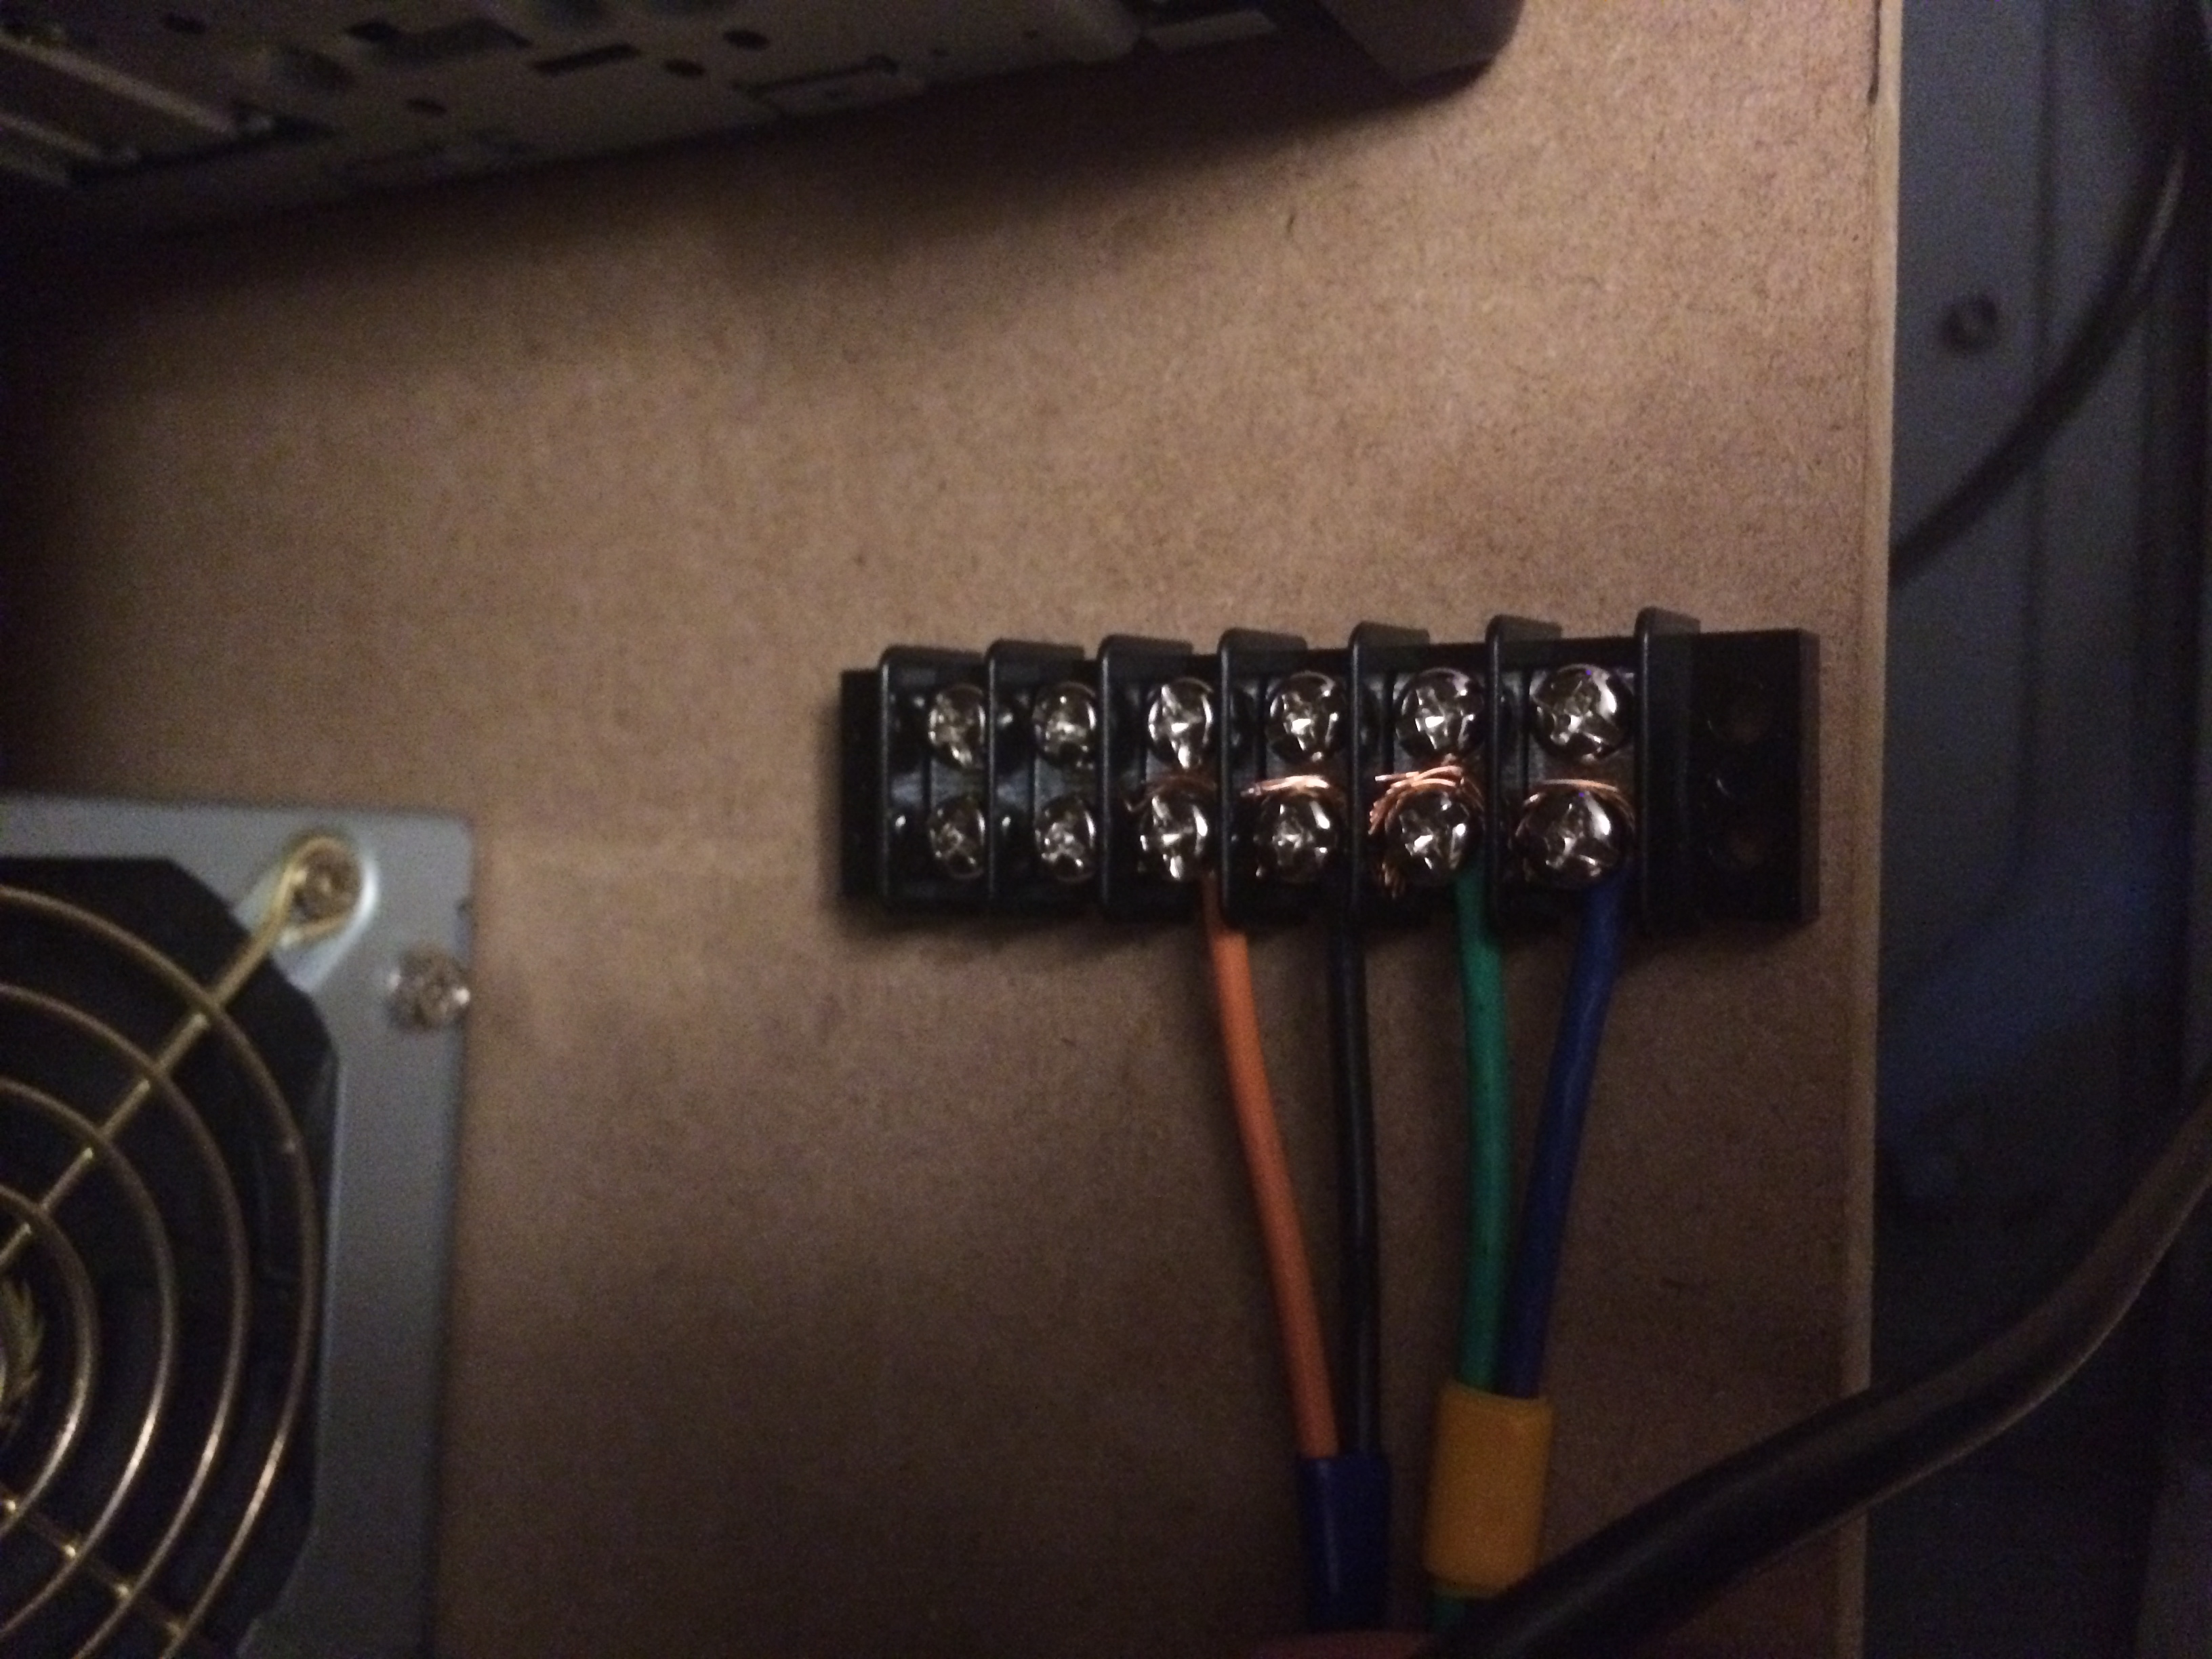
This Unit may be brought in during the winter months, so to make connections easy to remove, yet modular, I'm using a Screw-post Terminal Block. Speakers can be added and disconnected easily.
Stereo successfully powered up within the Unit with the Existing Power Cord!

Stereo successfully powered up within the Unit with the Existing Power Cord!
Waterproof Outdoor Speakers are wired into the Screw Terminal Block for Testing!

Waterproof Outdoor Speakers are wired into the Screw Terminal Block for Testing!
Using the existing wiring clips, I was able to clean up the wiring of the Desktop PSU - which looks very professional now. 12V and 5V Molex connectors are there if I want to add interior lighting or anything in the future as well.
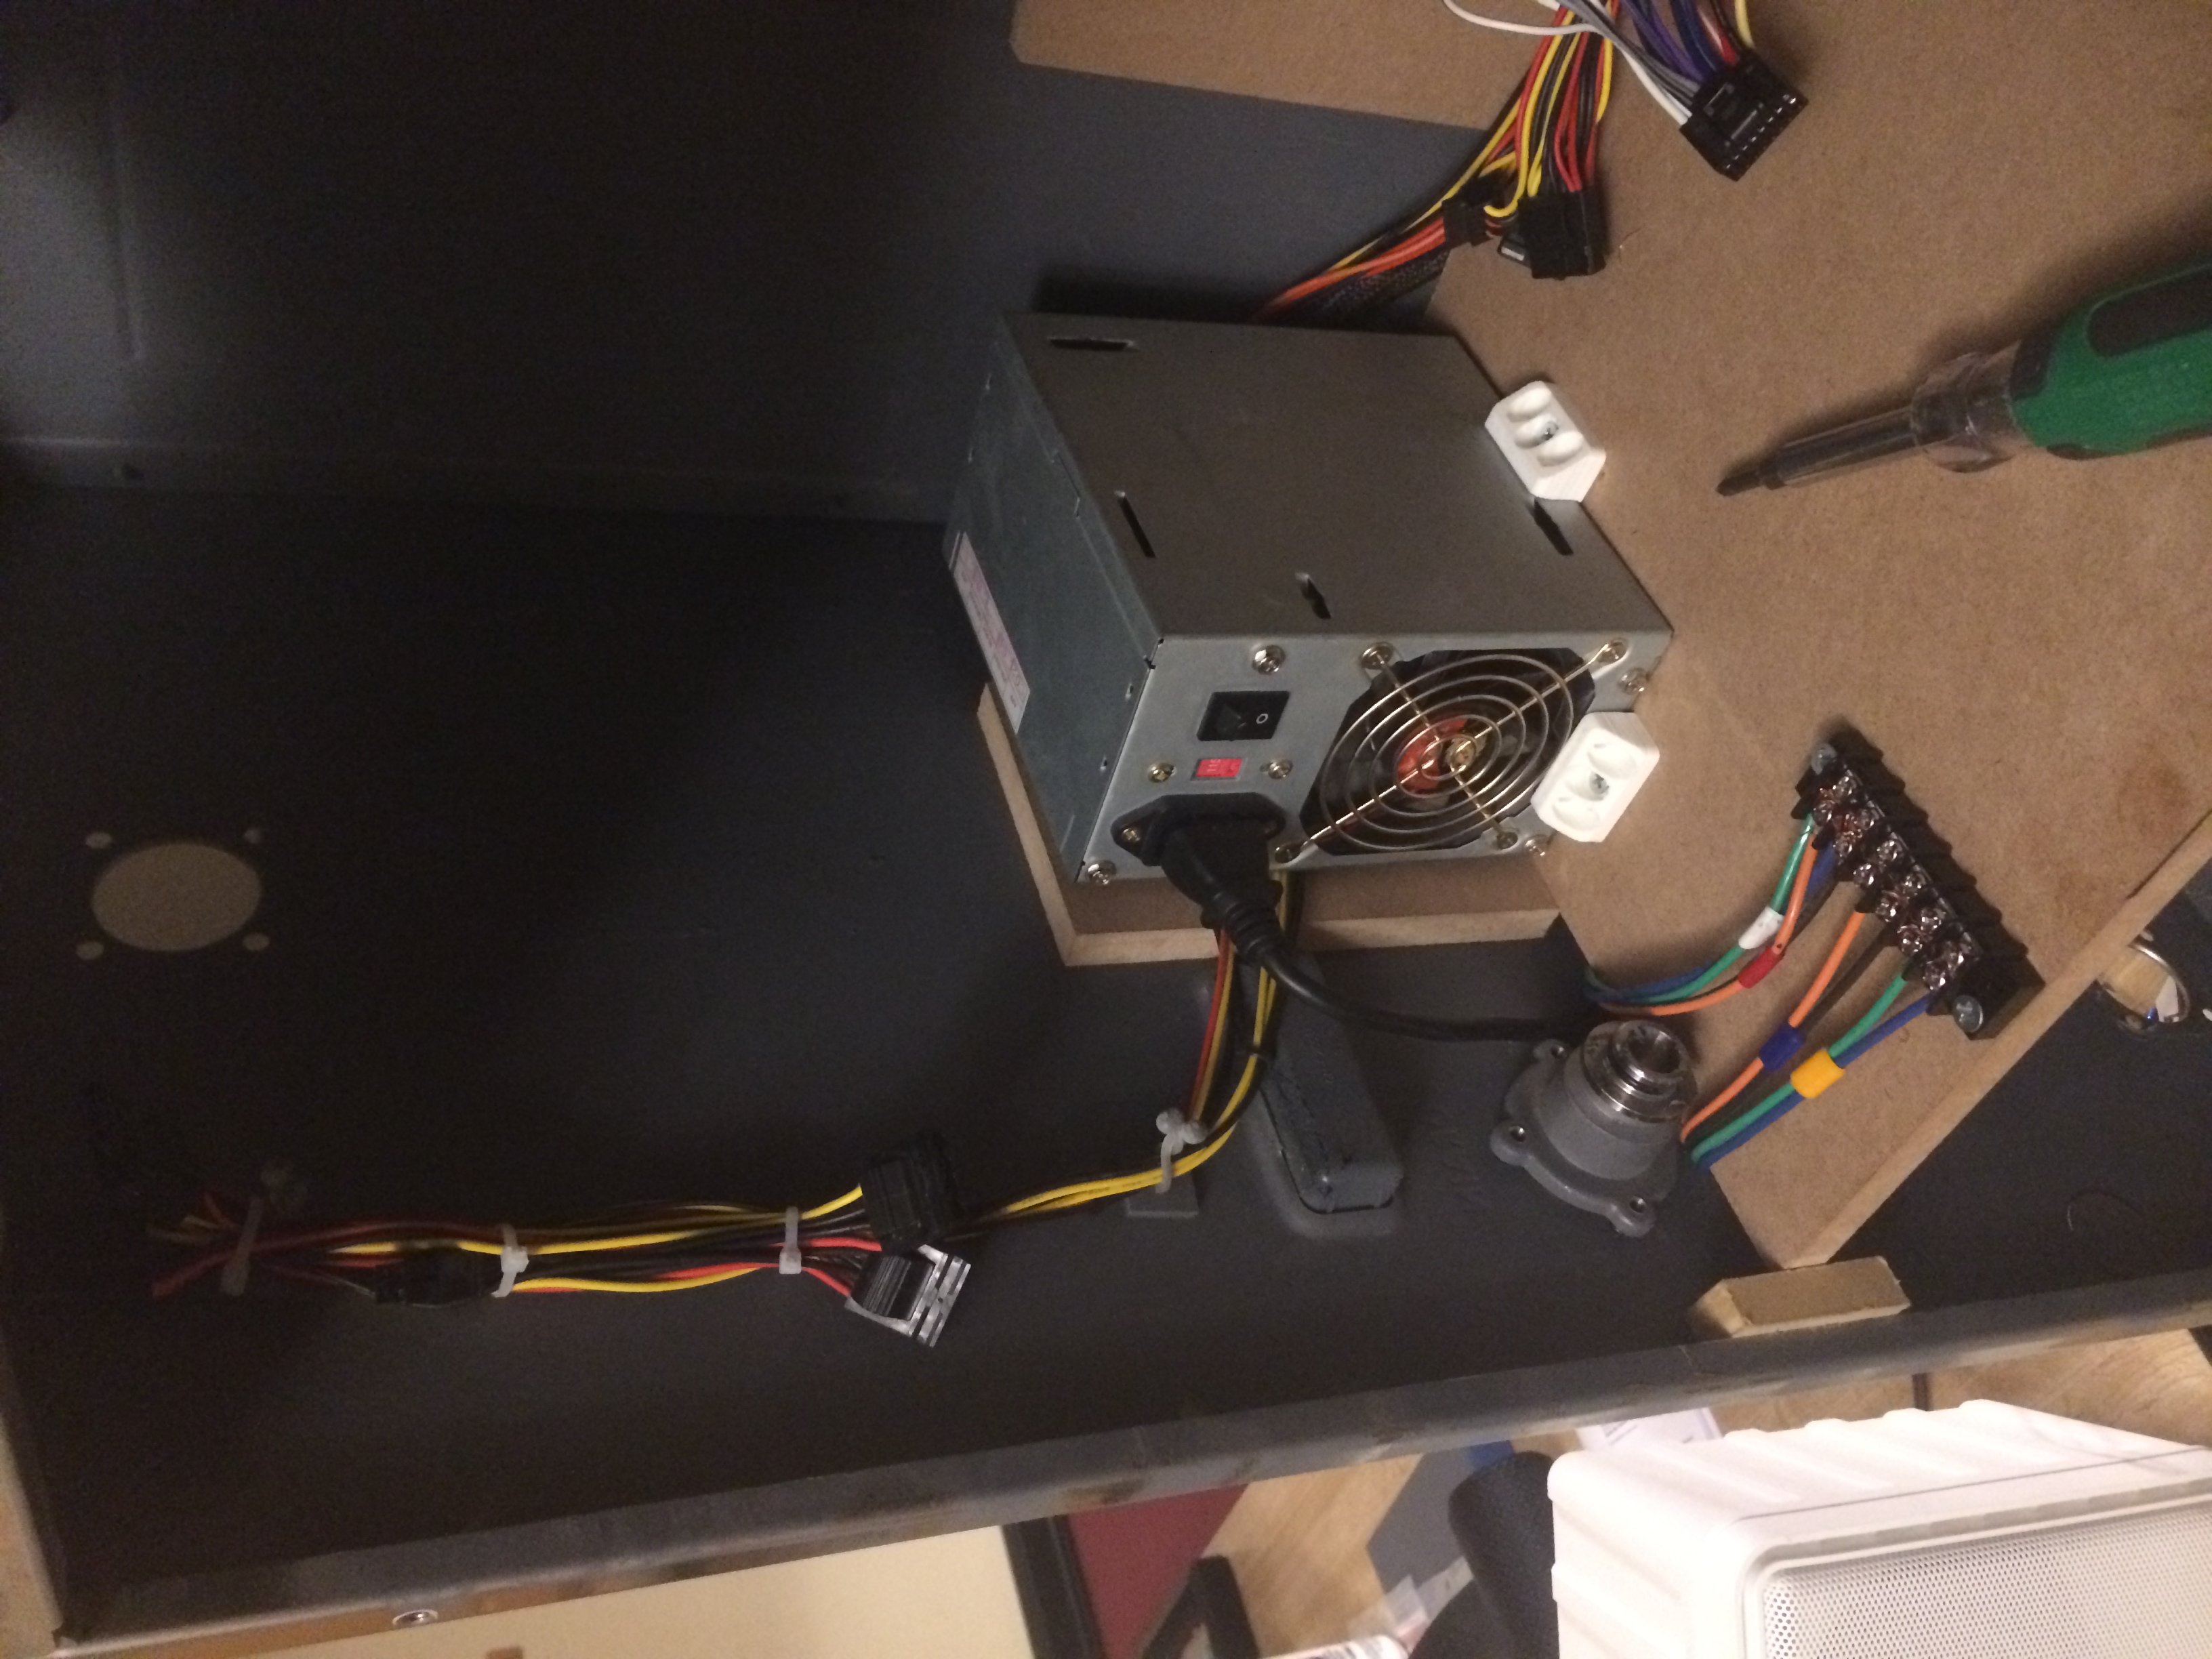
Using the existing wiring clips, I was able to clean up the wiring of the Desktop PSU - which looks very professional now. 12V and 5V Molex connectors are there if I want to add interior lighting or anything in the future as well.
Testing the fit of using insulating plastic tubing for professional appearance. This is out of a convenient power on the left side which originally served the purpose as a drain.
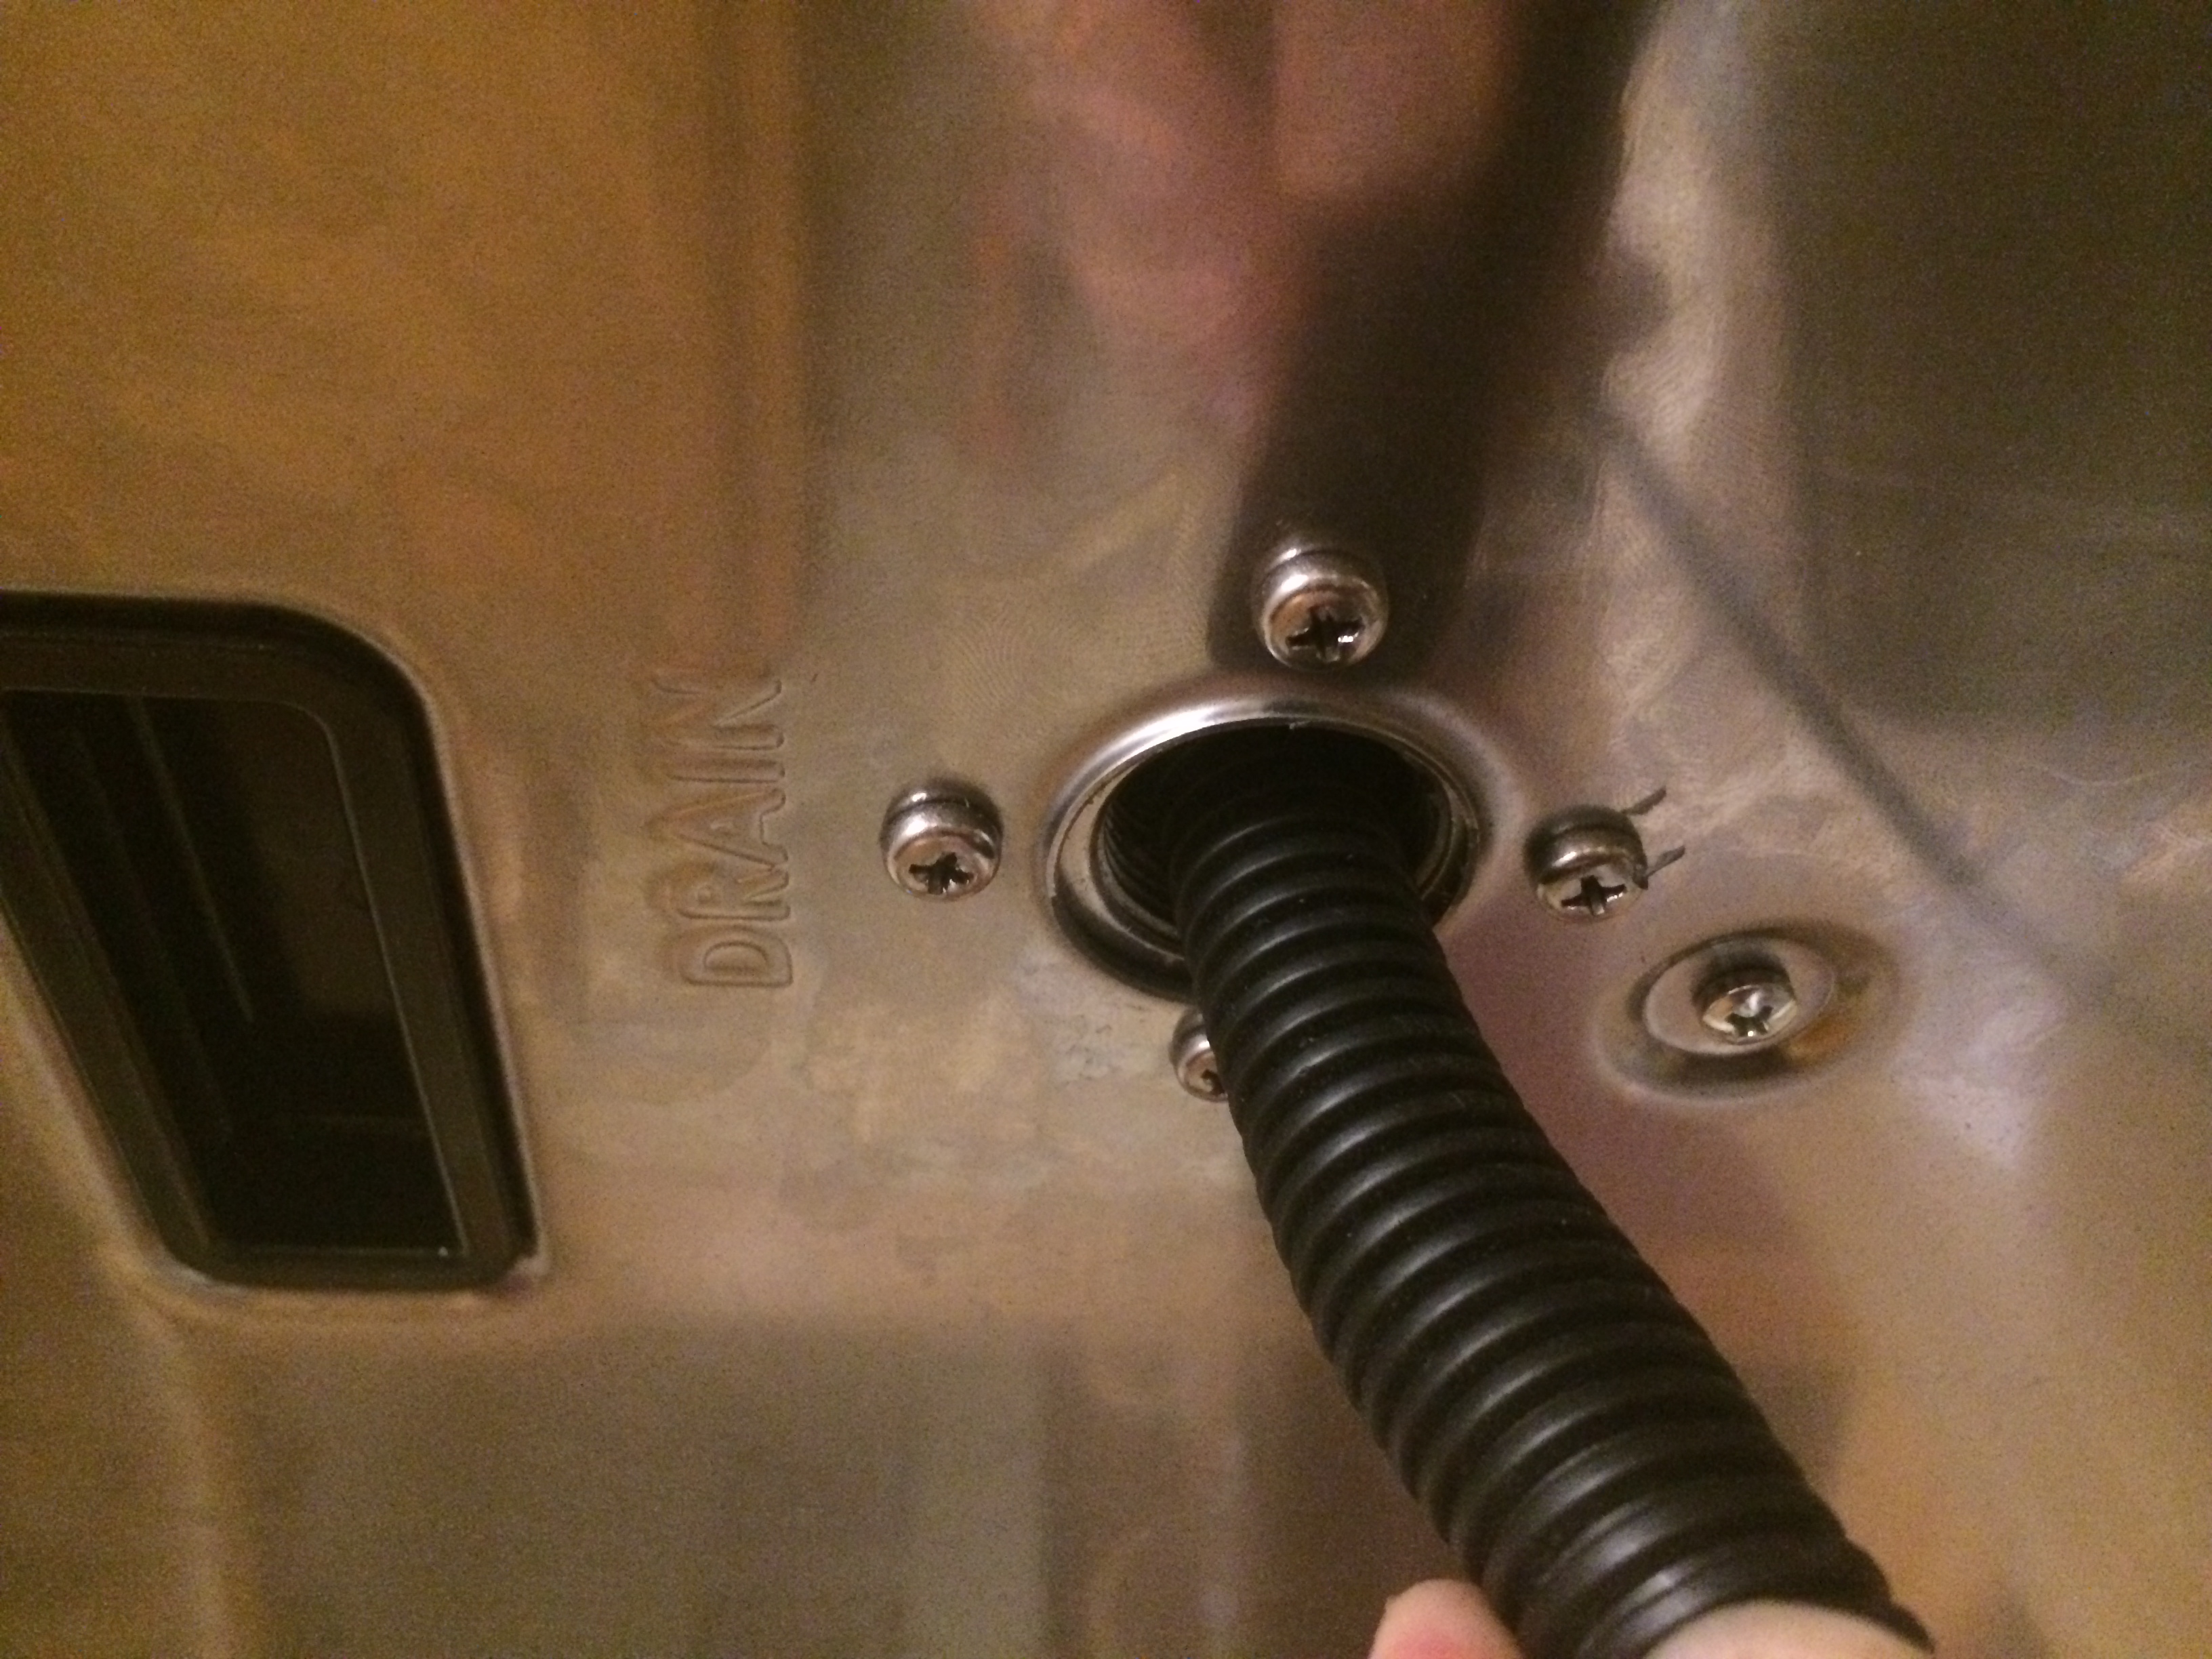
Testing the fit of using insulating plastic tubing for professional appearance. This is out of a convenient power on the left side which originally served the purpose as a drain.
Speaker wires run through the existing threaded drain connector and are hooked up to the screw terminal block. All pairs of wires are labelled for best acoustics.
Speaker wires run through the existing threaded drain connector and are hooked up to the screw terminal block. All pairs of wires are labelled for best acoustics.
Hooking up 3 Speakers to test Fading Feature. We can create different zones of audio in our backyard (Pool Side, Deck Side).
Hooking up 3 Speakers to test Fading Feature. We can create different zones of audio in our backyard (Pool Side, Deck Side).
First time the unit has seen daylight! Everything going well so far.
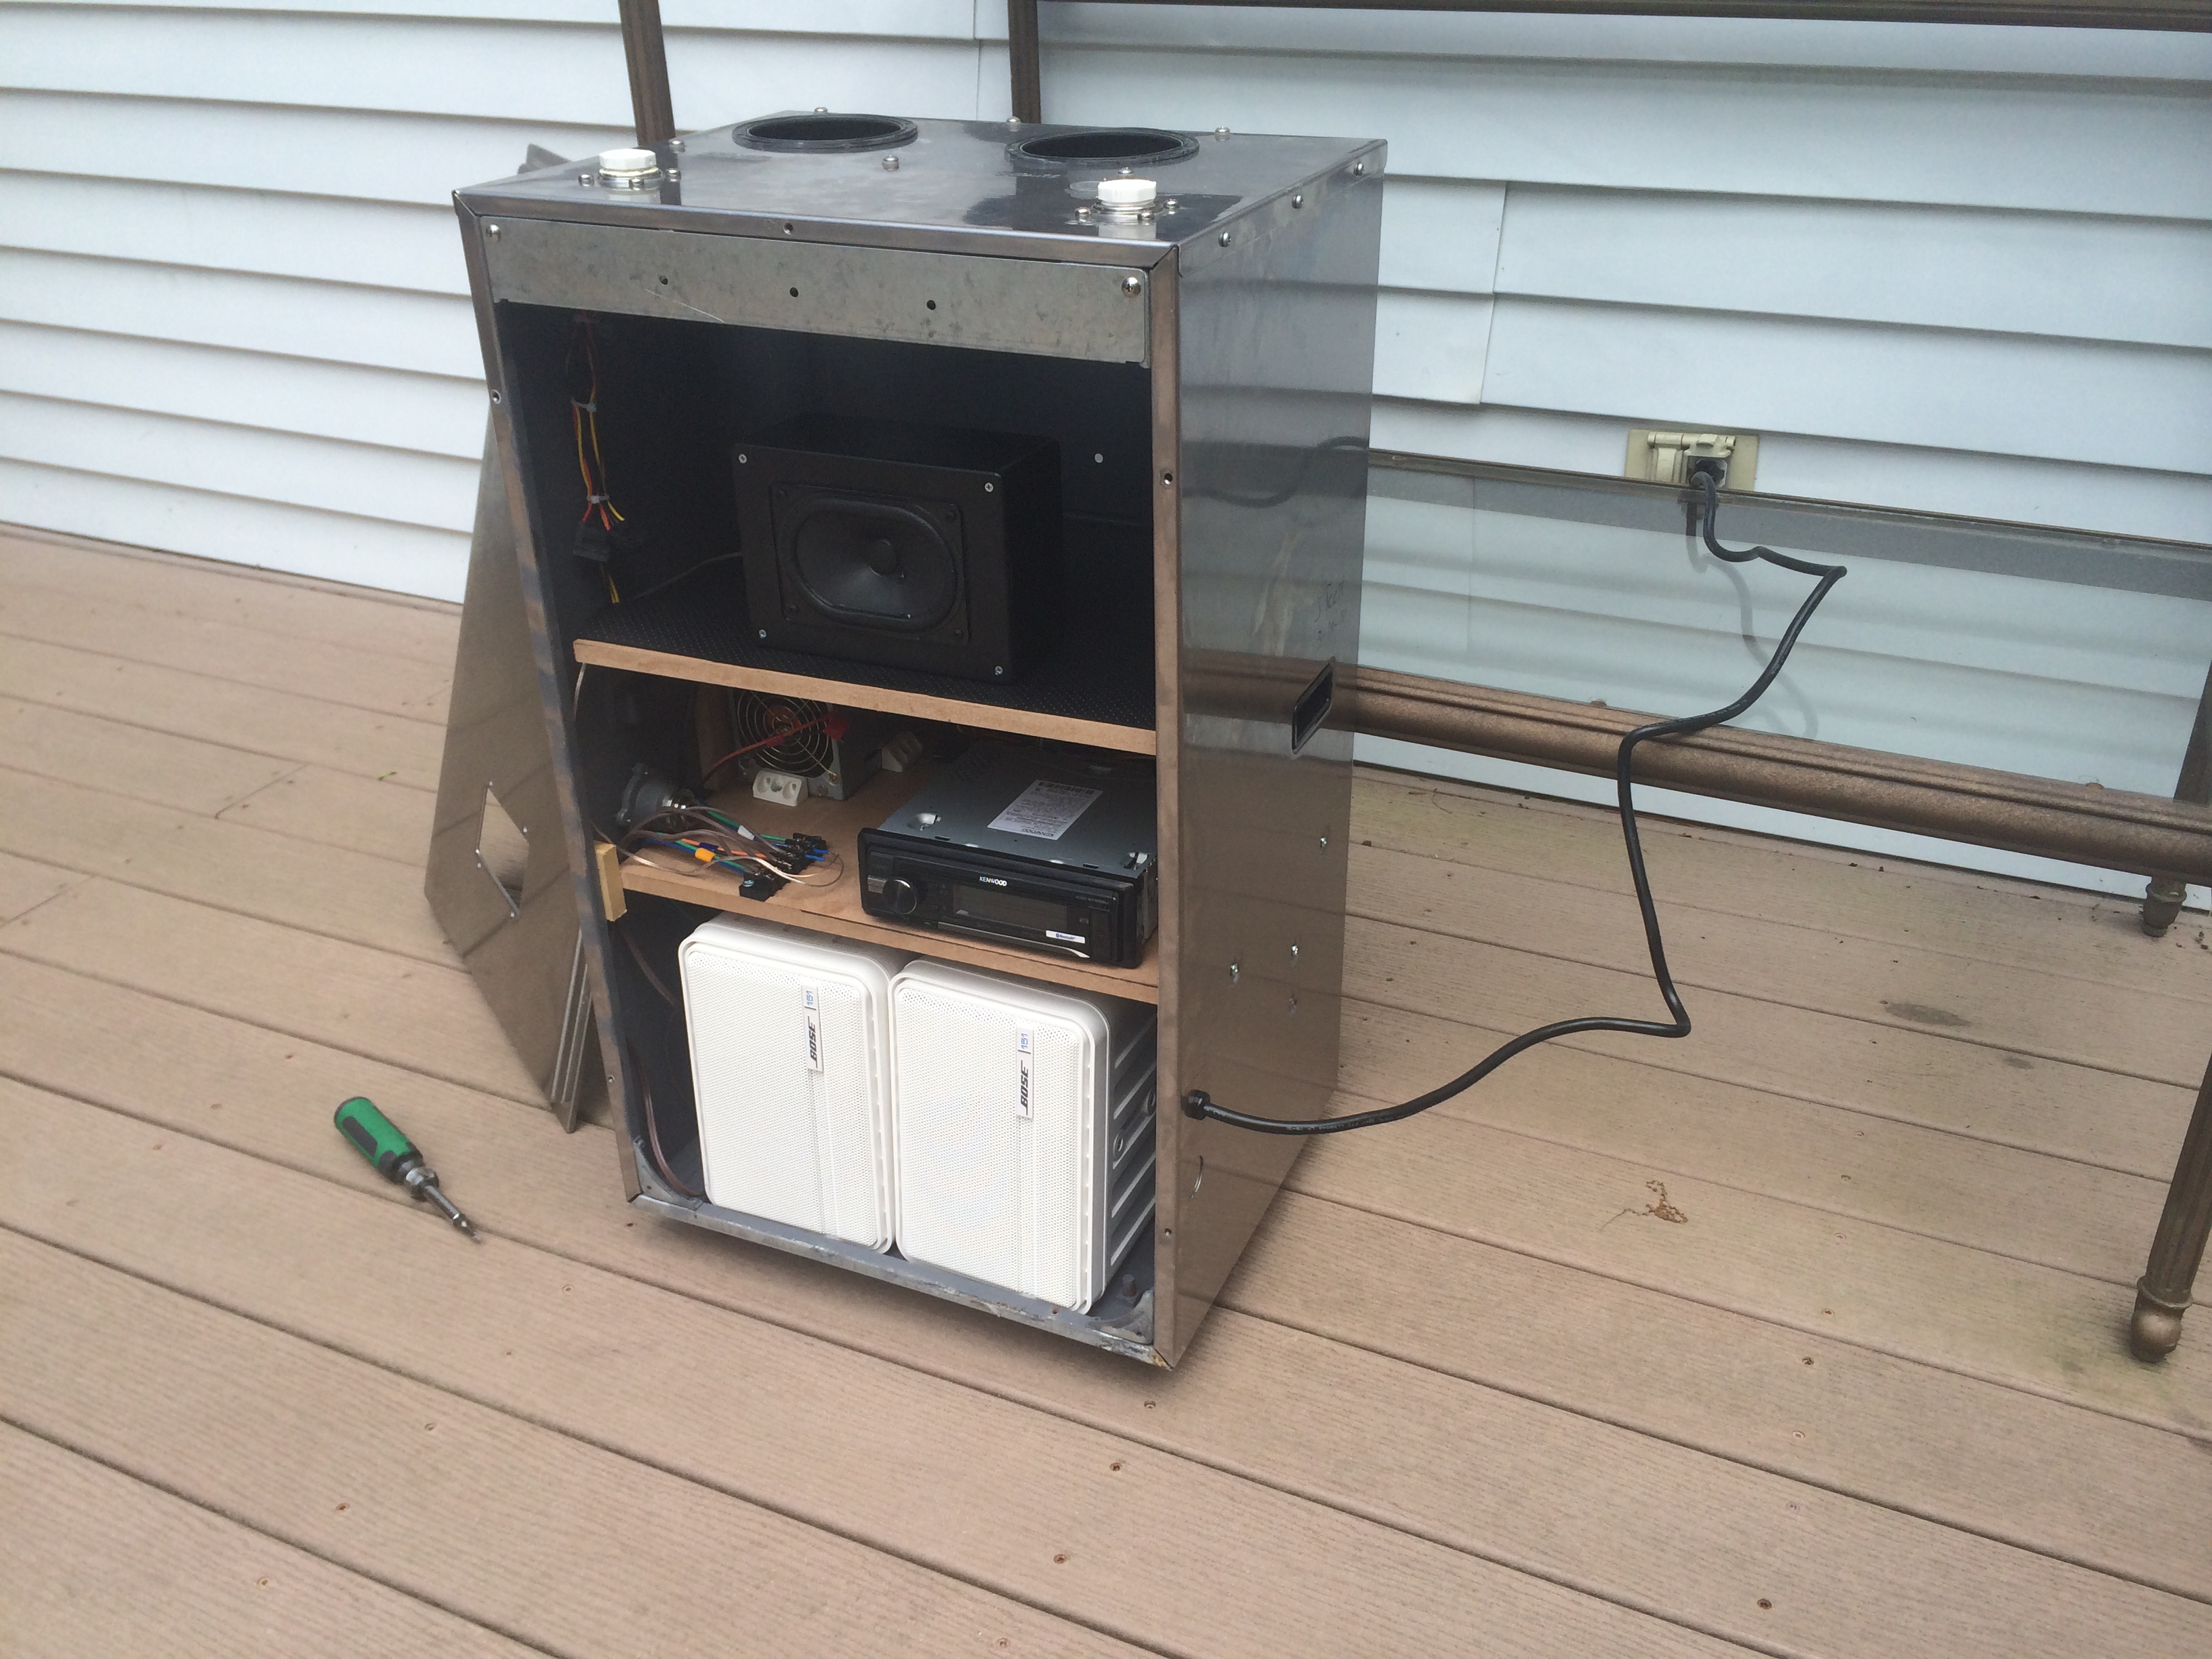
First time the unit has seen daylight! Everything going well so far.
Finally moved to its proper location. We have a small 2' x 2' Box in the Middle of our deck. This was coincidental but very convenient and fits very well there! Awesome!
Finally moved to its proper location. We have a small 2' x 2' Box in the Middle of our deck. This was coincidental but very convenient and fits very well there! Awesome!
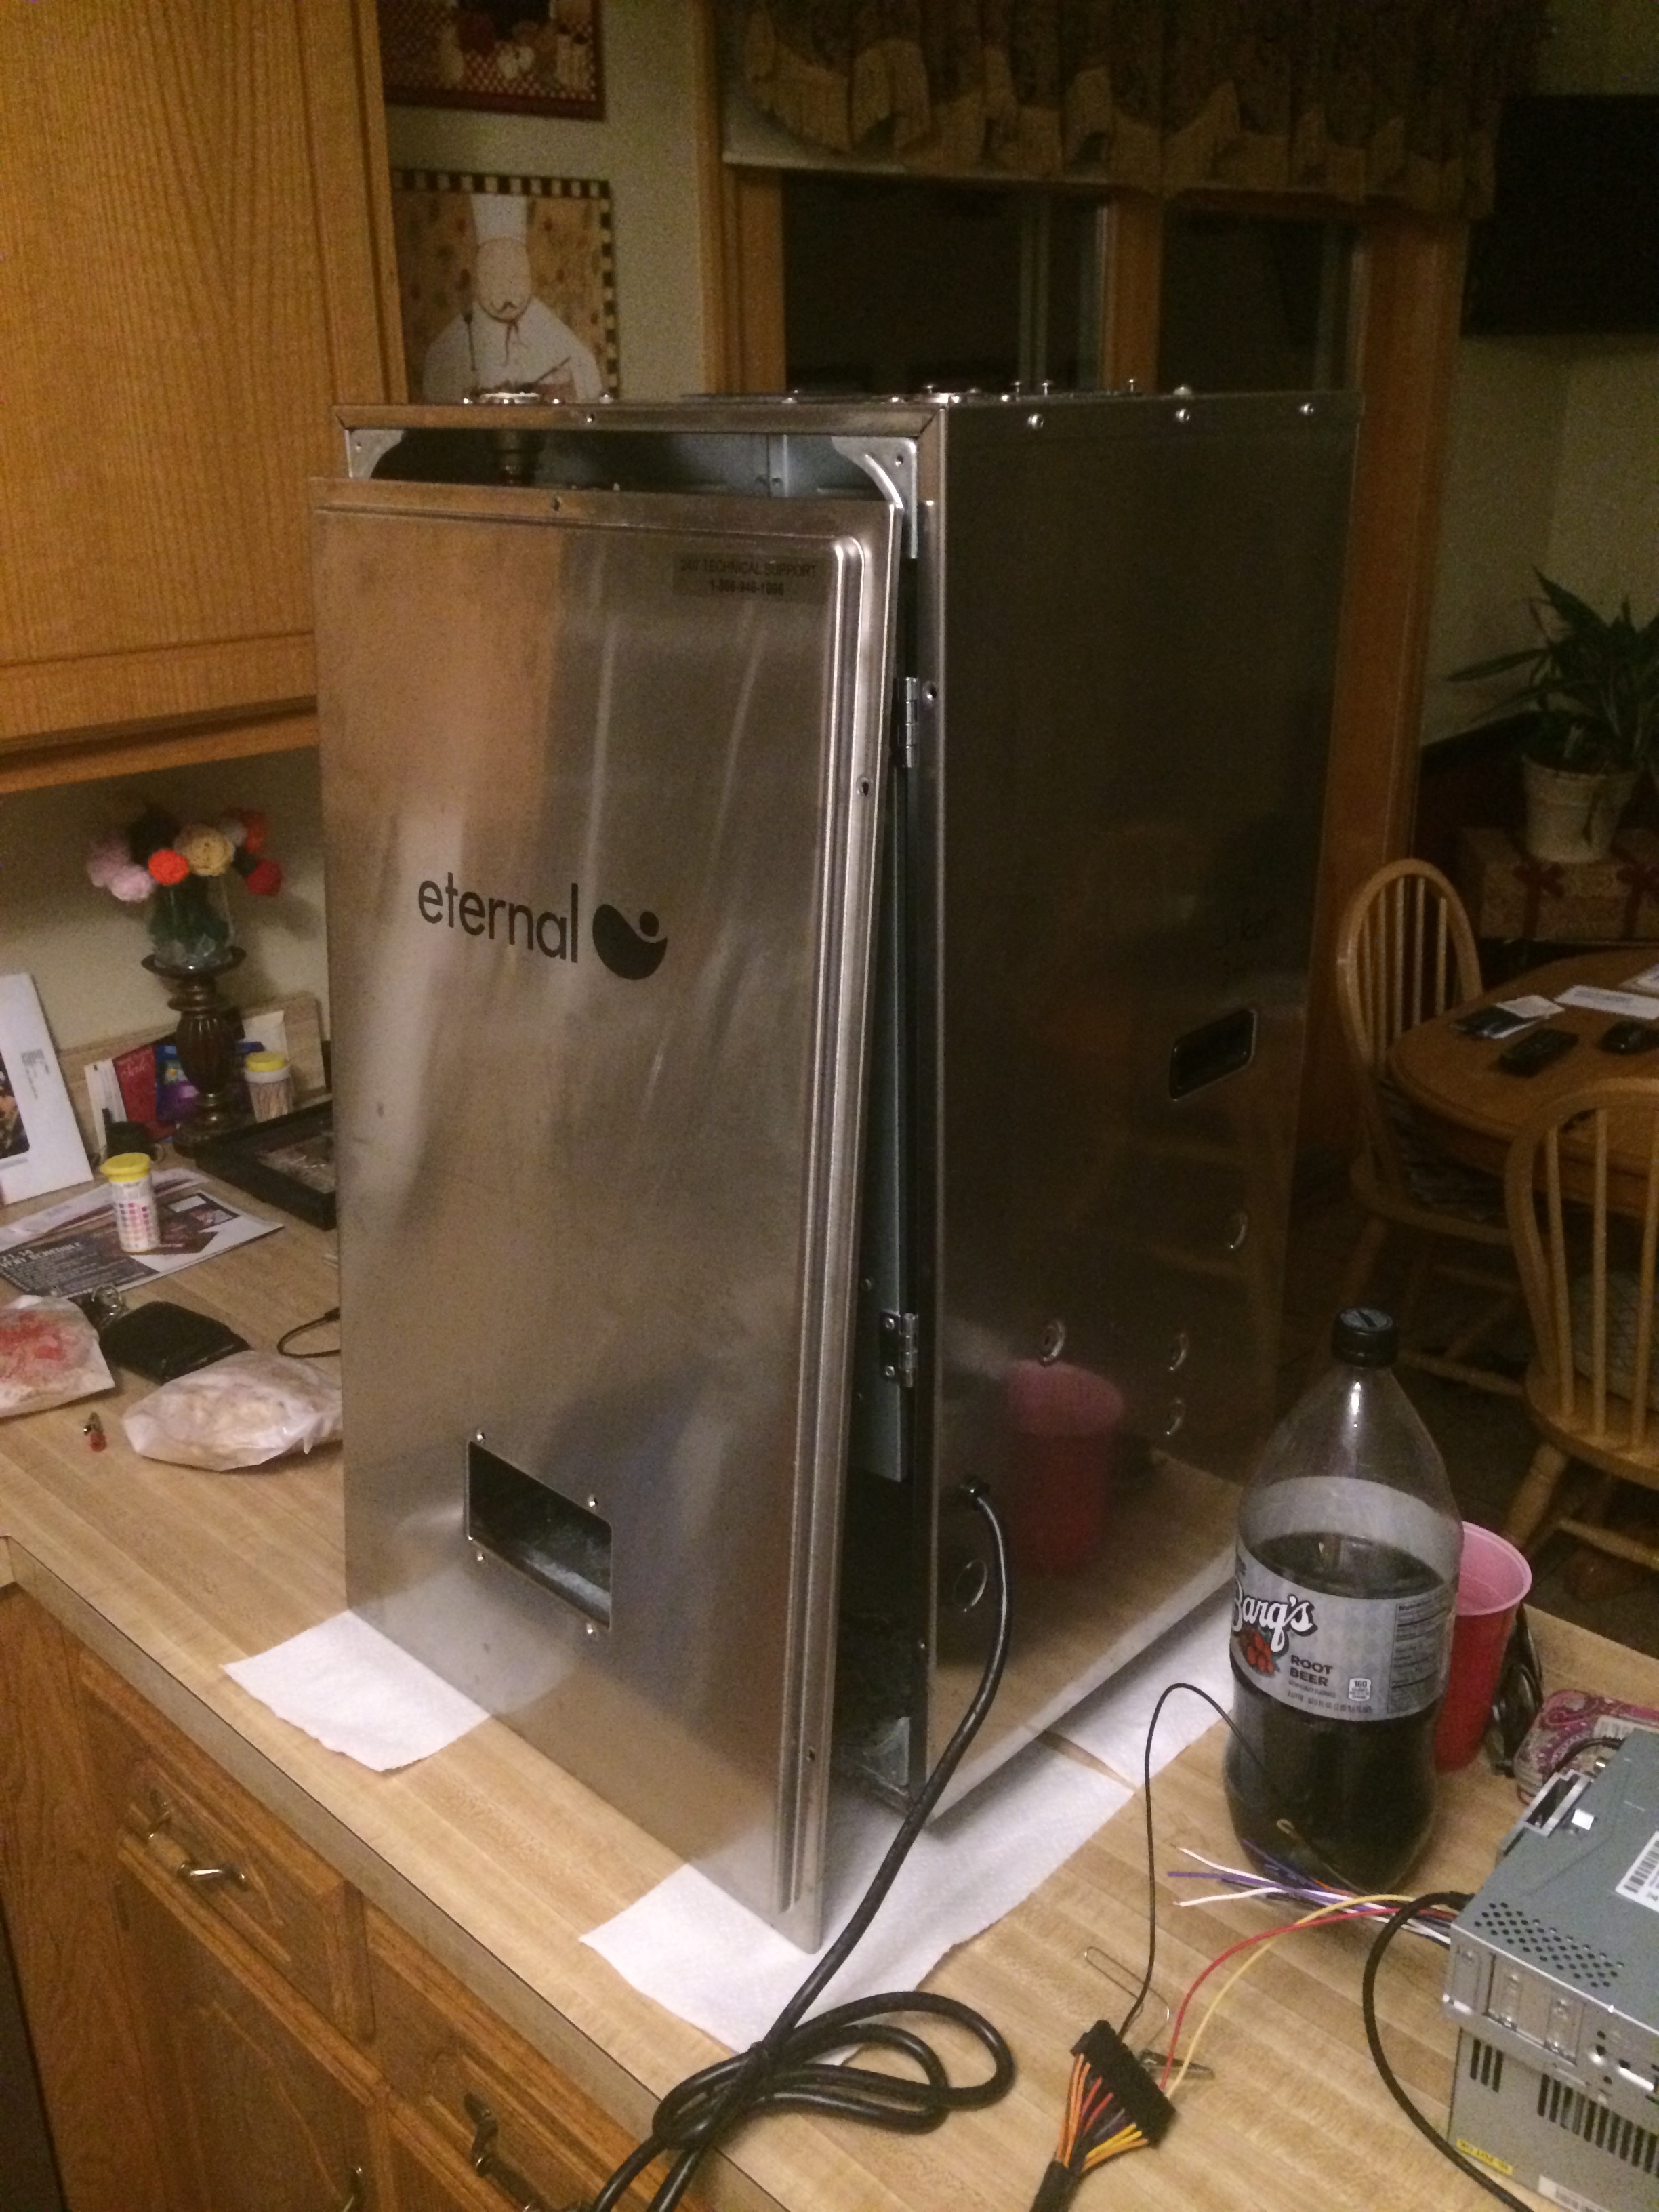
Marine Antenna Fitted on the side, 3D Printed Tops can be seen here. Unit doesn't look too obscure, Eternal doesn't shout Hot Water Heater, and it works very well!
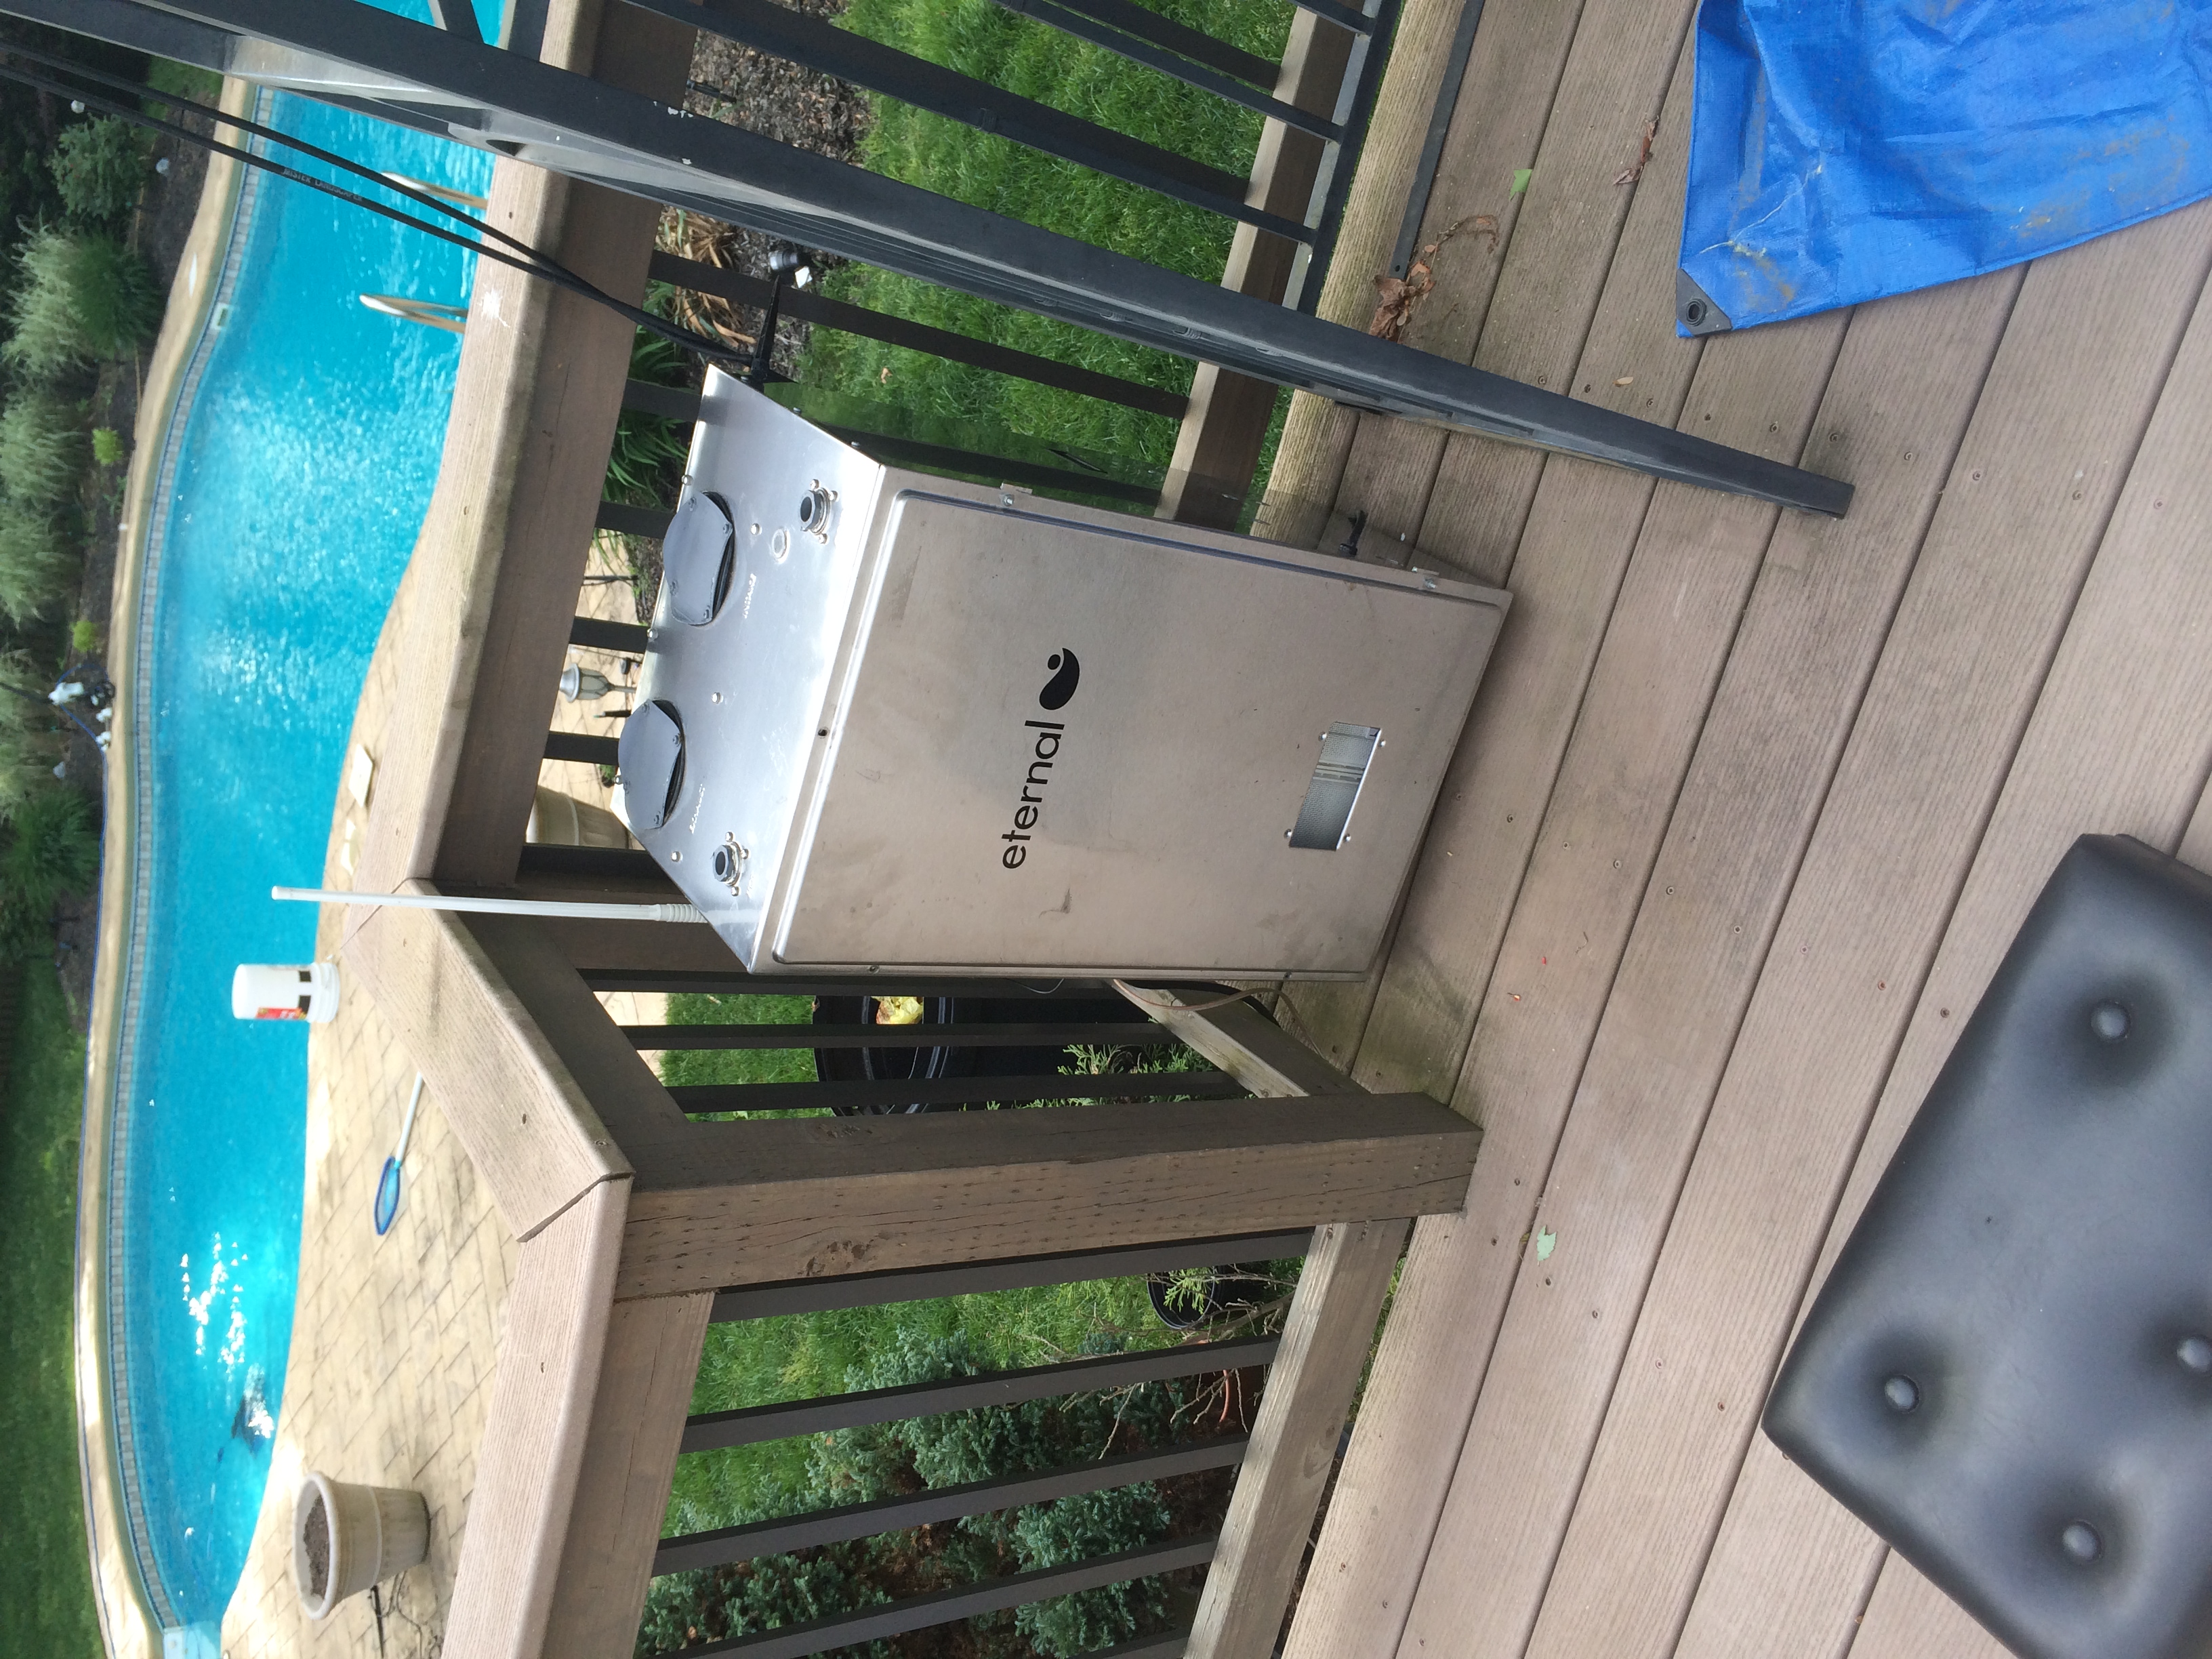
Marine Antenna Fitted on the side, 3D Printed Tops can be seen here. Unit doesn't look too obscure, Eternal doesn't shout Hot Water Heater, and it works very well!
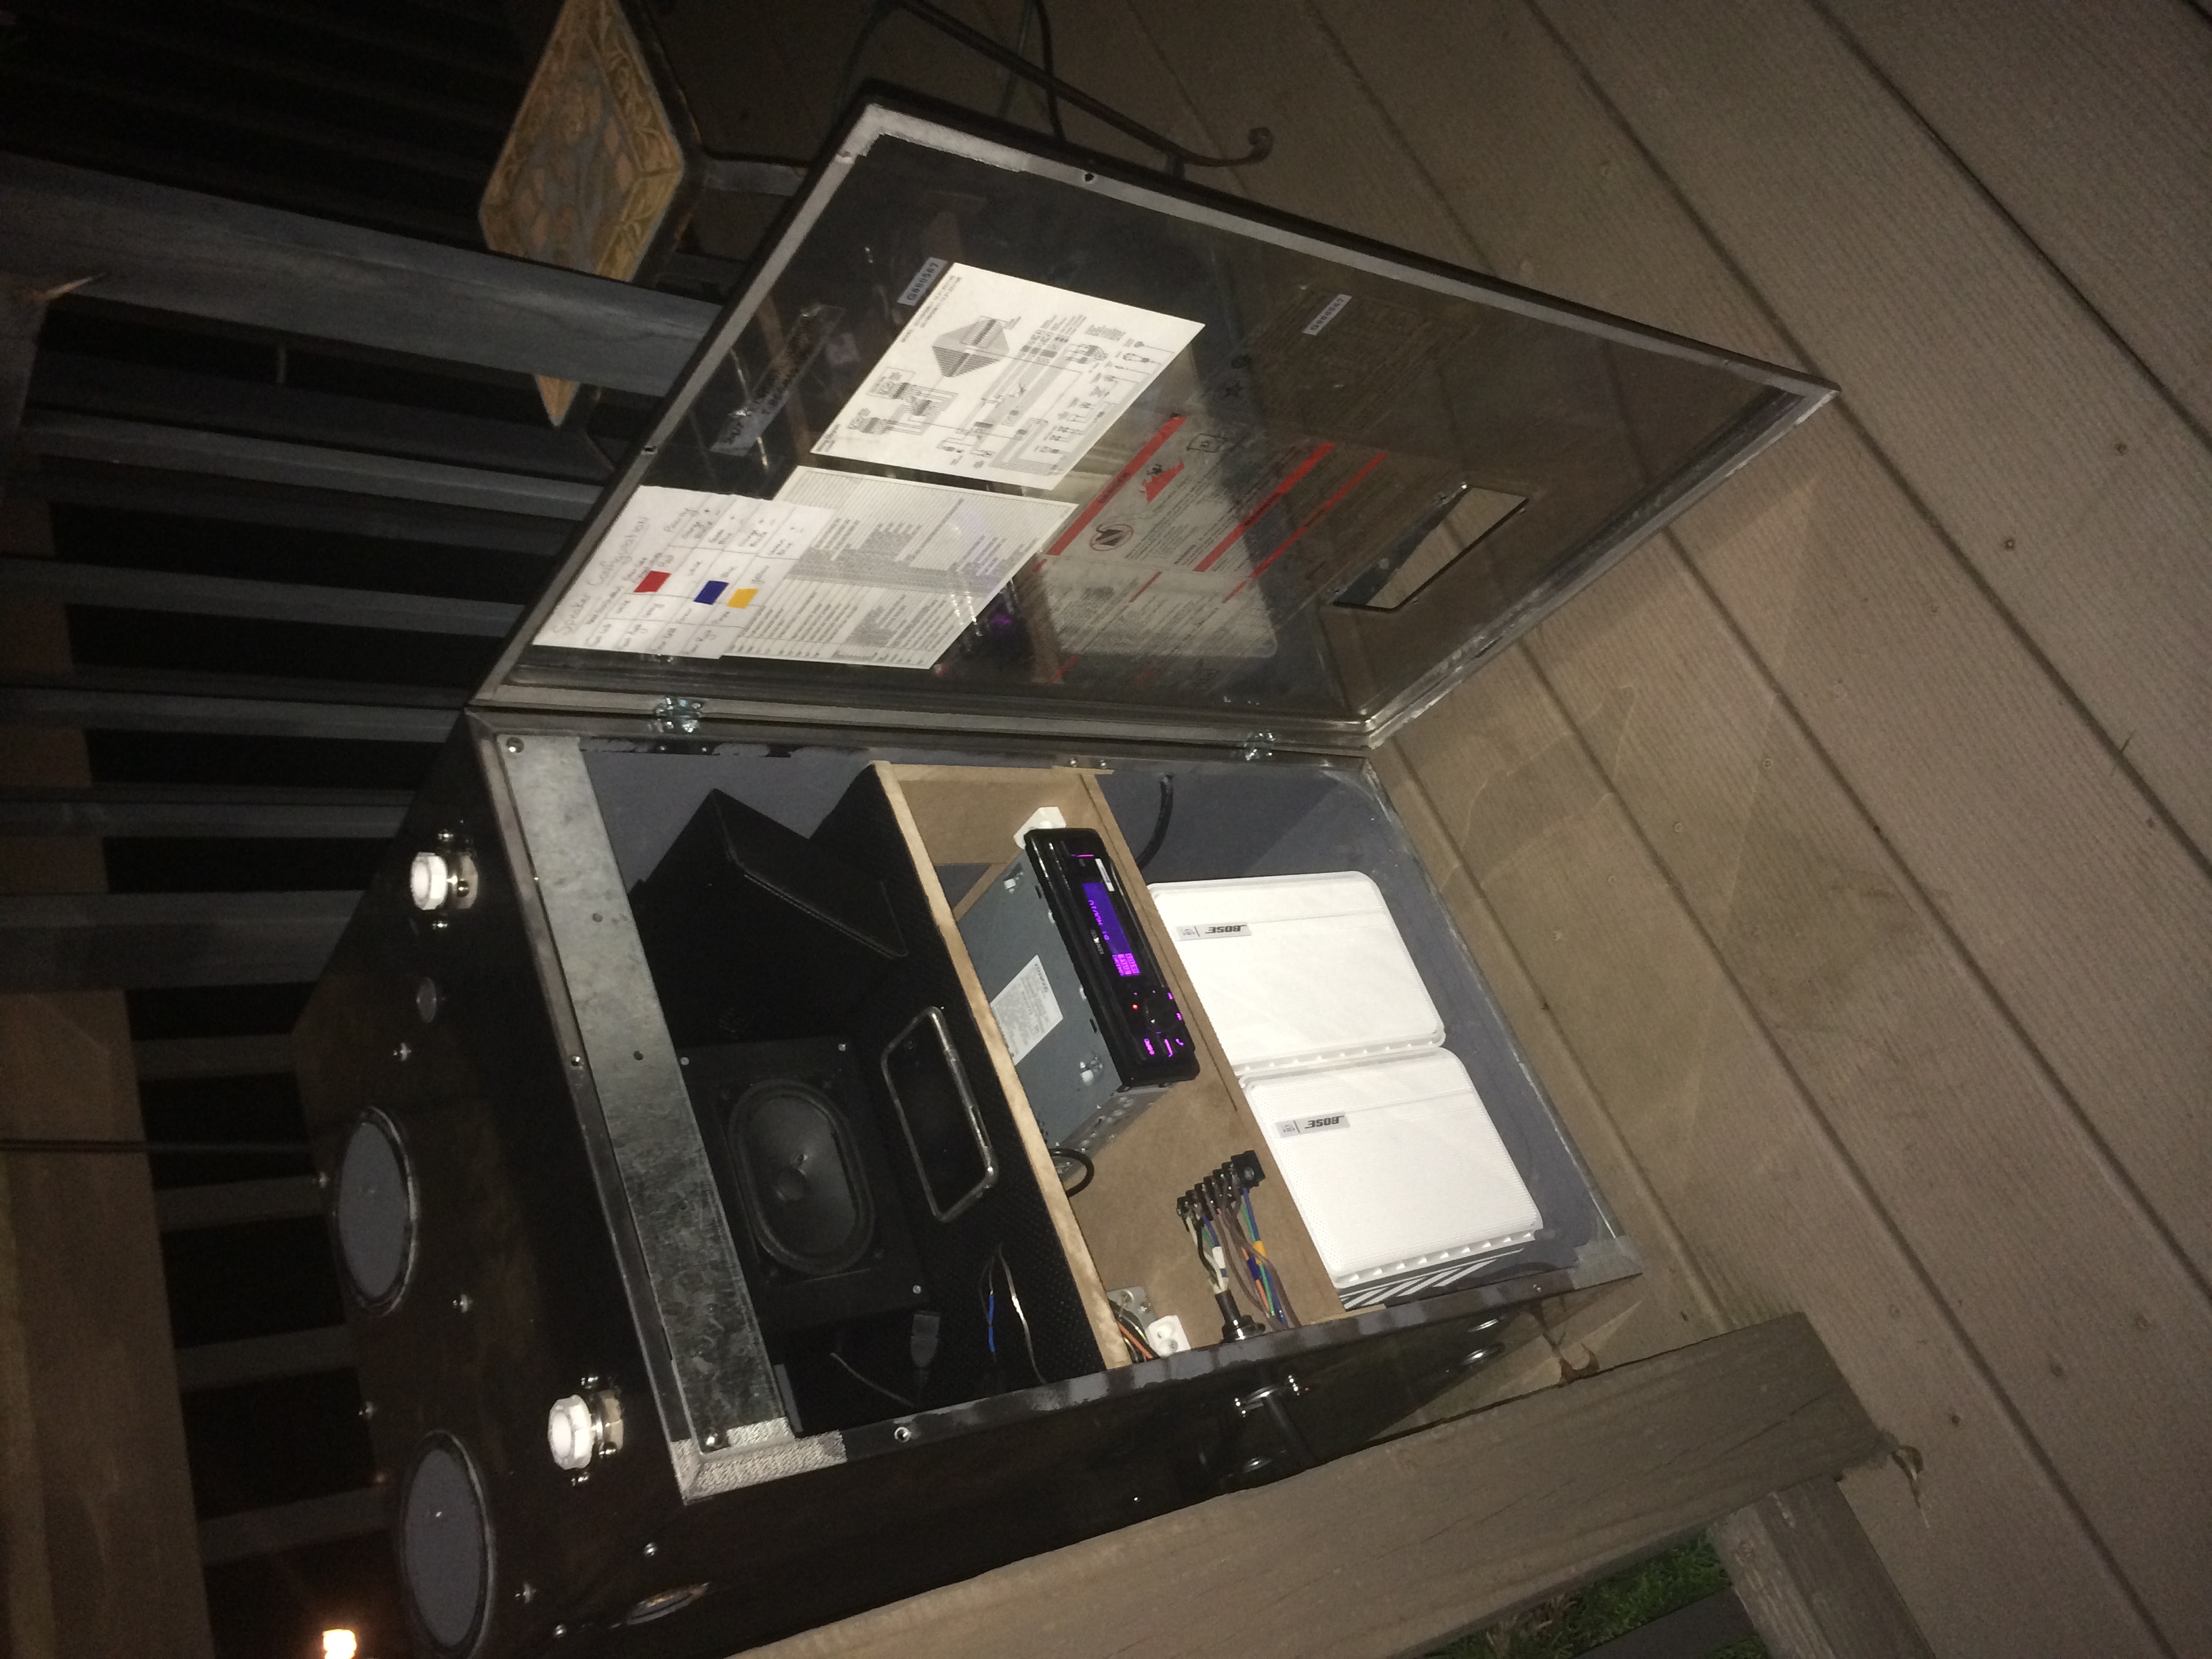
Hinges were retrofitted onto the door so that it could be opened when access was needed. I kept the stickers on the interior to share with guests, I'm sure they'd love the project.
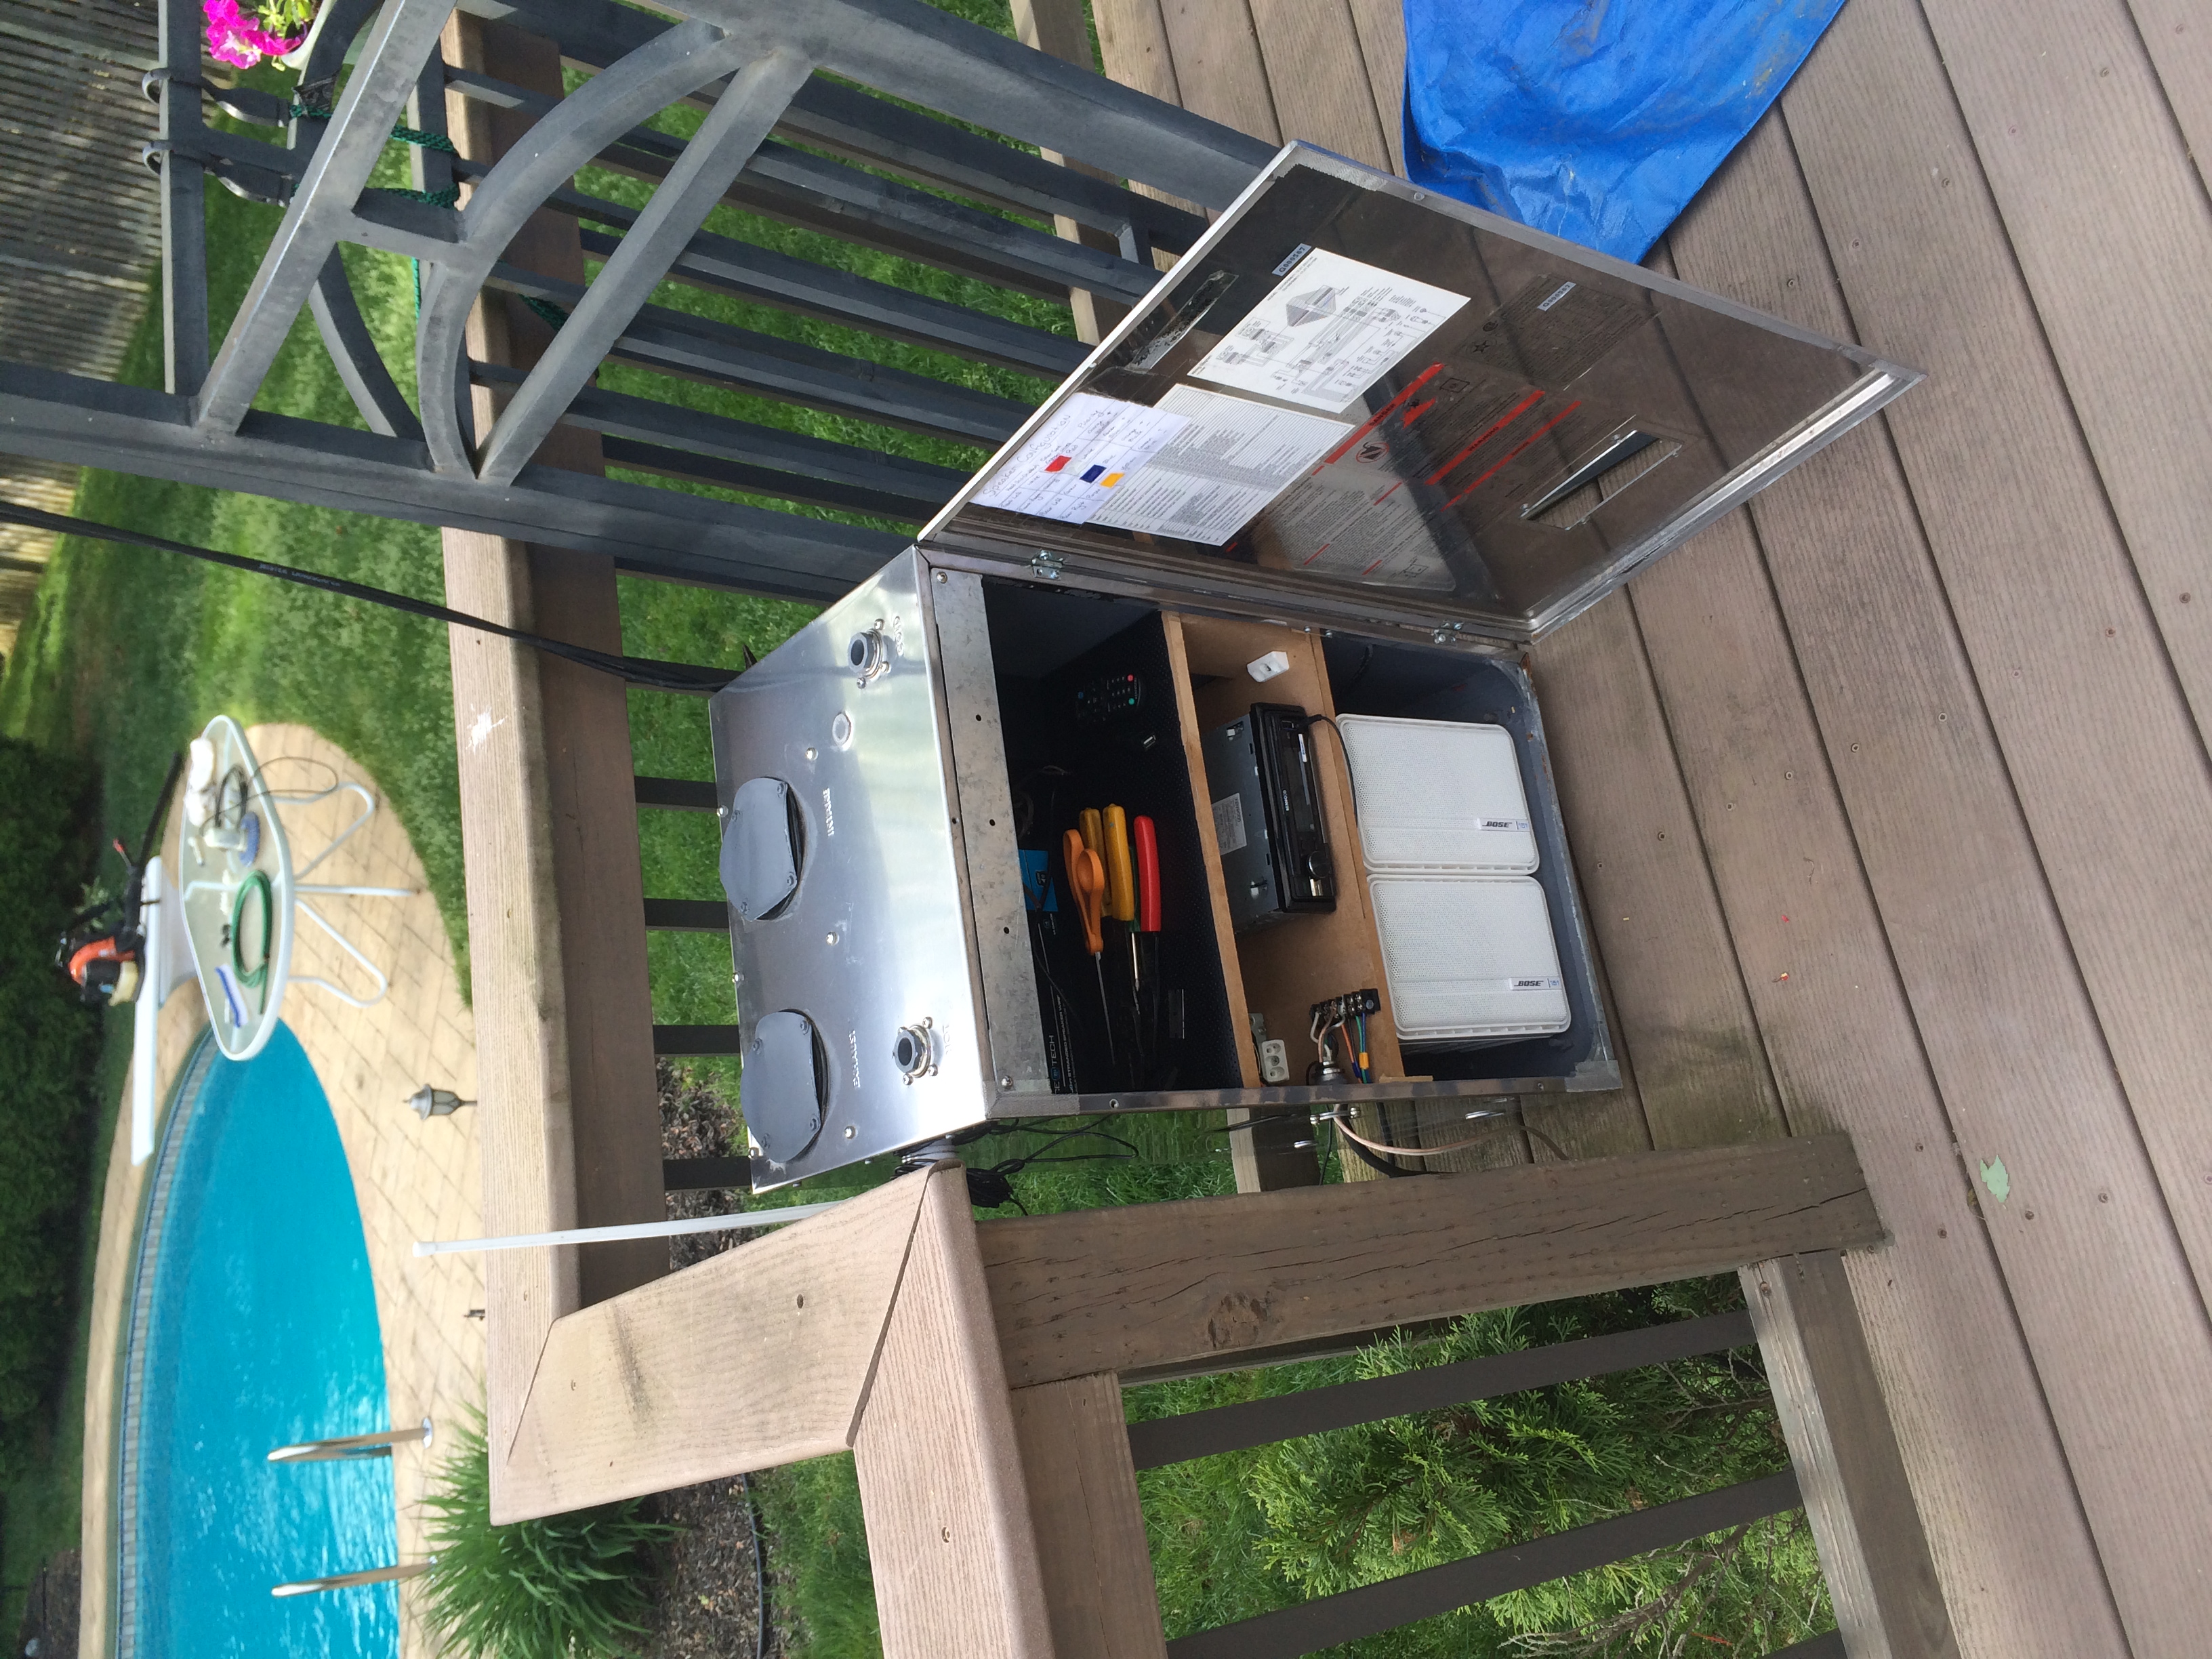
Hinges were retrofitted onto the door so that it could be opened when access was needed. I kept the stickers on the interior to share with guests, I'm sure they'd love the project.